Why FerroCement Water Tanks?
Having the ability to store water seems to create an innate sense of secure satisfaction now that our ferro-cement tanks are finished. Collecting and holding lovely cool, clean and fresh water in a passive way.
Deciding to use this technique took a little convincing on my part, mainly due to the huge reliance on cement. We researched and looked into many other ways of storing water, even getting so far as contacting farmers and cheese makers to enquire about buying second-hand stainless-steel vats. This seemed like a good prospect; stainless steel is the Rolls Royce of water storage and it would be second hand. But to have a tank big enough for our needs we would need to have some pretty study foundations and actually getting it onto the land seemed an impossibility.
These reasons combined with the enormous cost element, led us back to ferro-cement. We felt that it had quite a high efficiency of material use relative to the amount that is storable, due it it being round. The shape is very strong and thus less material is needed in the wall structure. Although I took some time to come around to this, it felt like it was a genuinely good use of cement for the gained outcomes – namely fresh drinking water storage for life.
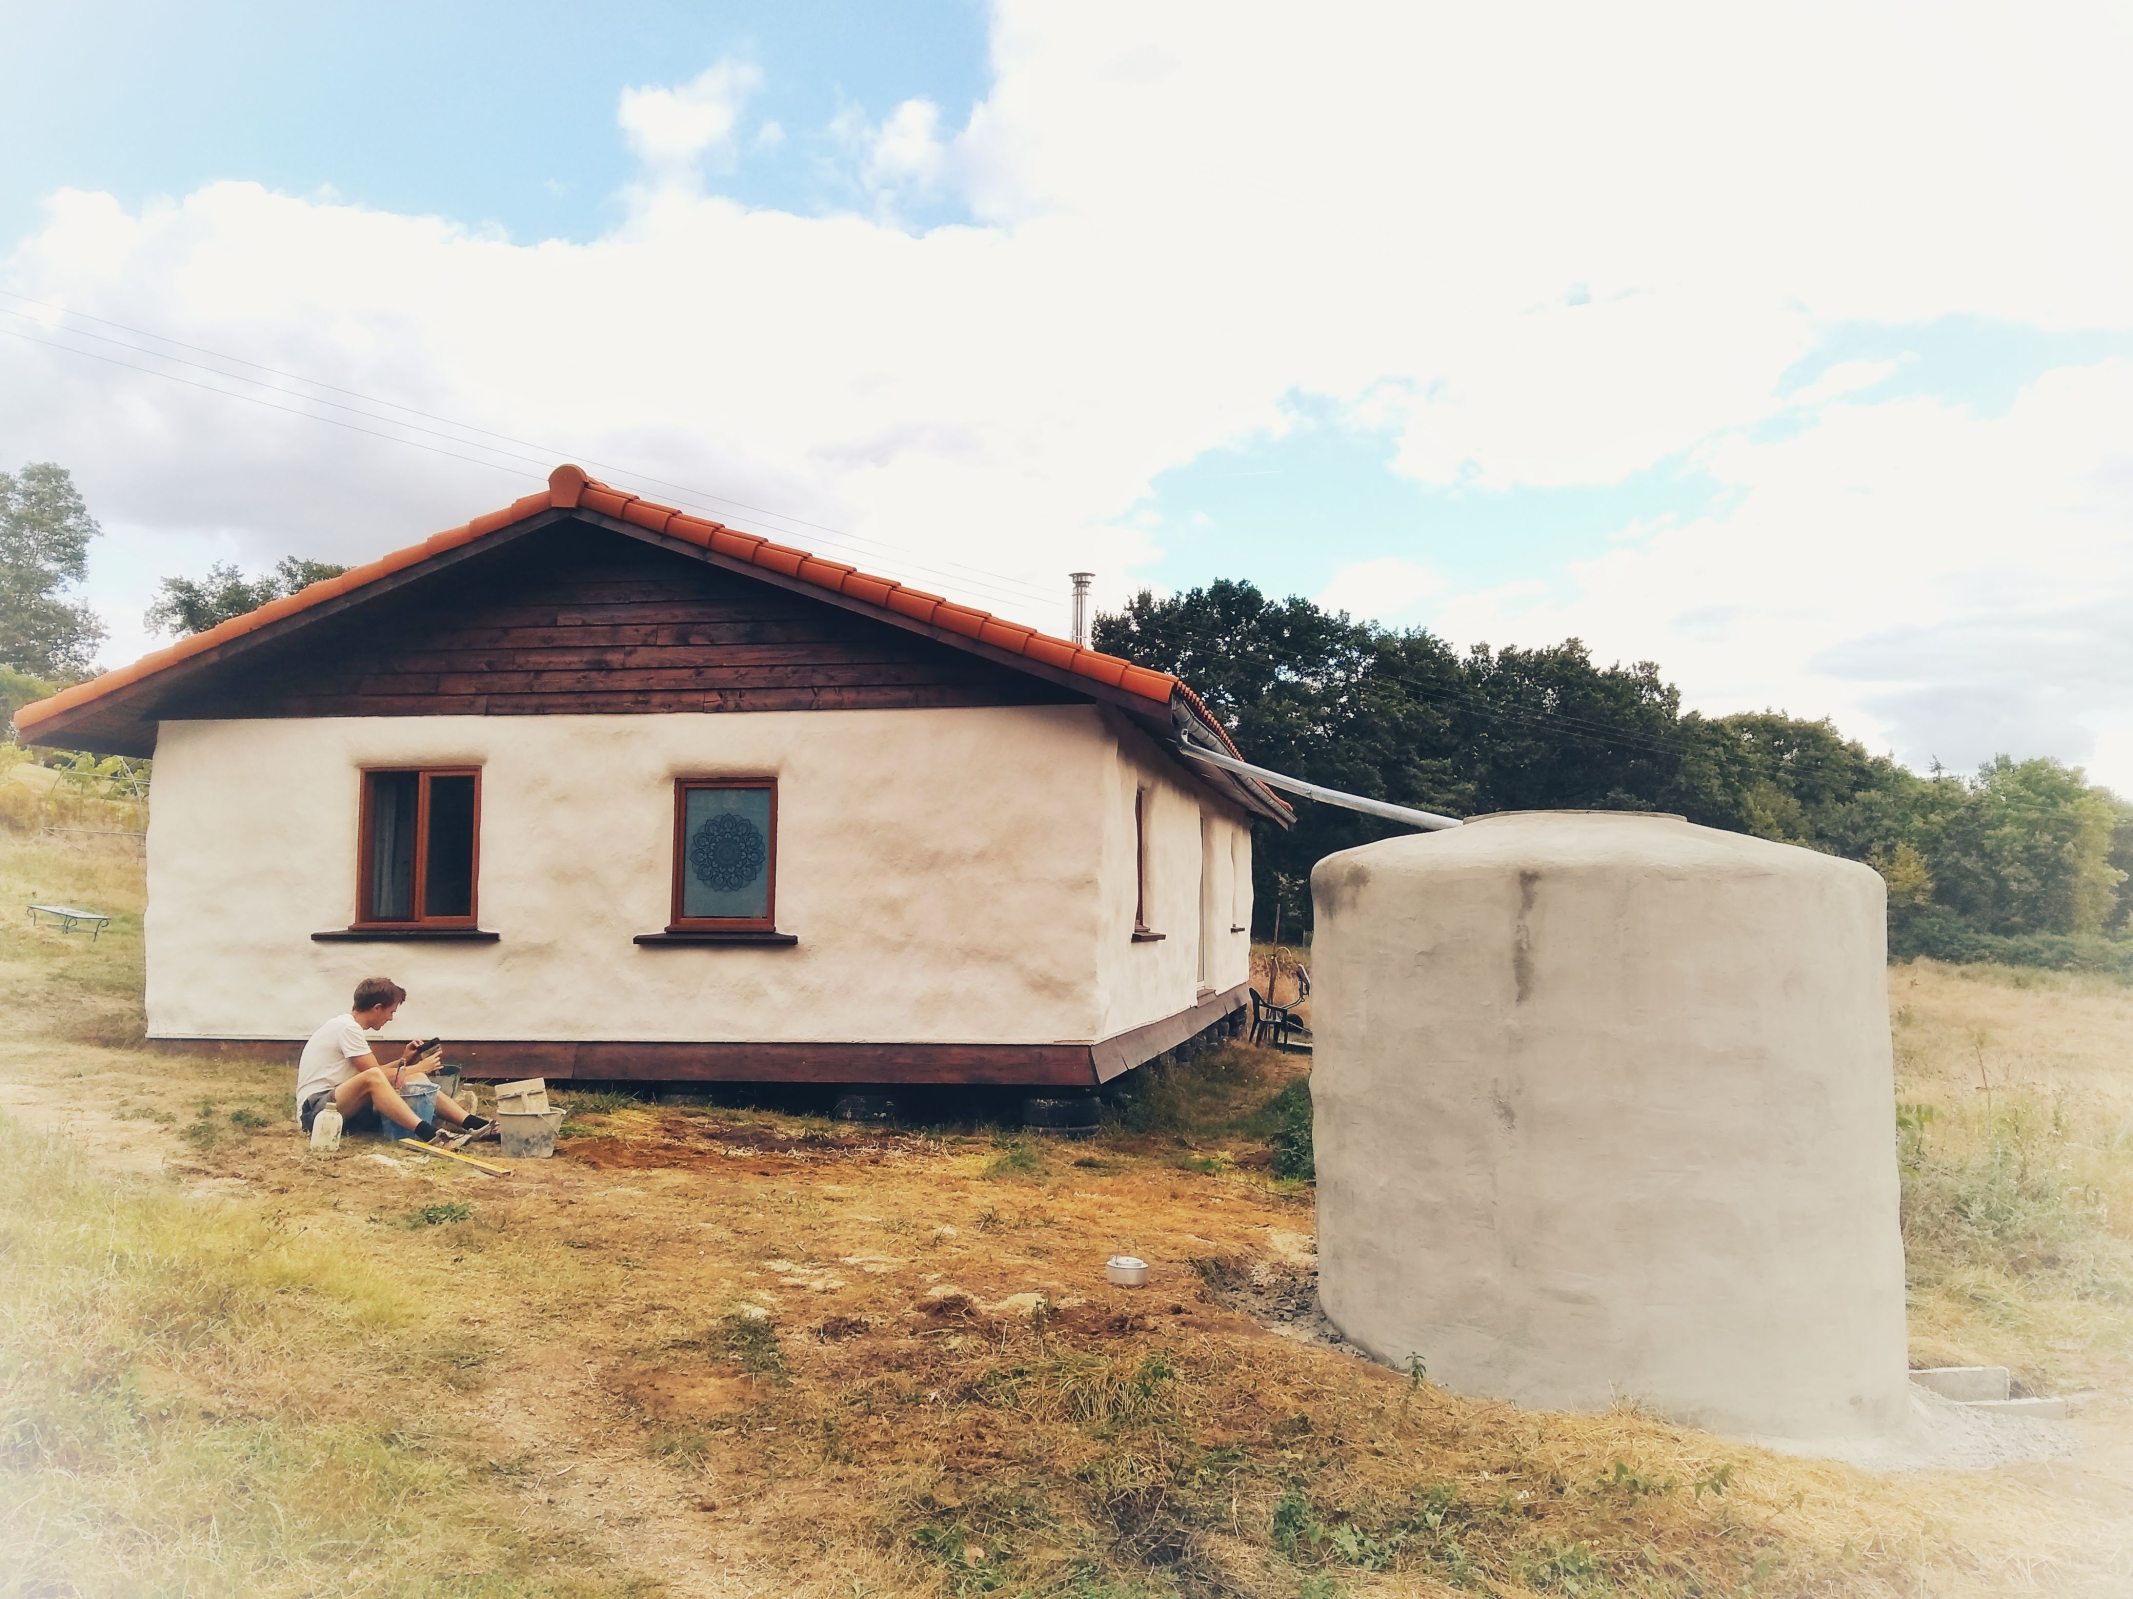
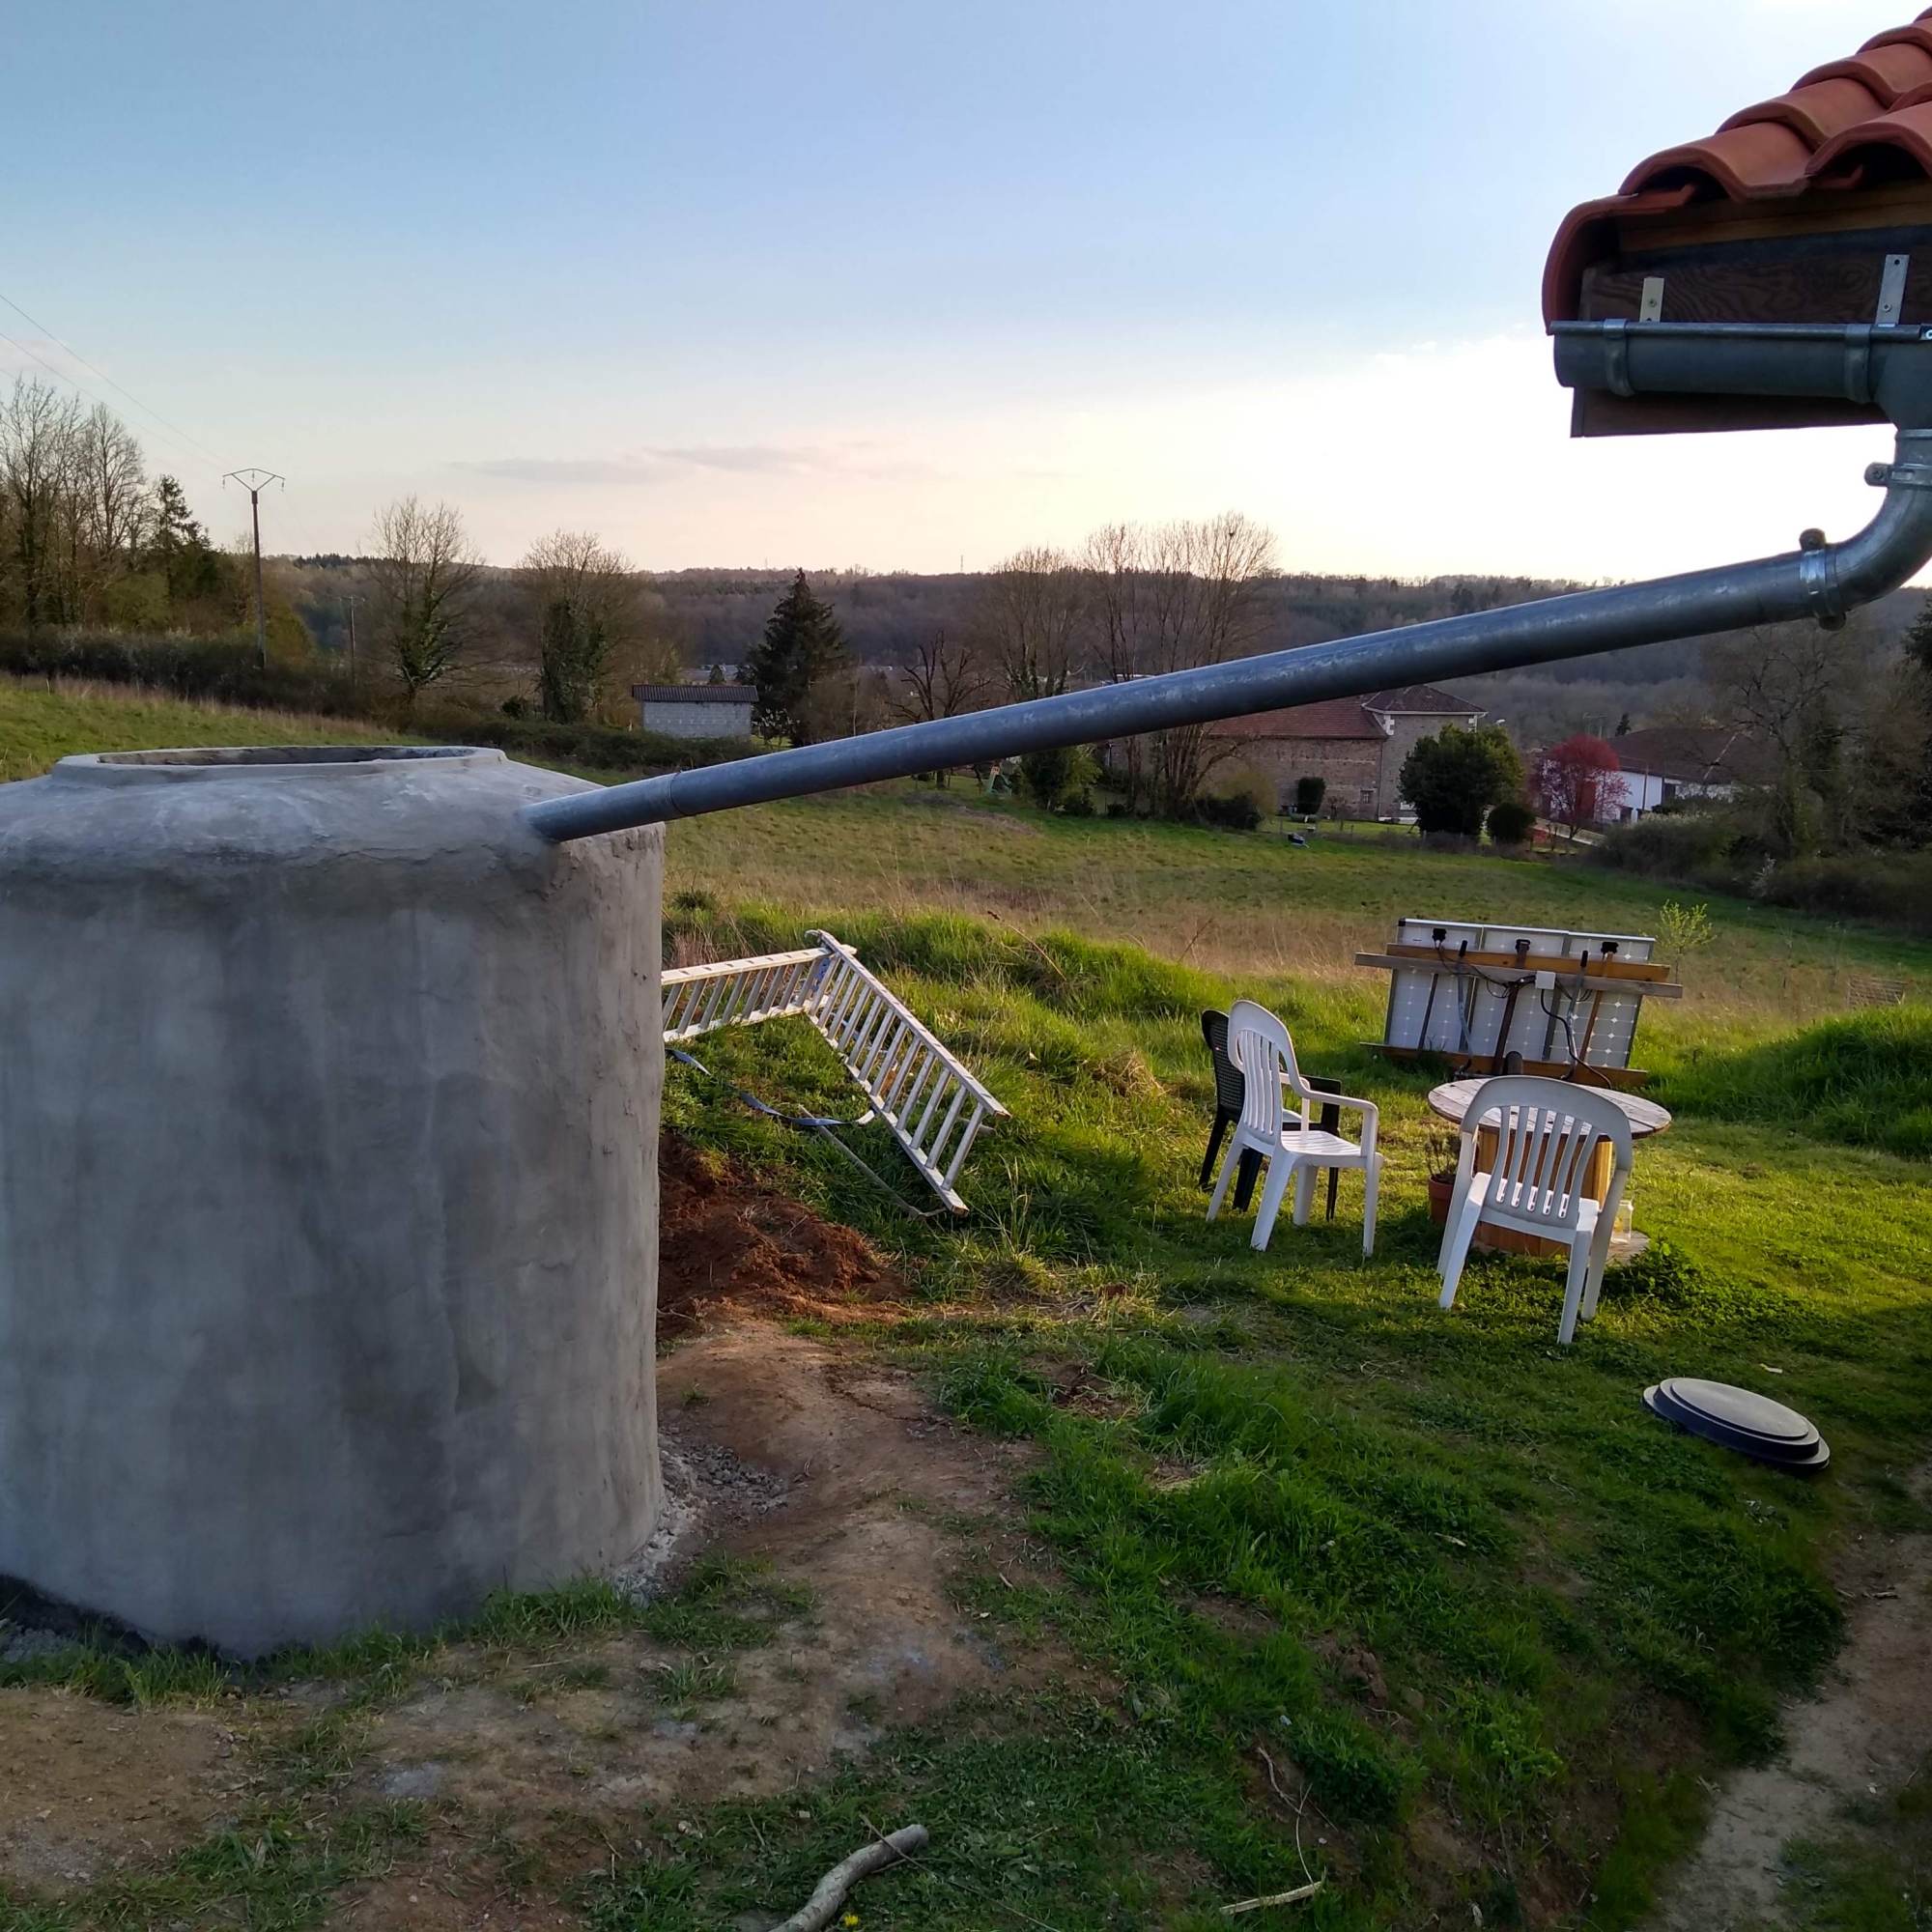
The tanks are good for other reasons besides cost. Firstly, Using a cylindrical shape allows for a constant ever-so-slight movement and therefore aeration, which means the water doesn’t become stagnant, it is instead ‘alive’, keeping it fresh over long periods. Secondly, any floating matter that enters the tank should (and does) flow out of the large overflow pipe. Finally and very importantly, the lack of UV light prevents any large build-up of algae. However, should we want to clean it or just take a look inside to see what is going on, we can access it anytime through the lid.
The creation of the tank hasn’t been without its trials. Alongside the inevitable ‘learning opportunities’ is the sheer hard graft required to build these tanks. We finished our second tank, affectionately known as “Frank”, with the superb help of our Workaway volunteers, friends and family. Many hands have helped to create the two tanks, for which we are endlessly grateful.
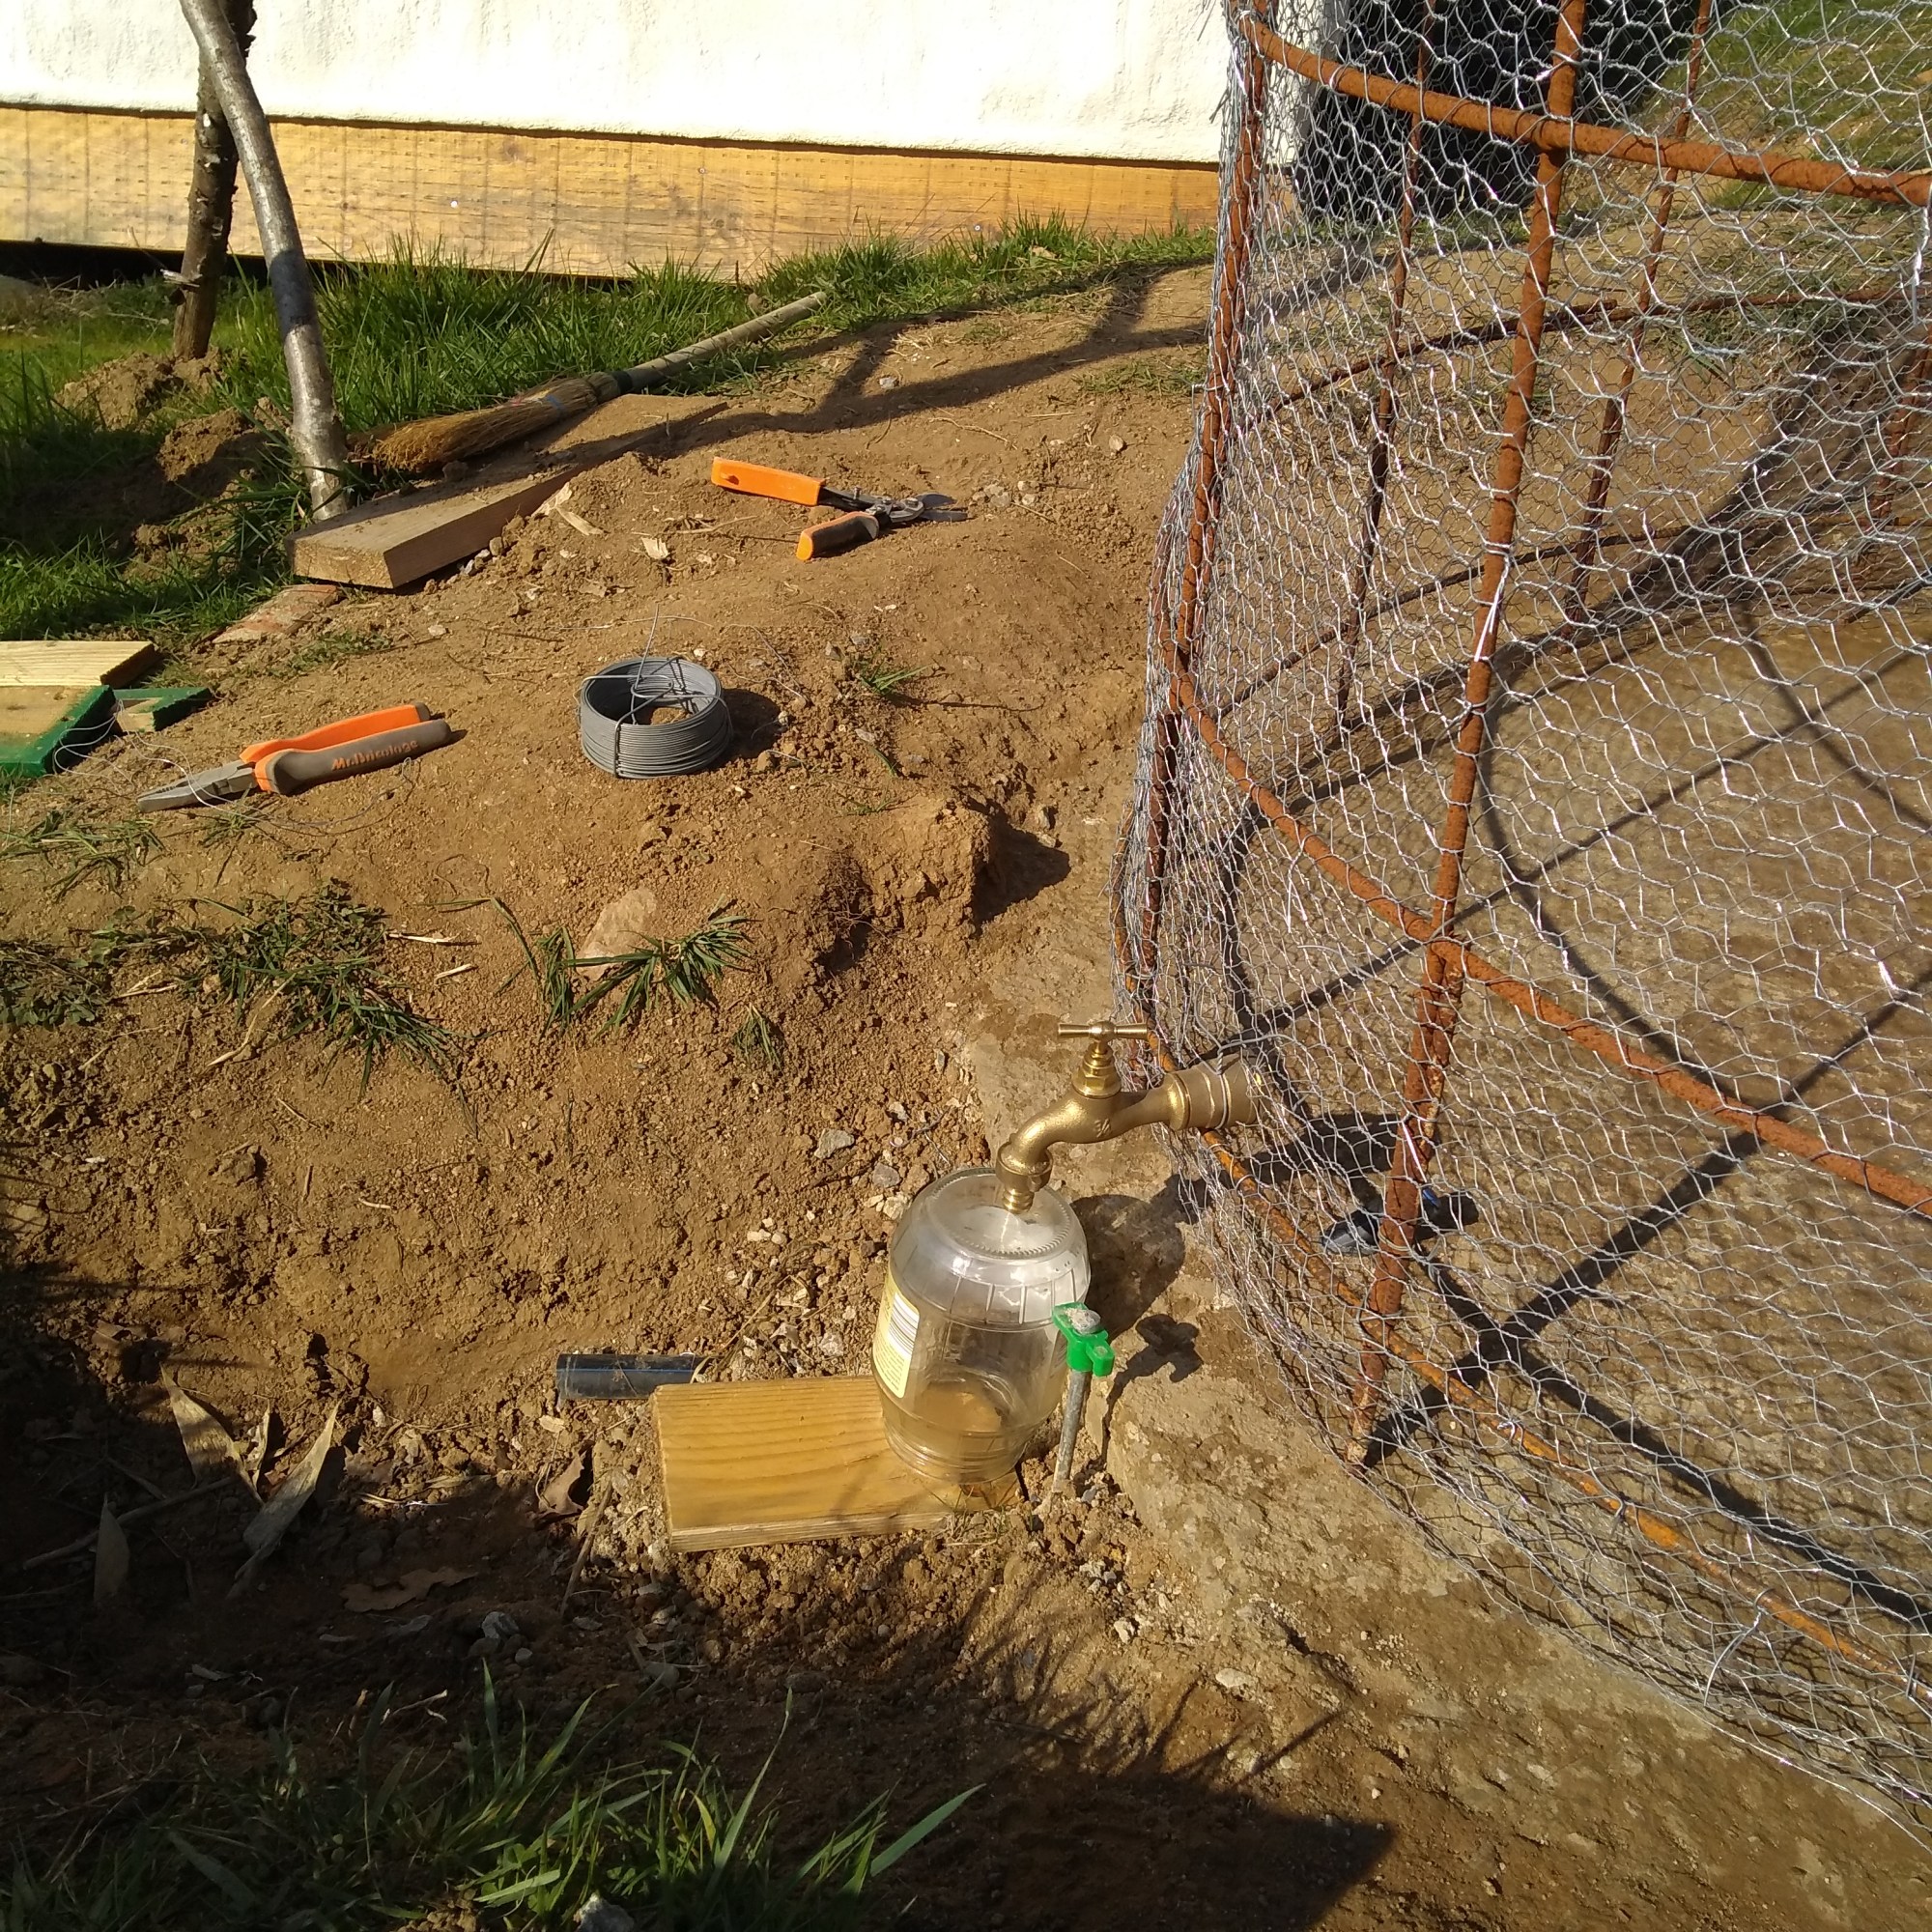
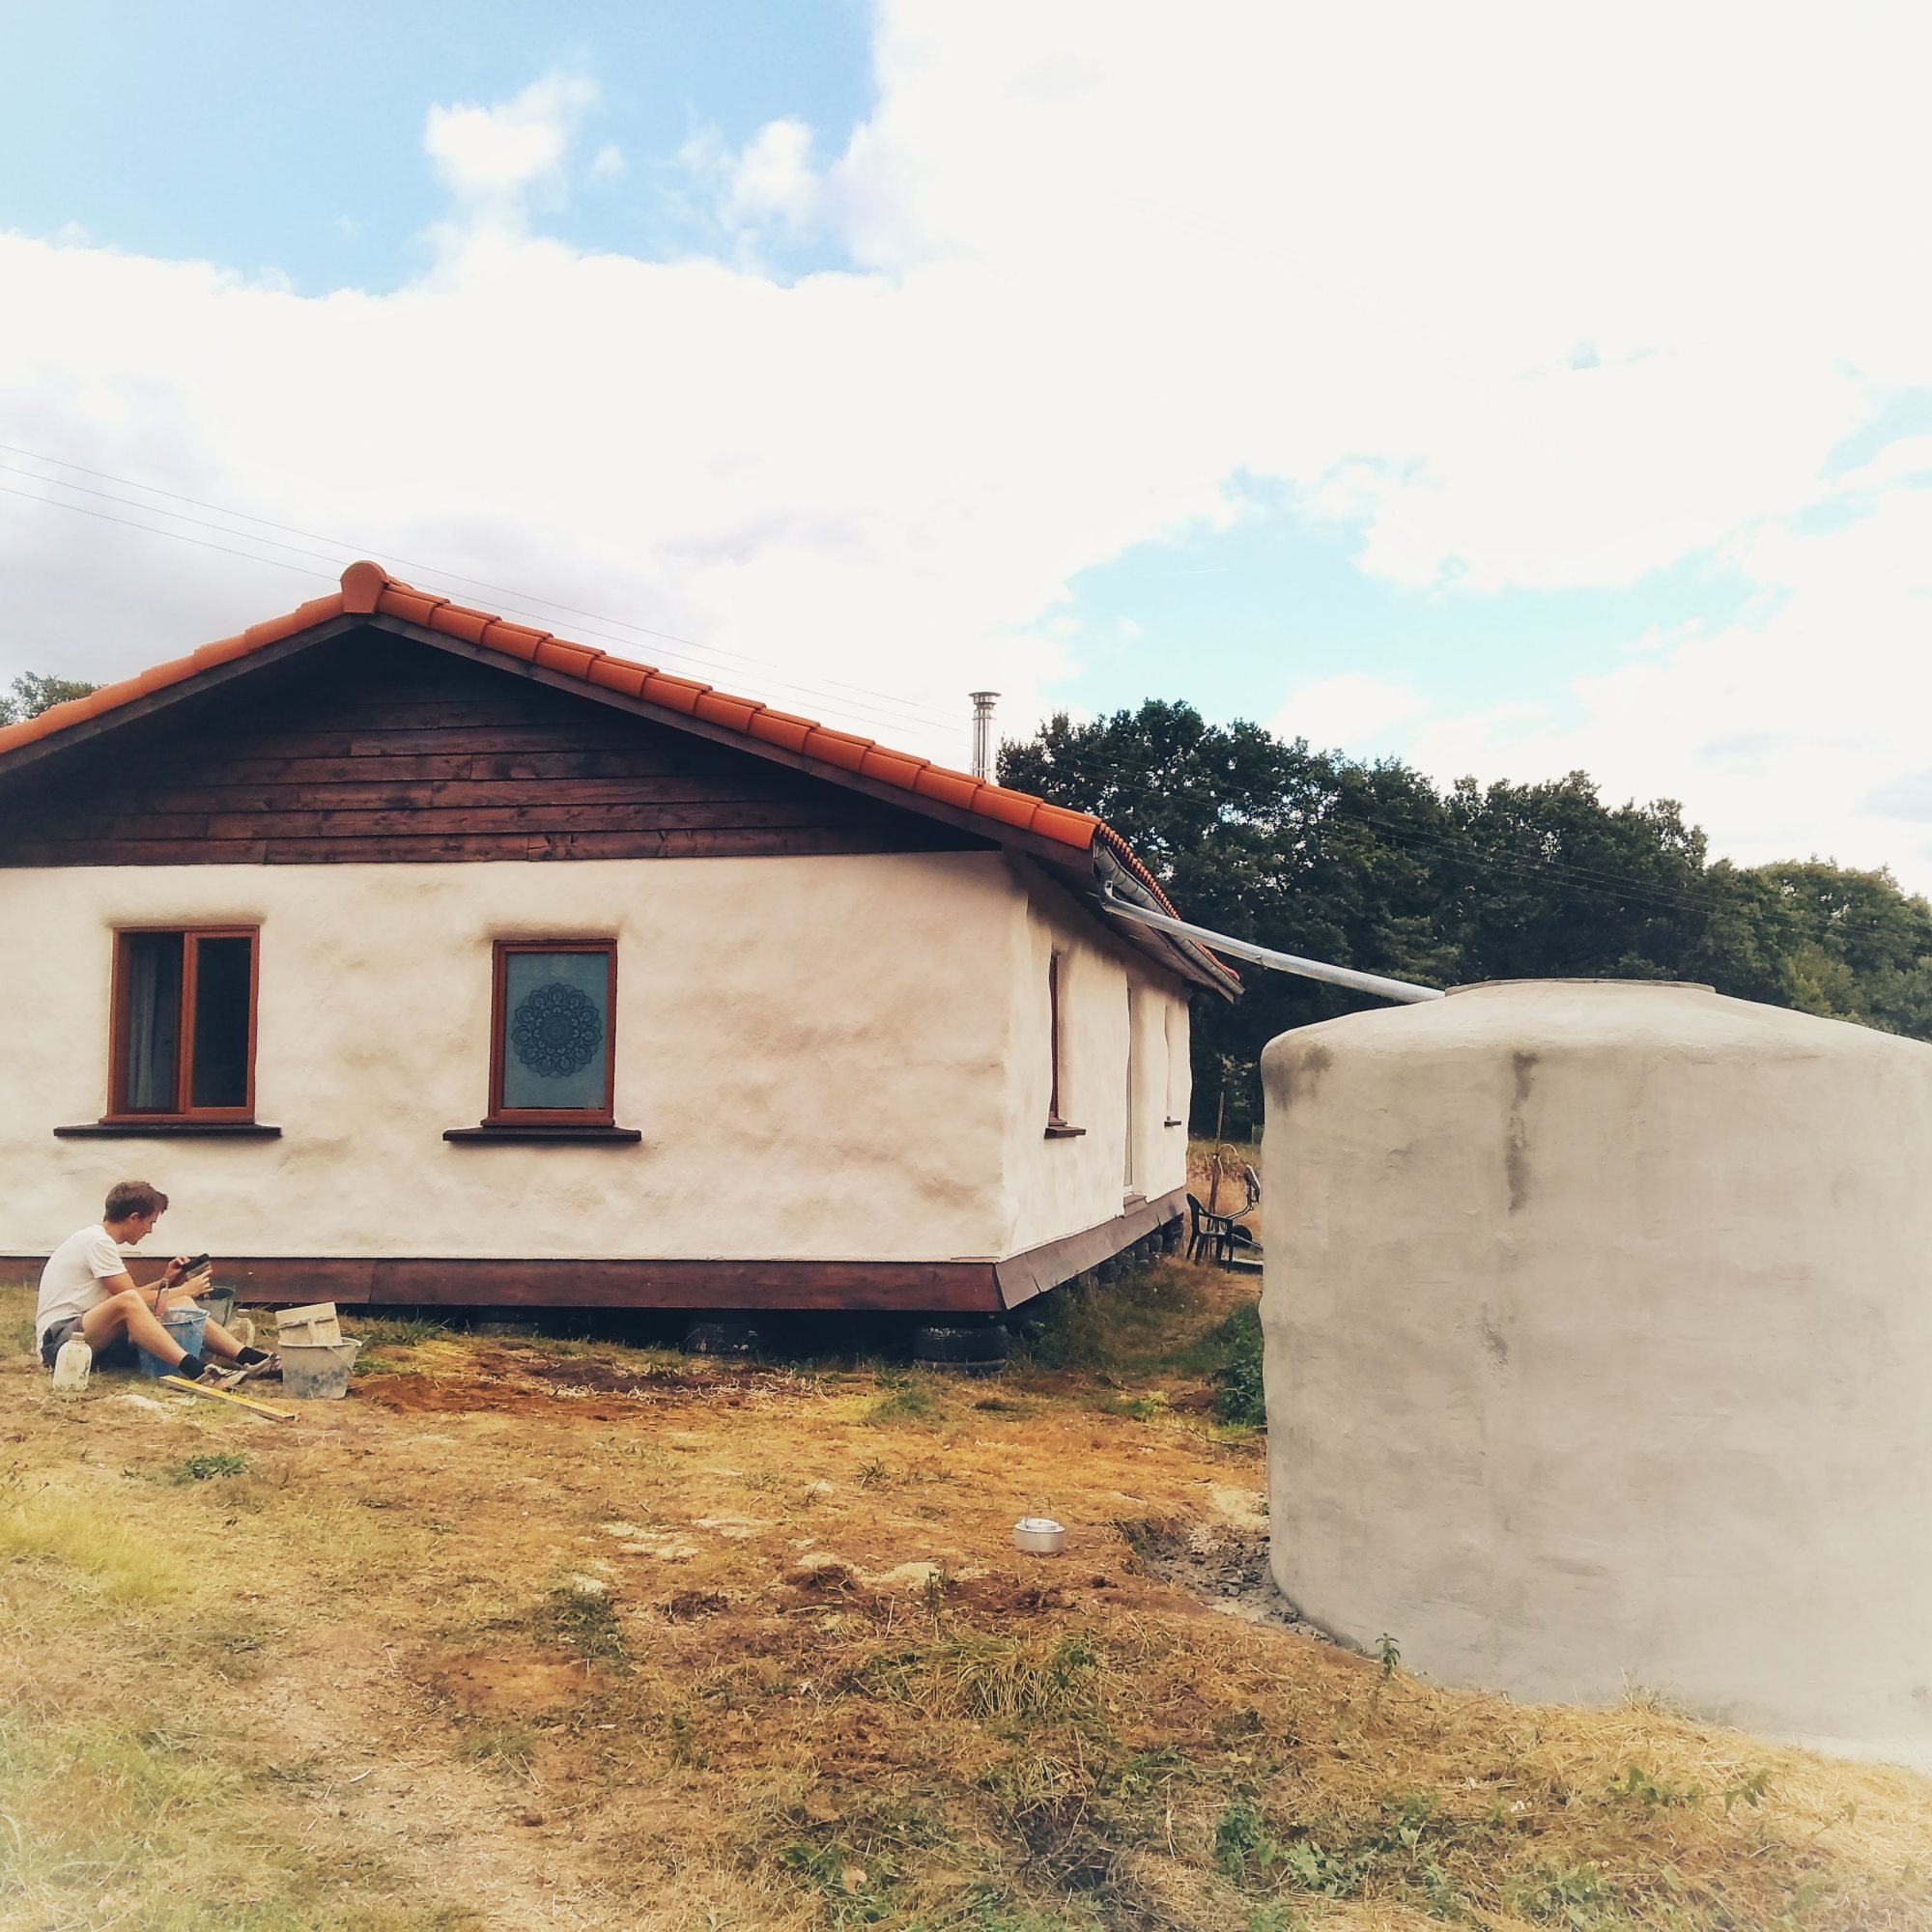
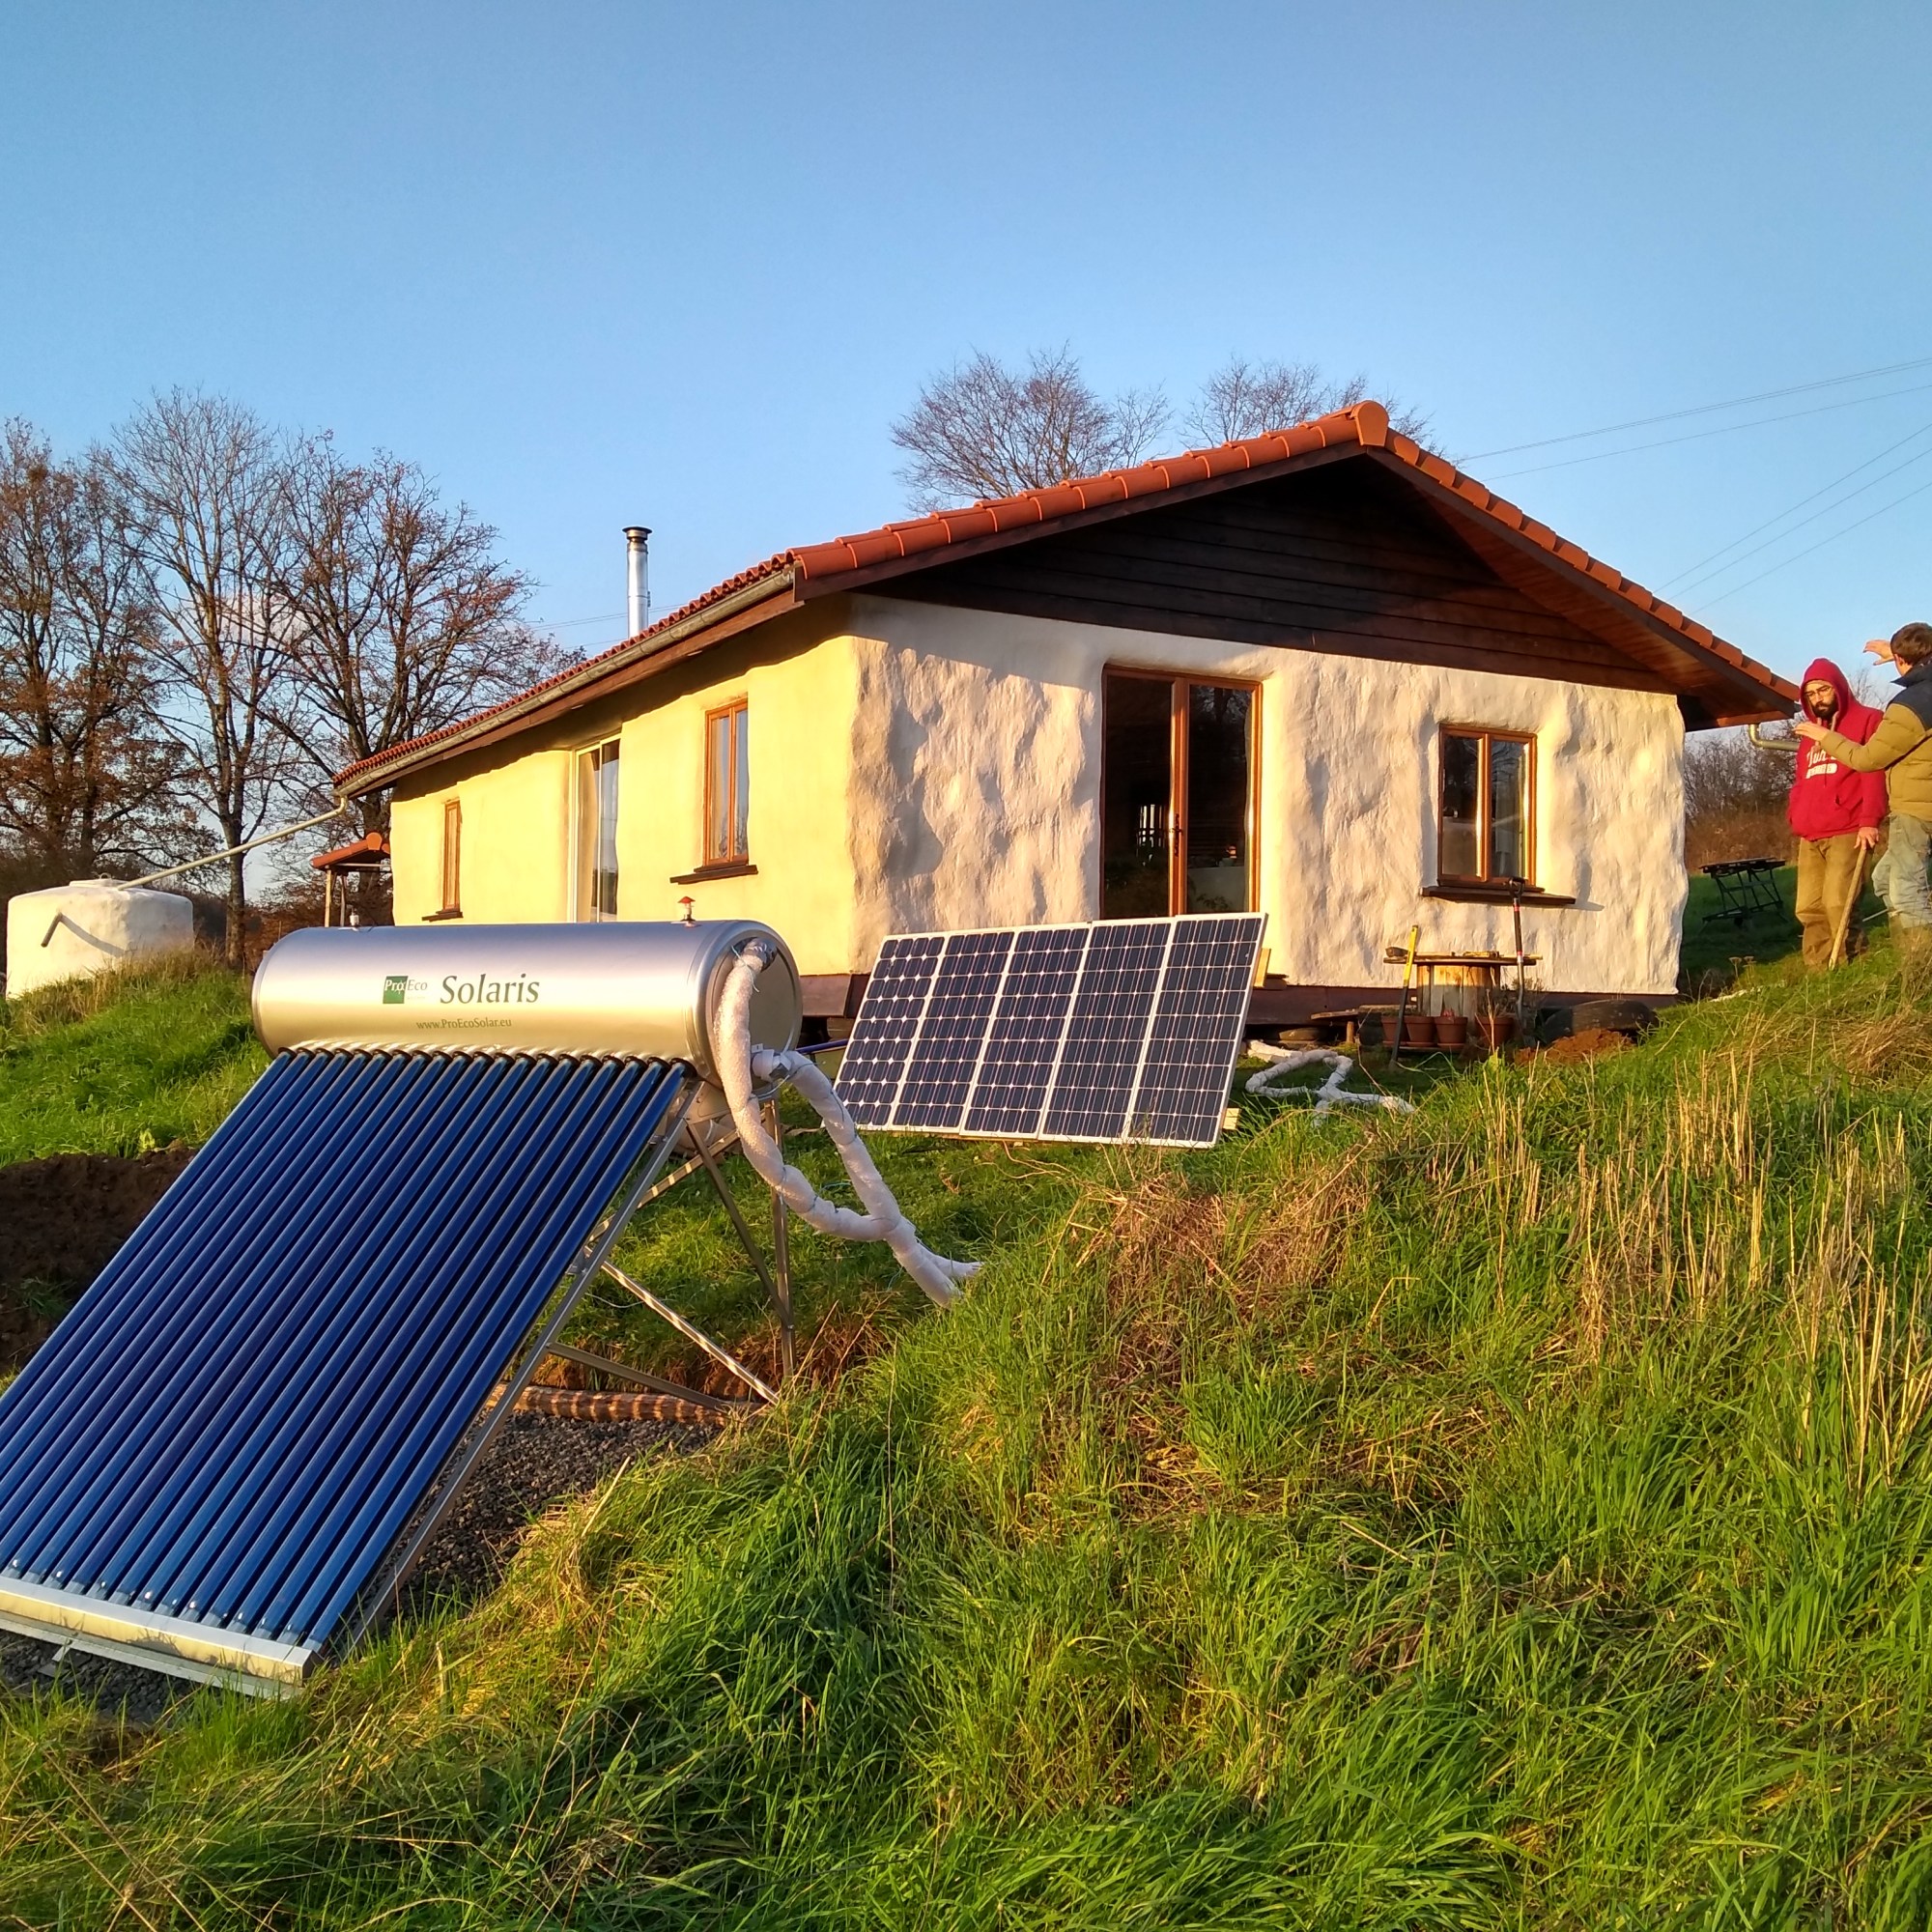
Both tanks are now in constant use, plumbed into the house. Which means…..real, actual, proper running water inside! Amazeballs. Hank is plumbed into a 167L evacuated-tube solar water heater, which, in turn, is plumbed into our shower for hot water. Frank is plumbed into the cold water system, currently providing cold water for the shower as well as a sink in the bathroom.
We have also been drinking the rain water from Hank since the summer. Dan goes whole-hog and often drinks directly from the tank, as did some of our daring Workawayers! I myself am not as brave and I drink it after it has been through the magical Berkey filter. It tastes so good! It is the softest water I have ever drunk or bathed in (not both at the same time 😂). Delish.
Constructing Hank The Tank
In order to construct Hank, we followed the excellent book simply named ‘Water Storage’ by Art Ludwig religiously. Hank is a ‘Medium-Duty Shaped Ferrocement Tank’. With the help of our super engineer, Nils, and his magical unicorn spreadsheet, we were able to quickly work out how big the diameter should be to give us X litres of water. The same table also gave us information about how much rebar we would need and the volume of cement. For Hank, we decided 2,800 litres would be a good starting point. Later on, we used the same Excel wizardry to work out the dimensions for Frank.
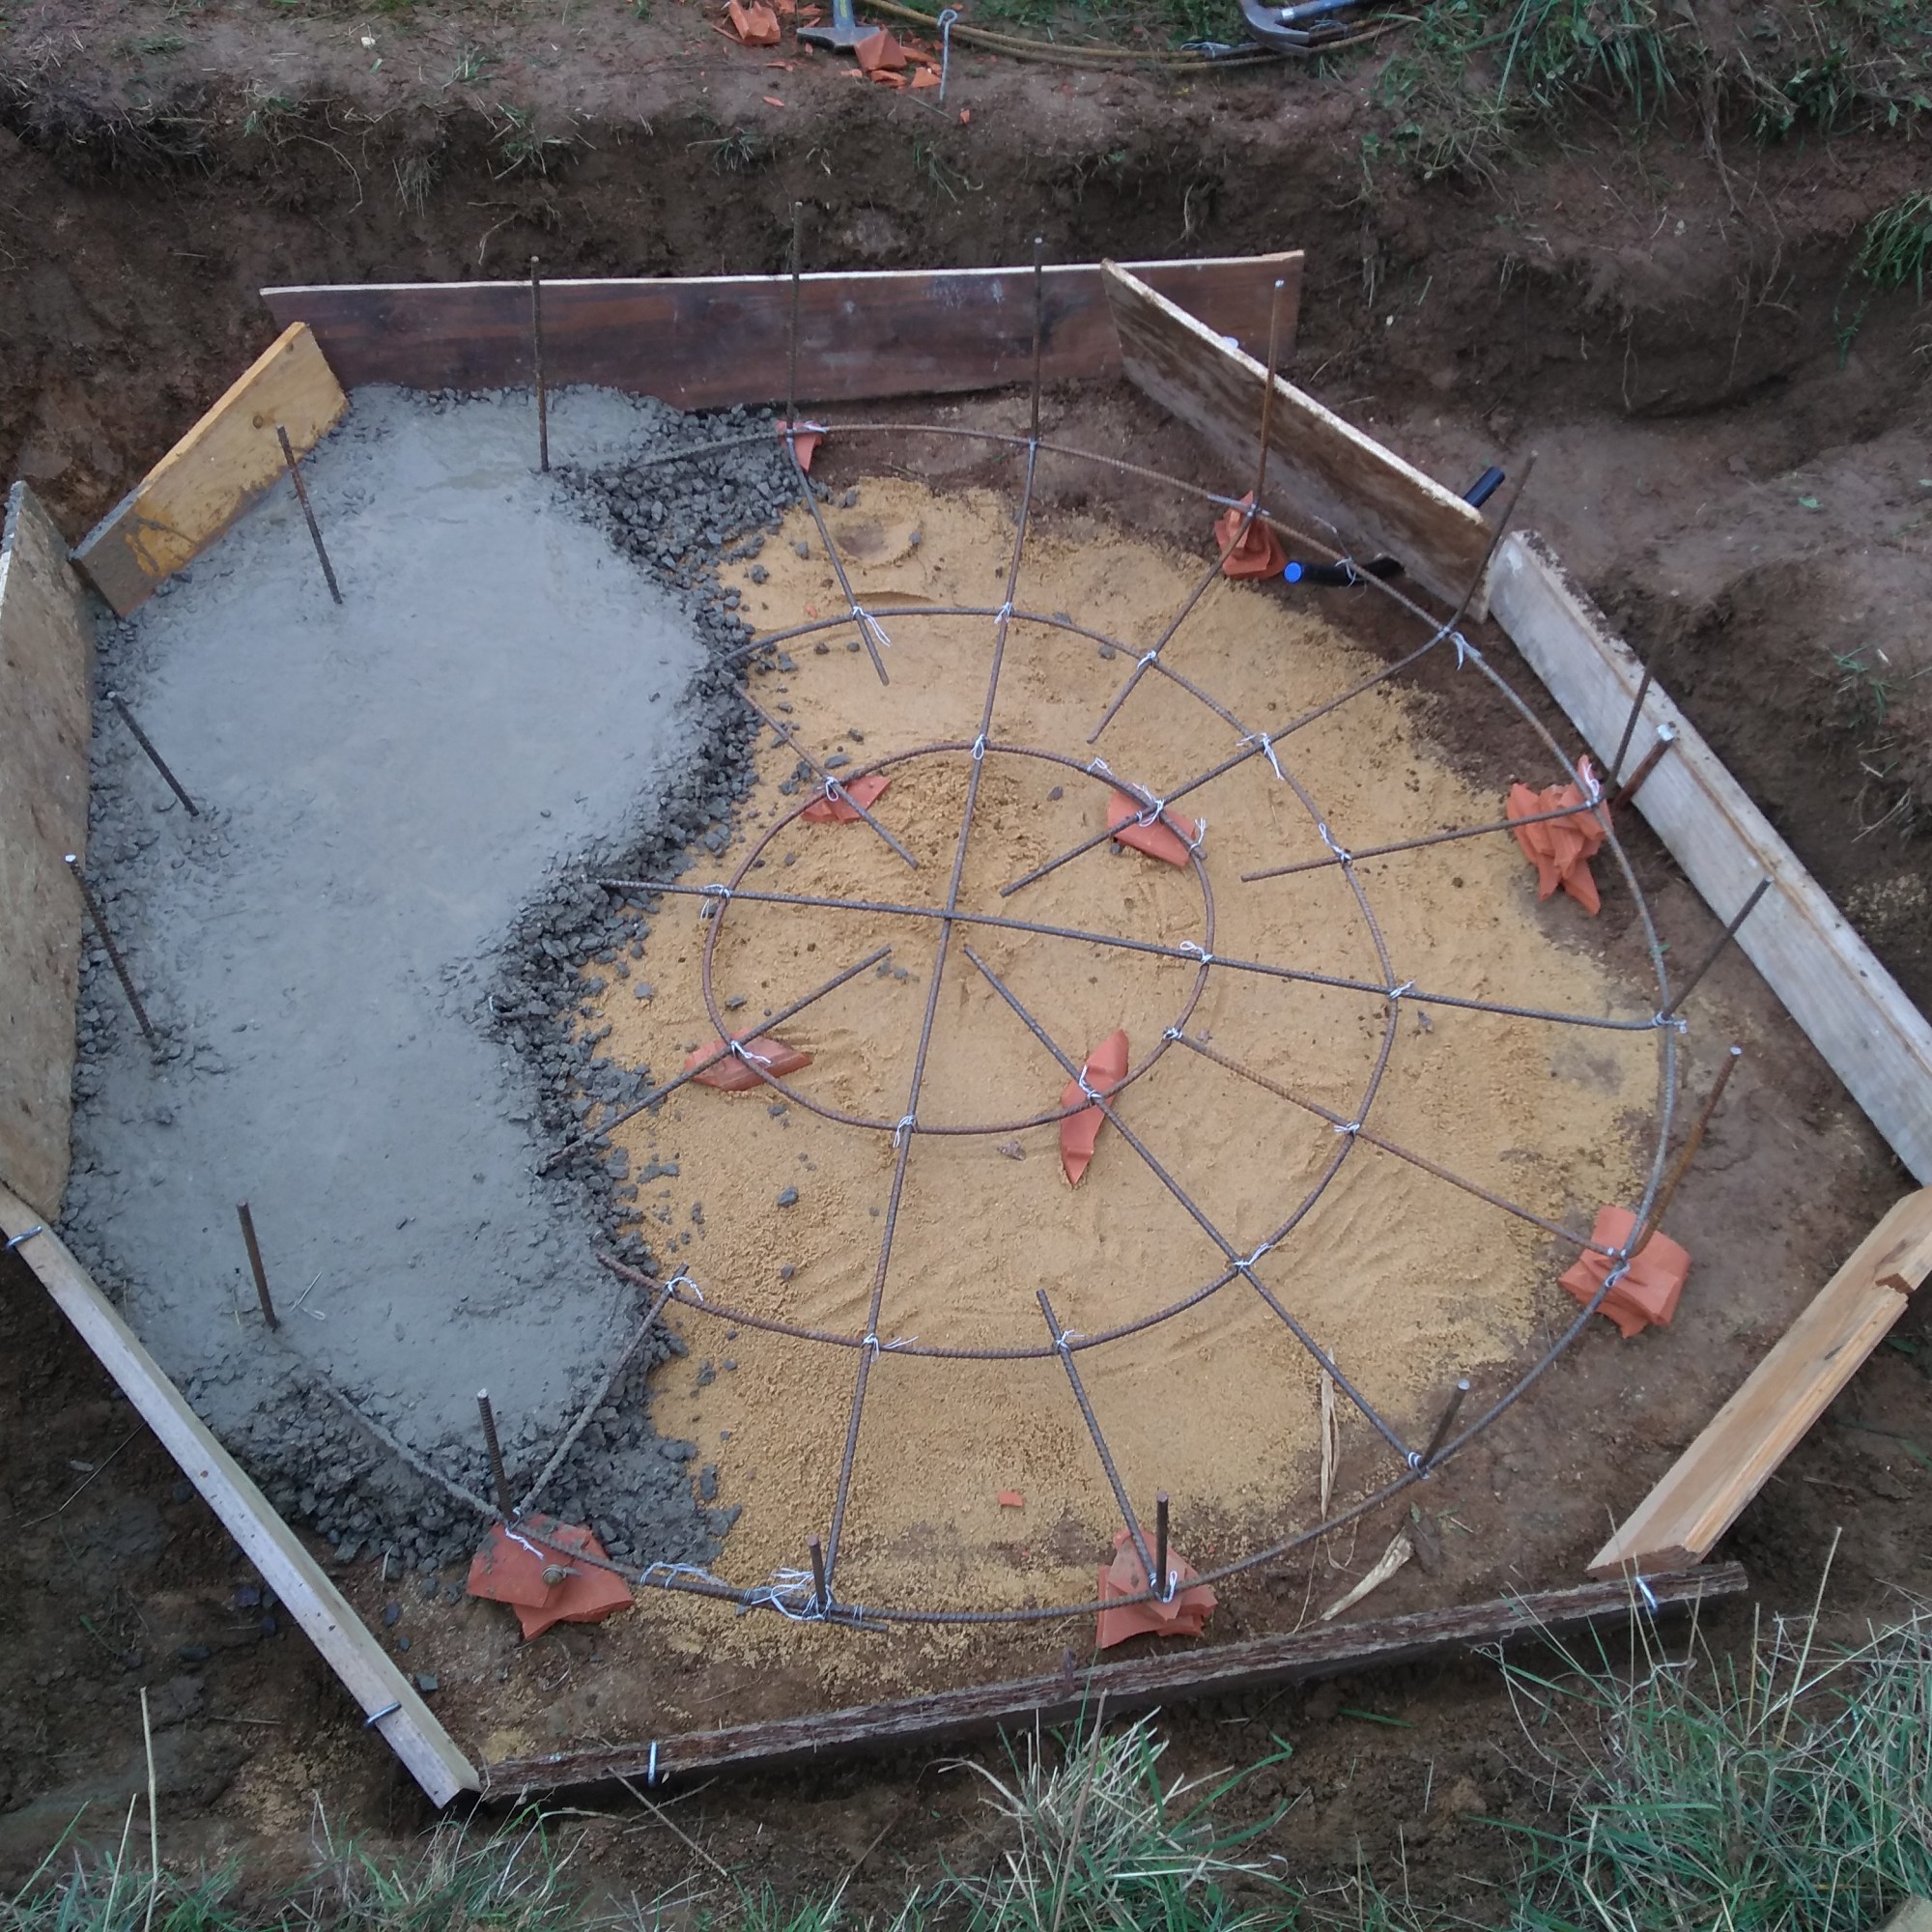
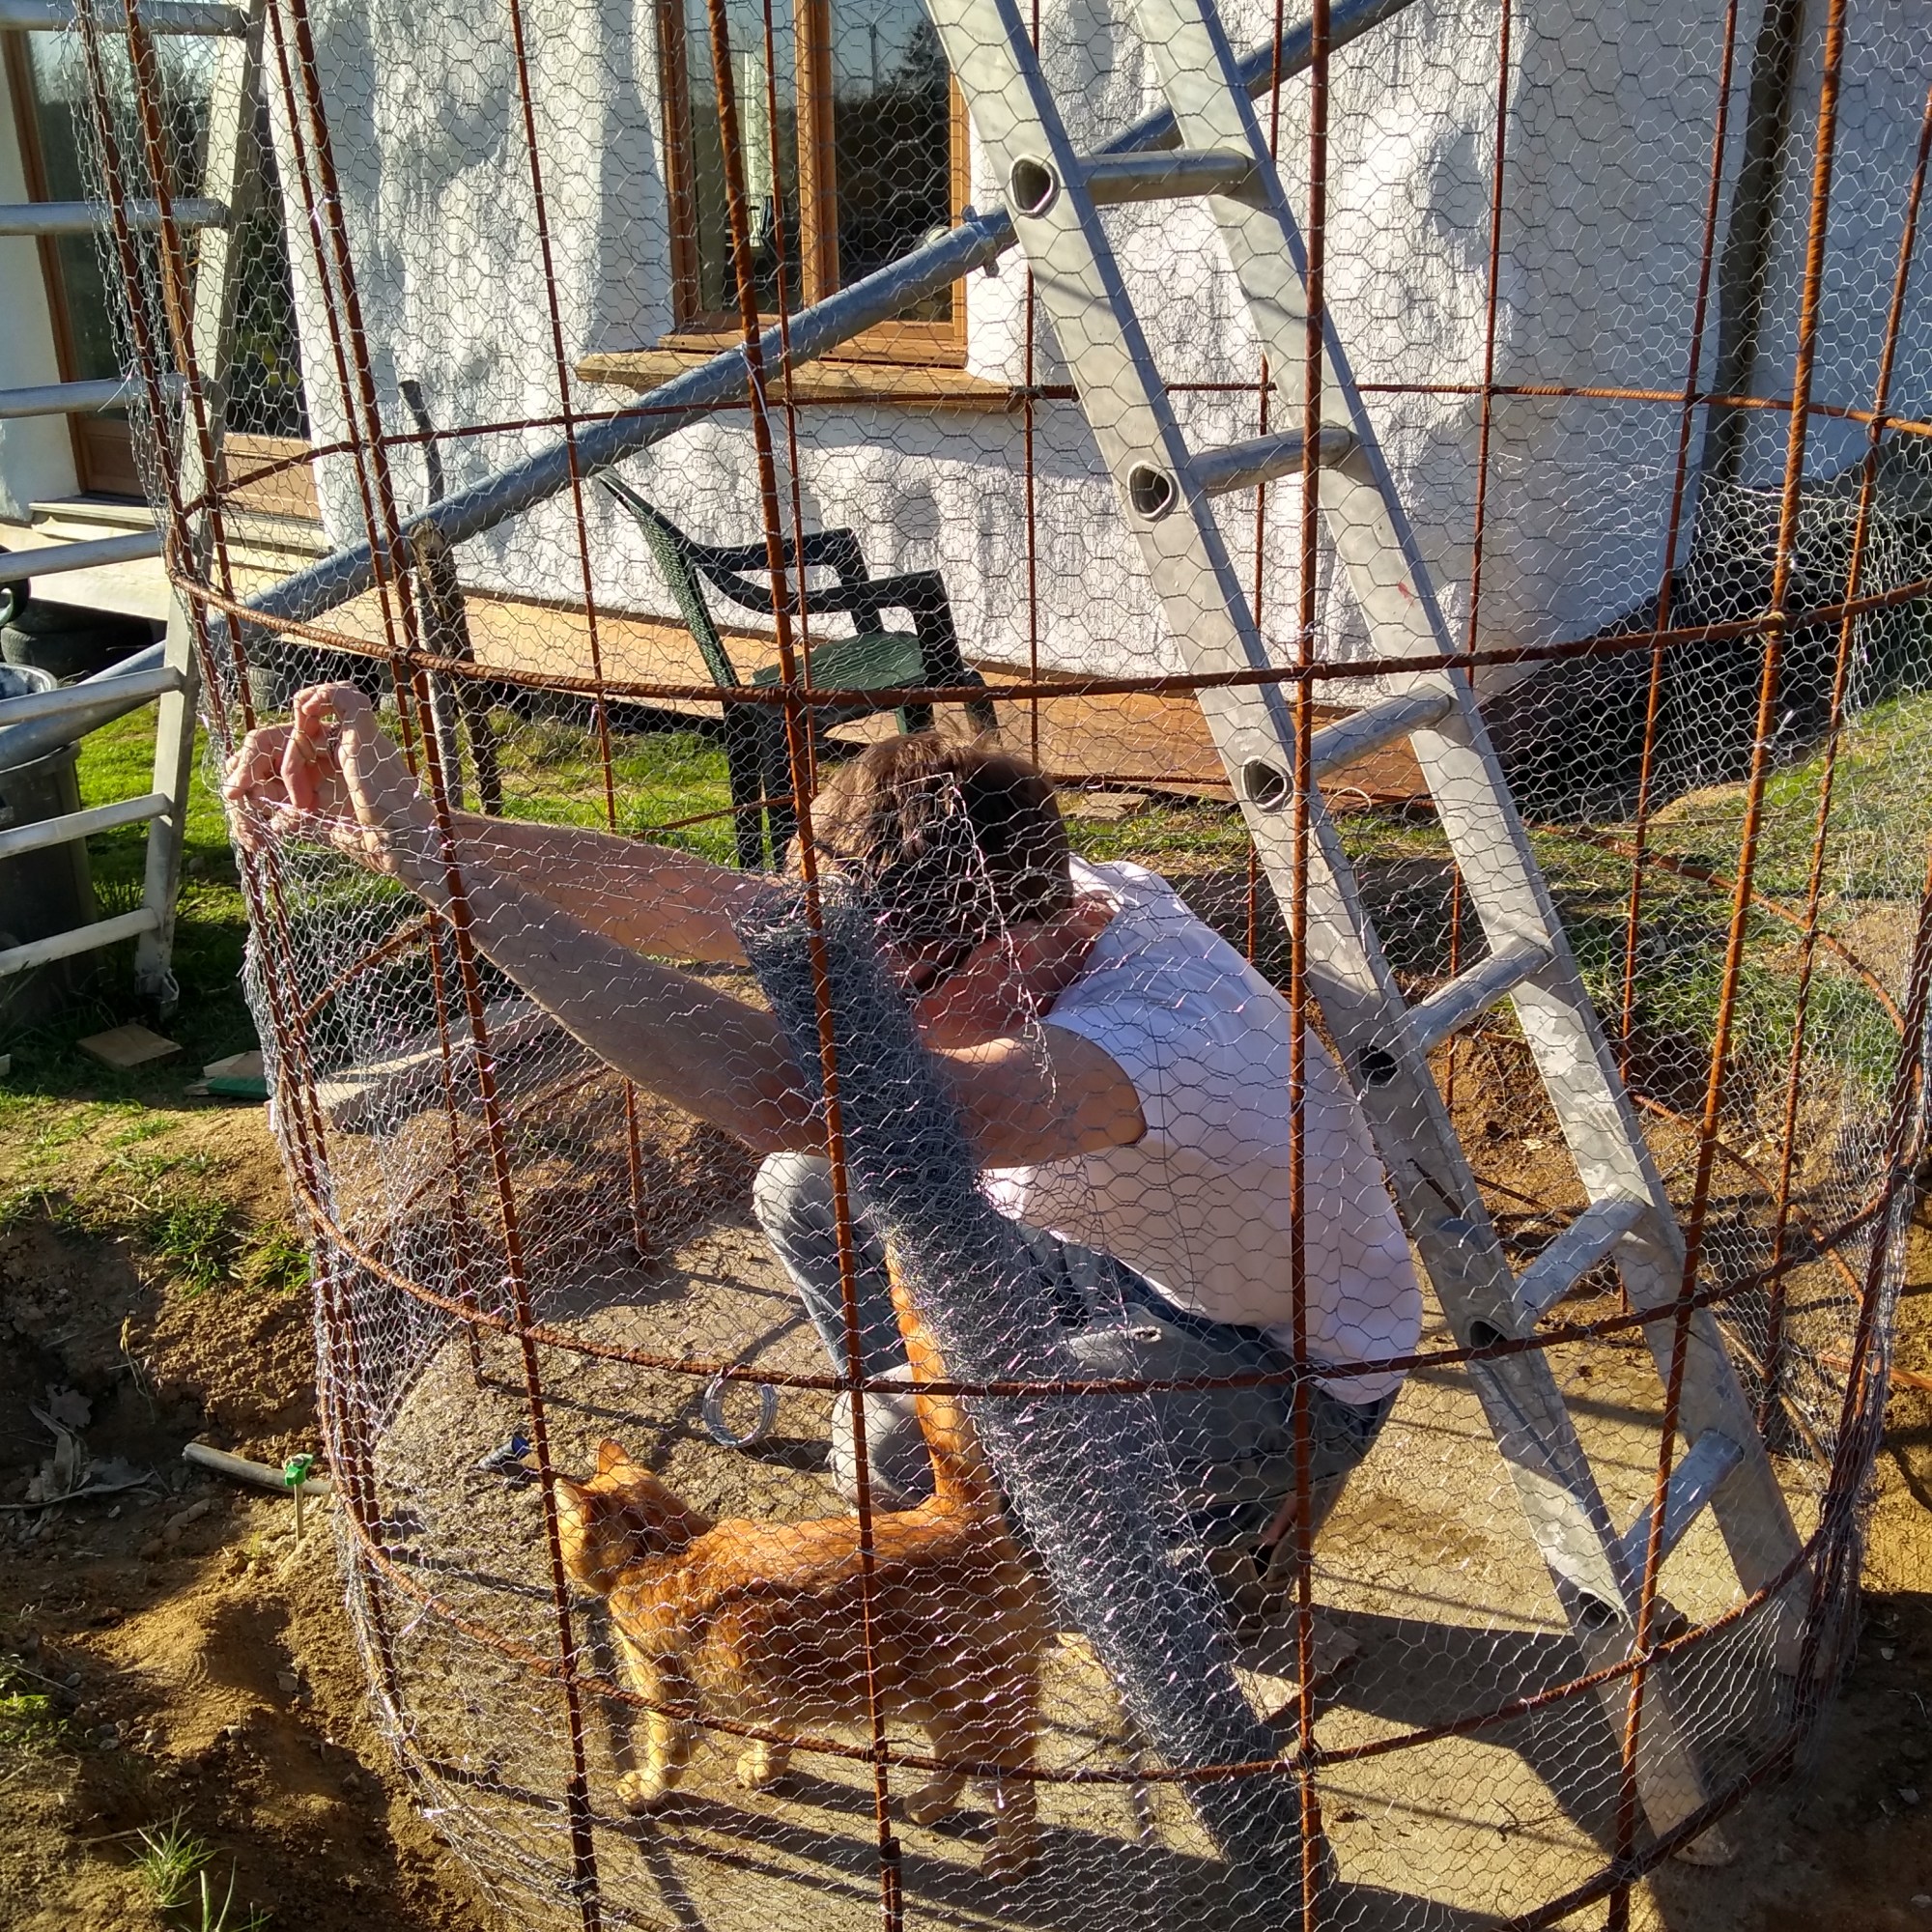
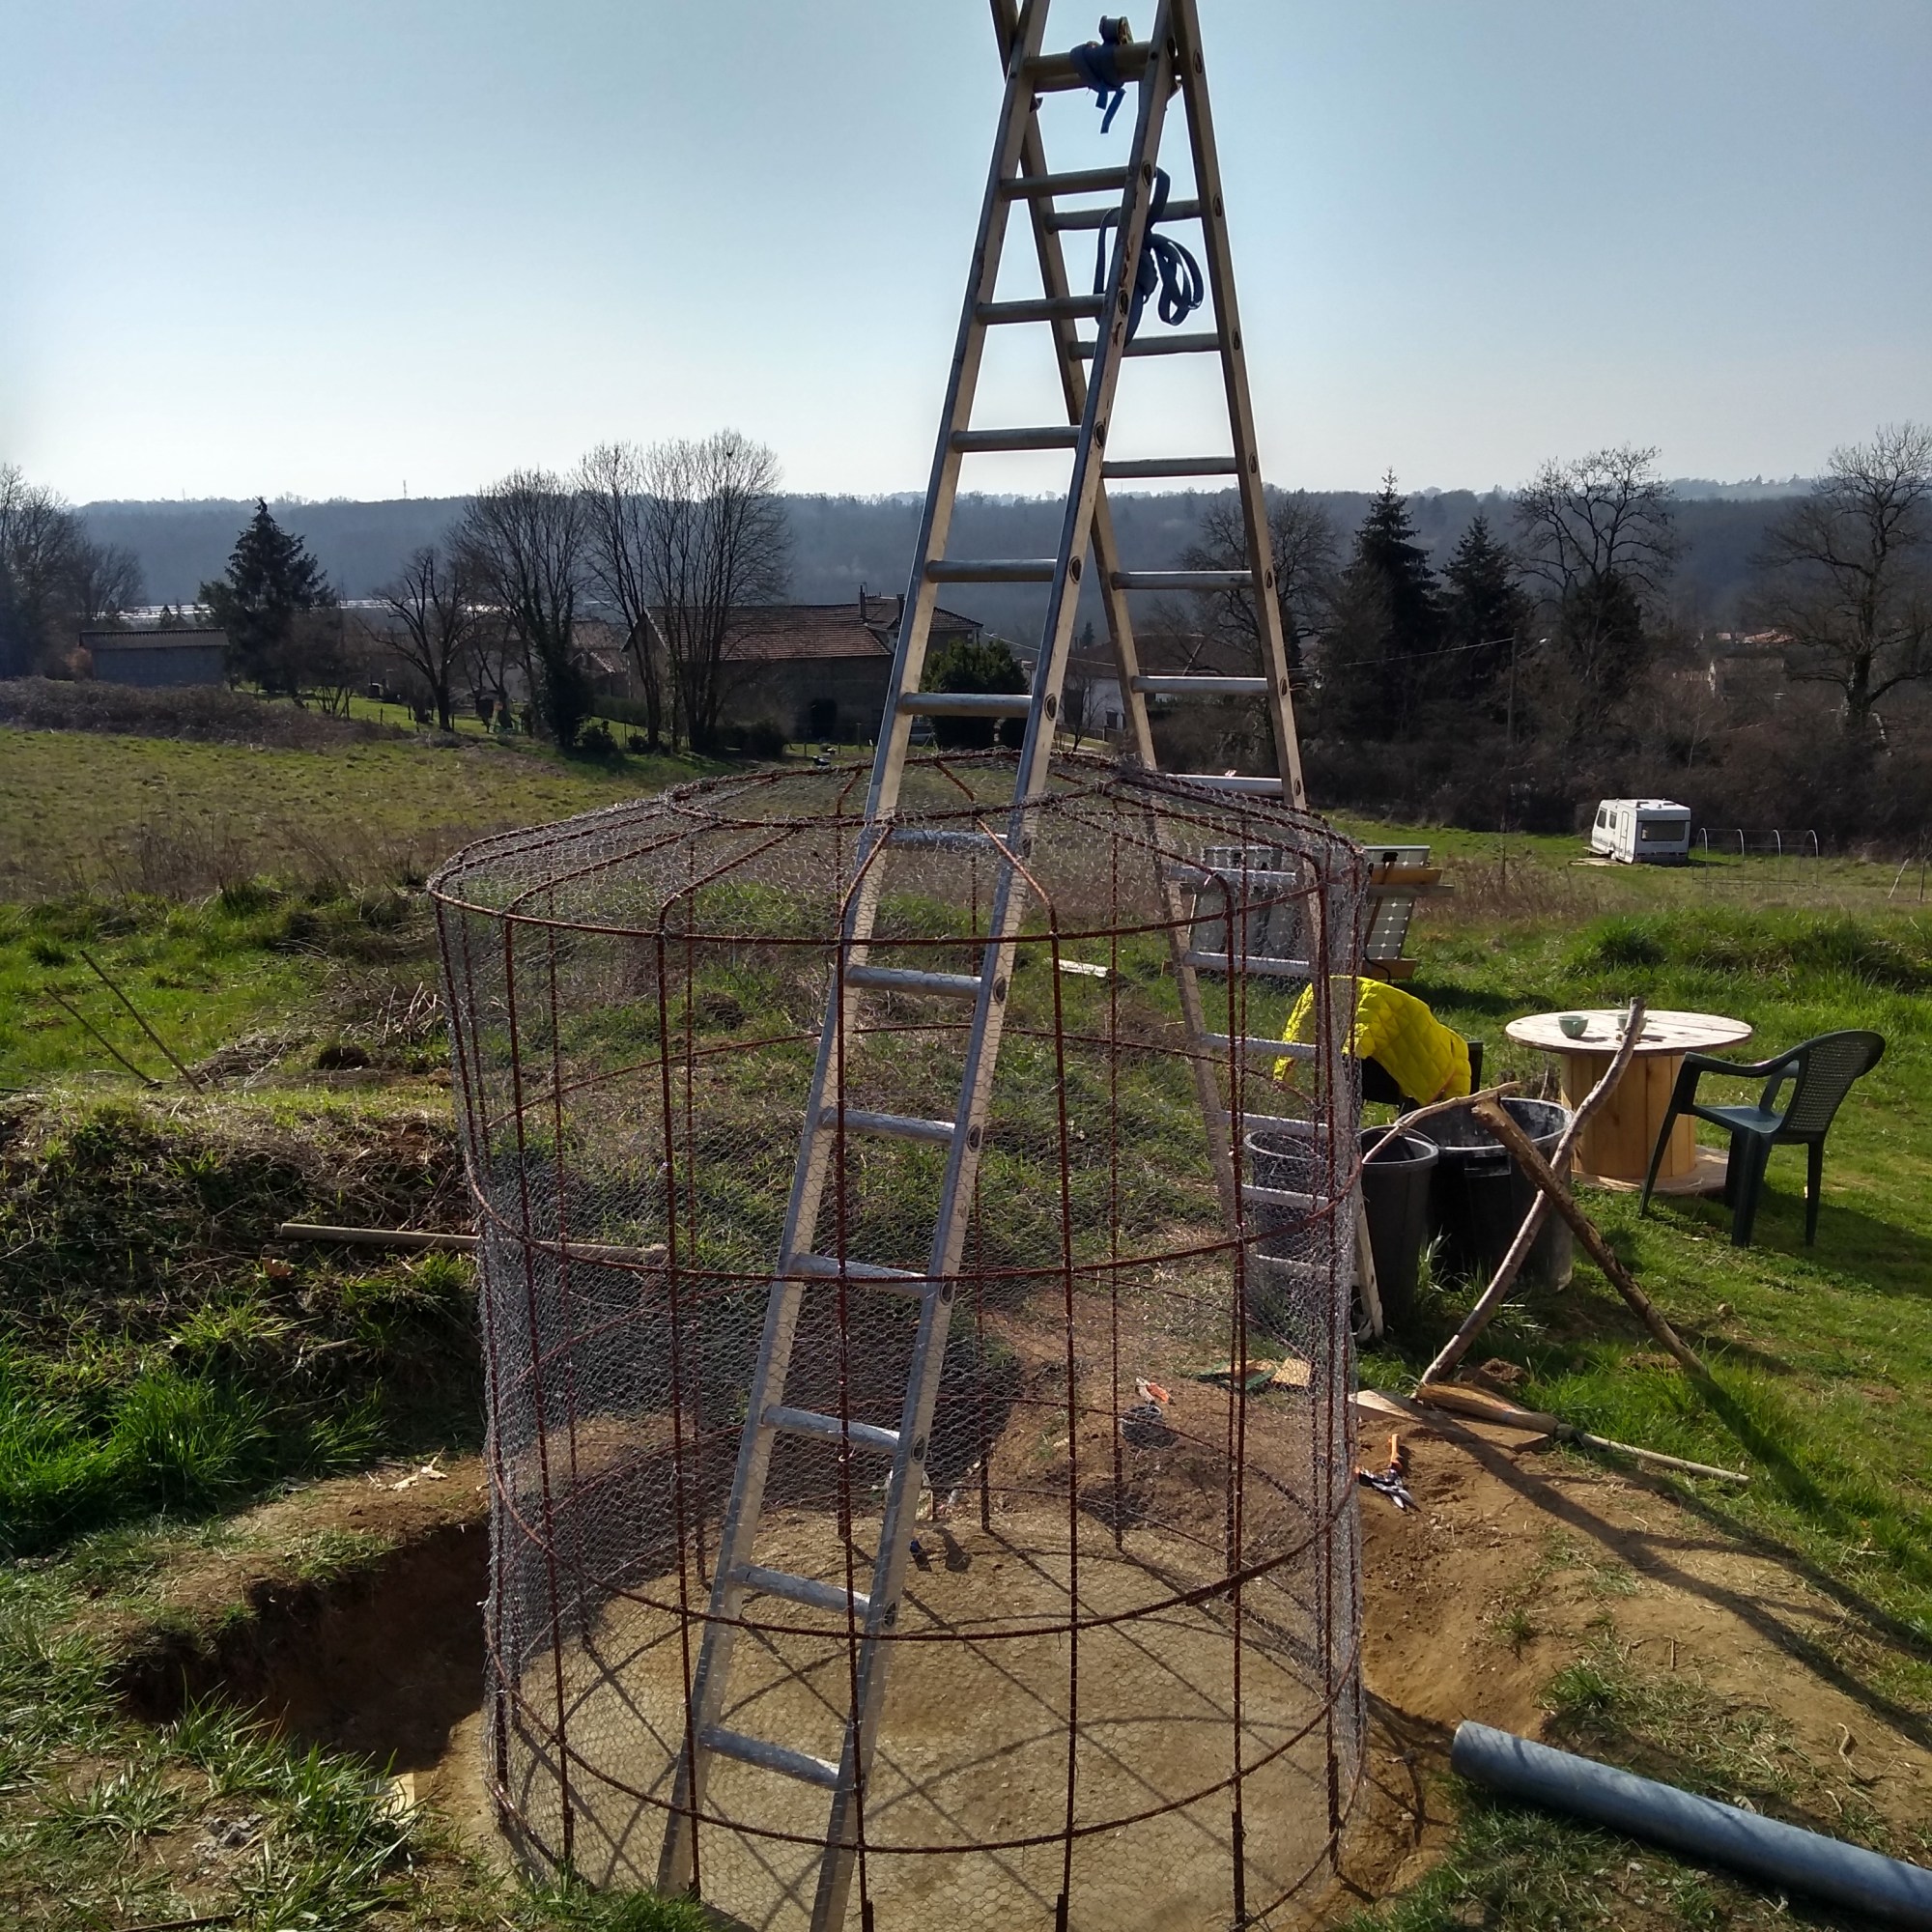
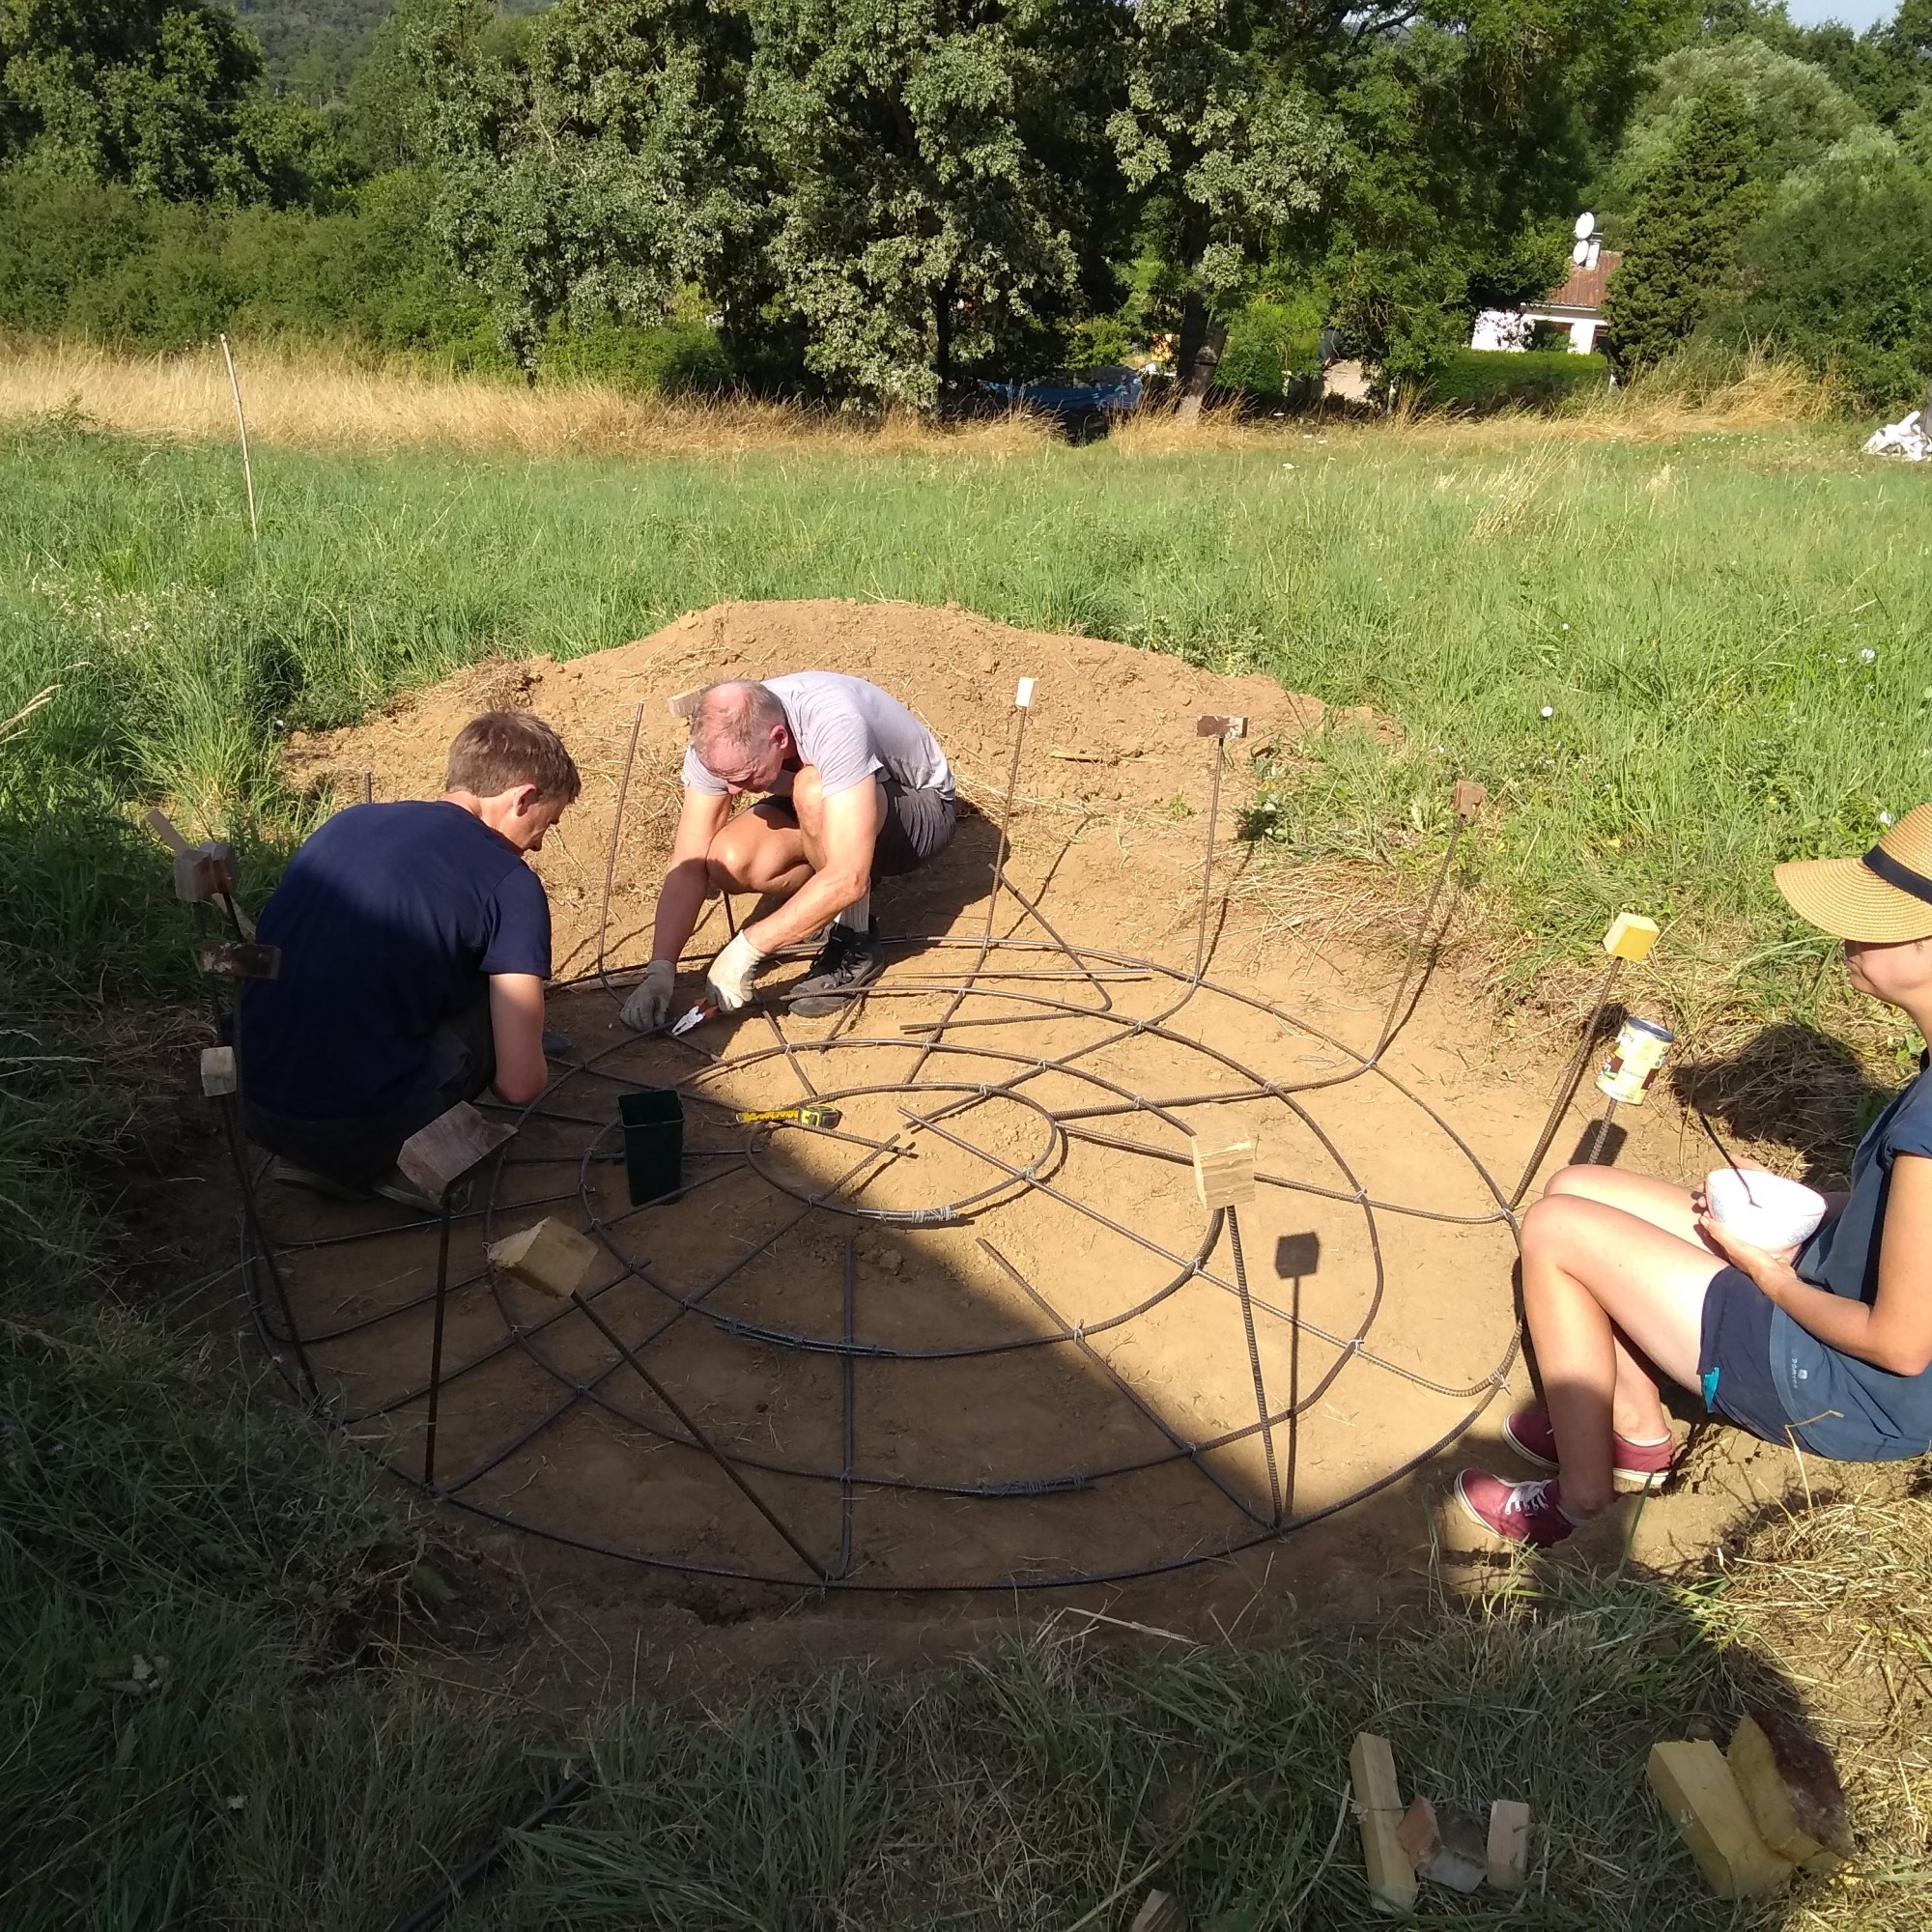
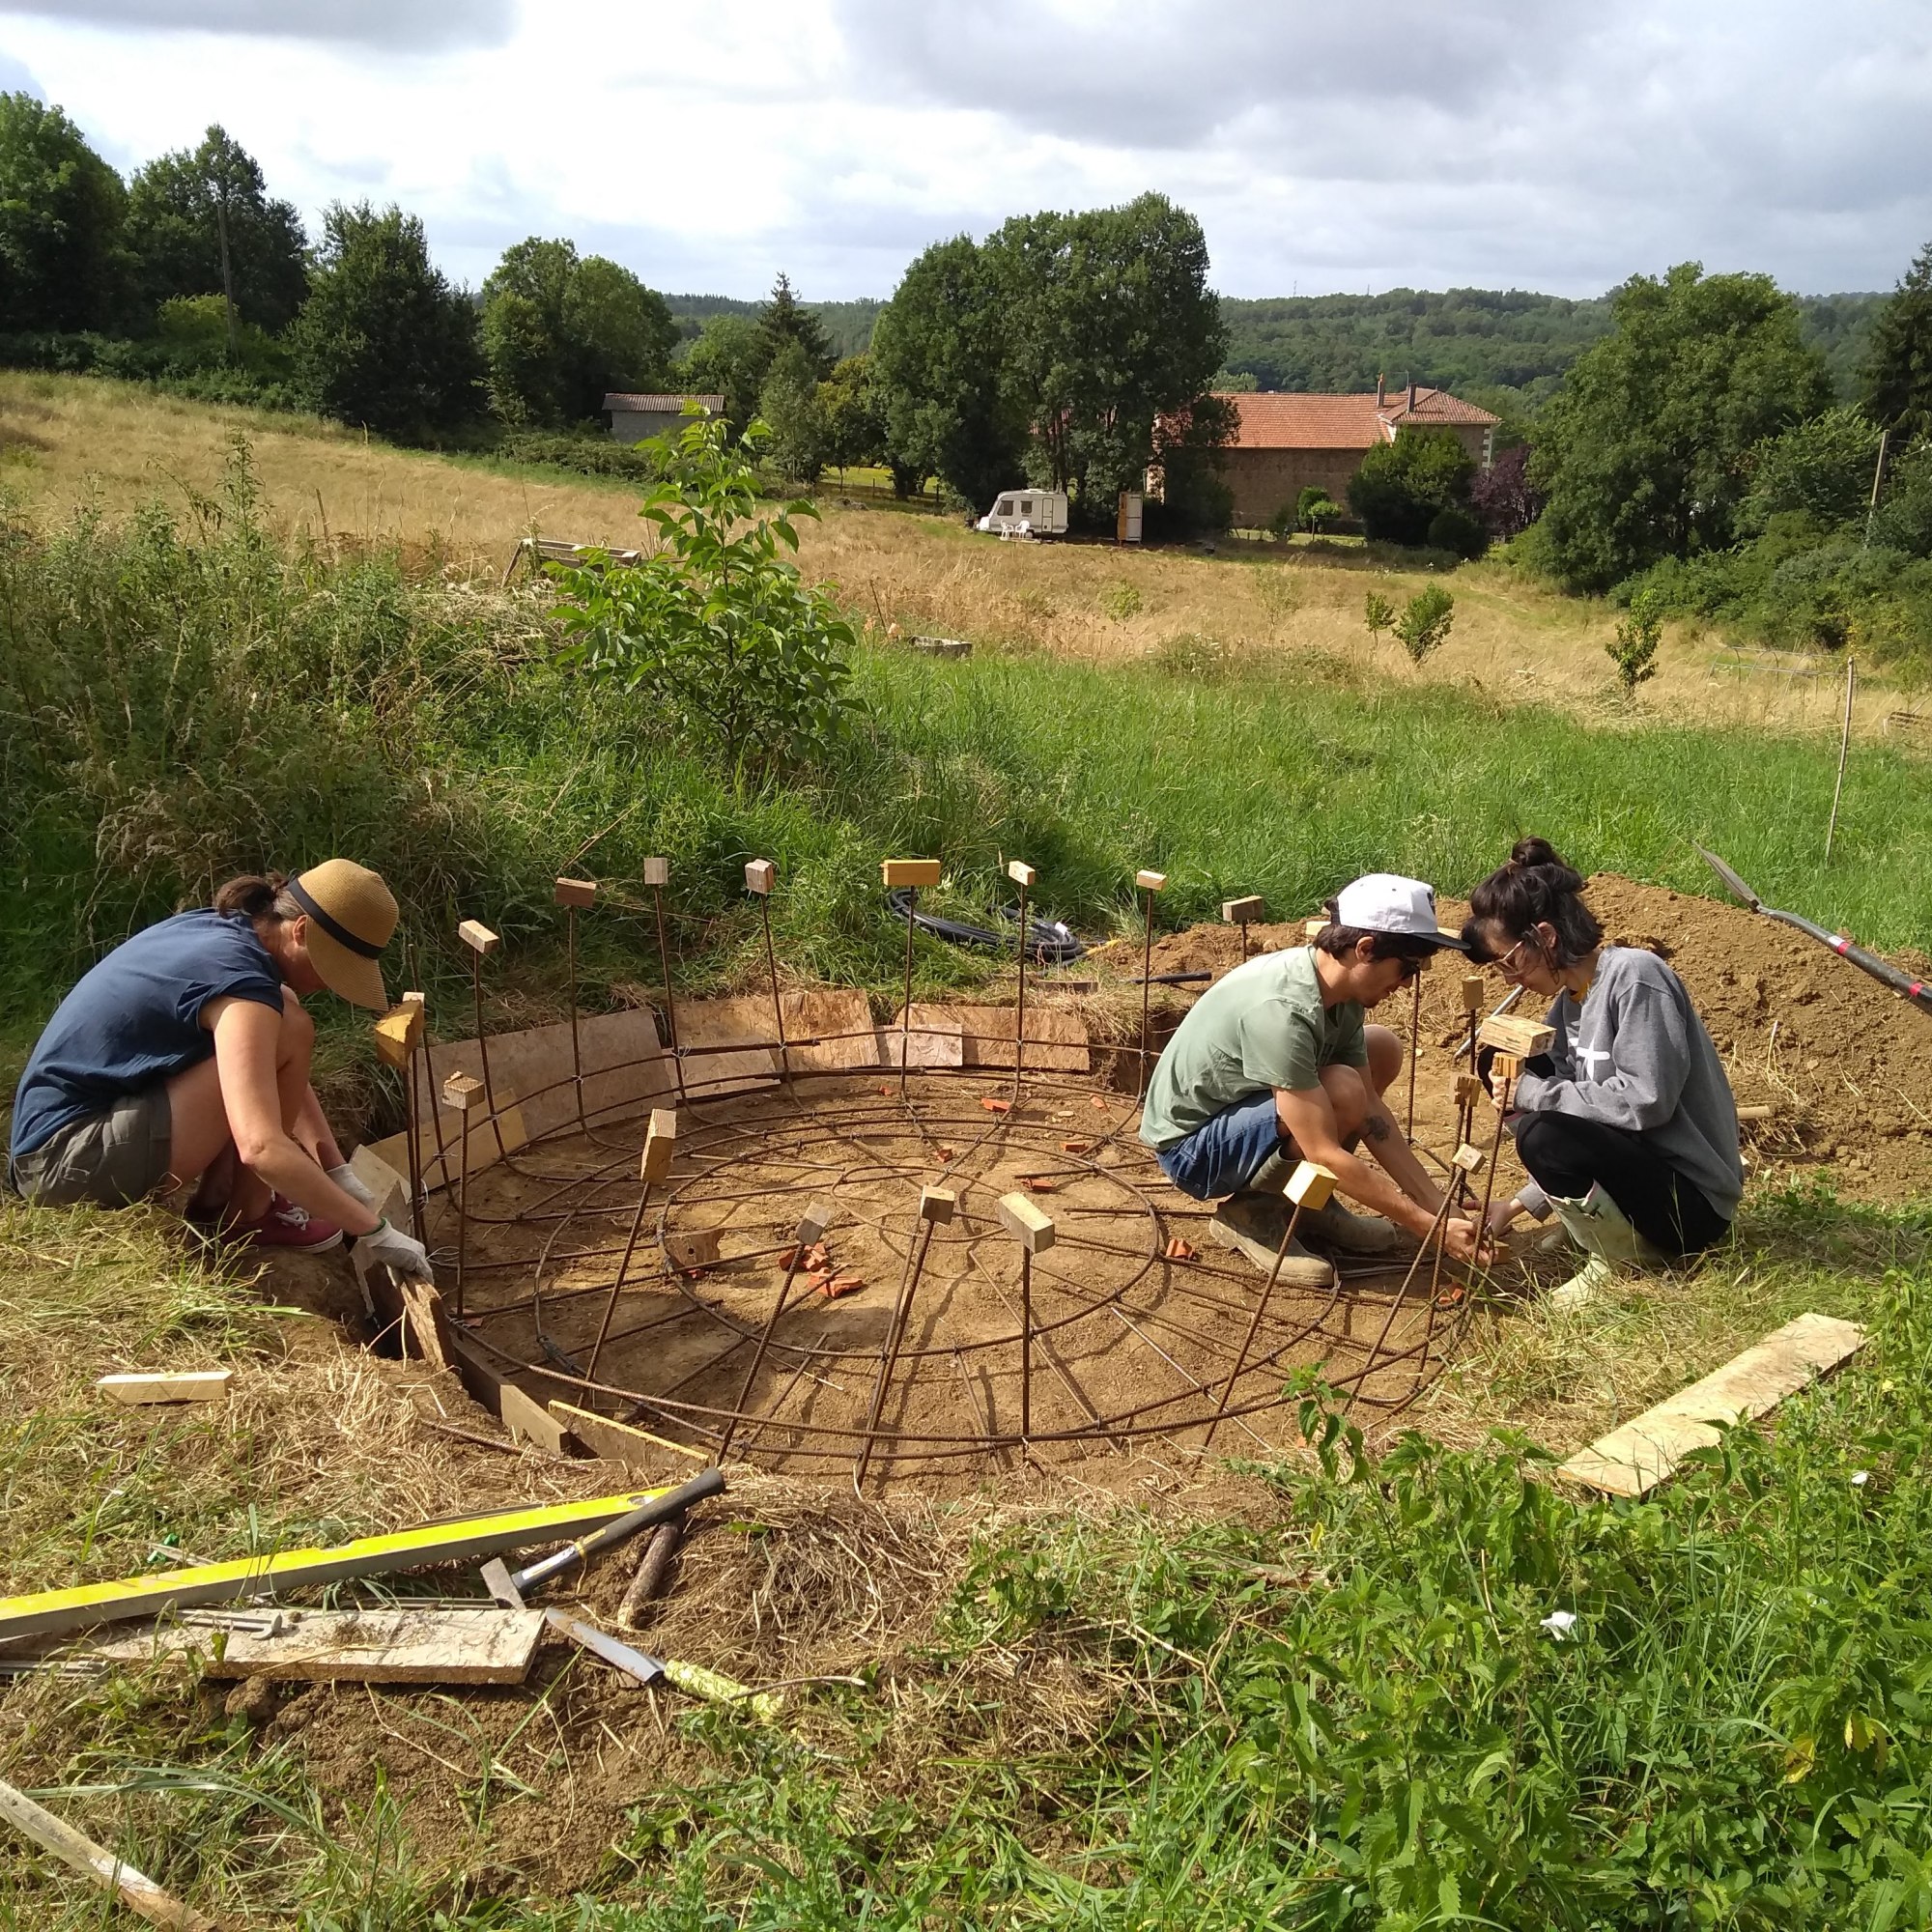
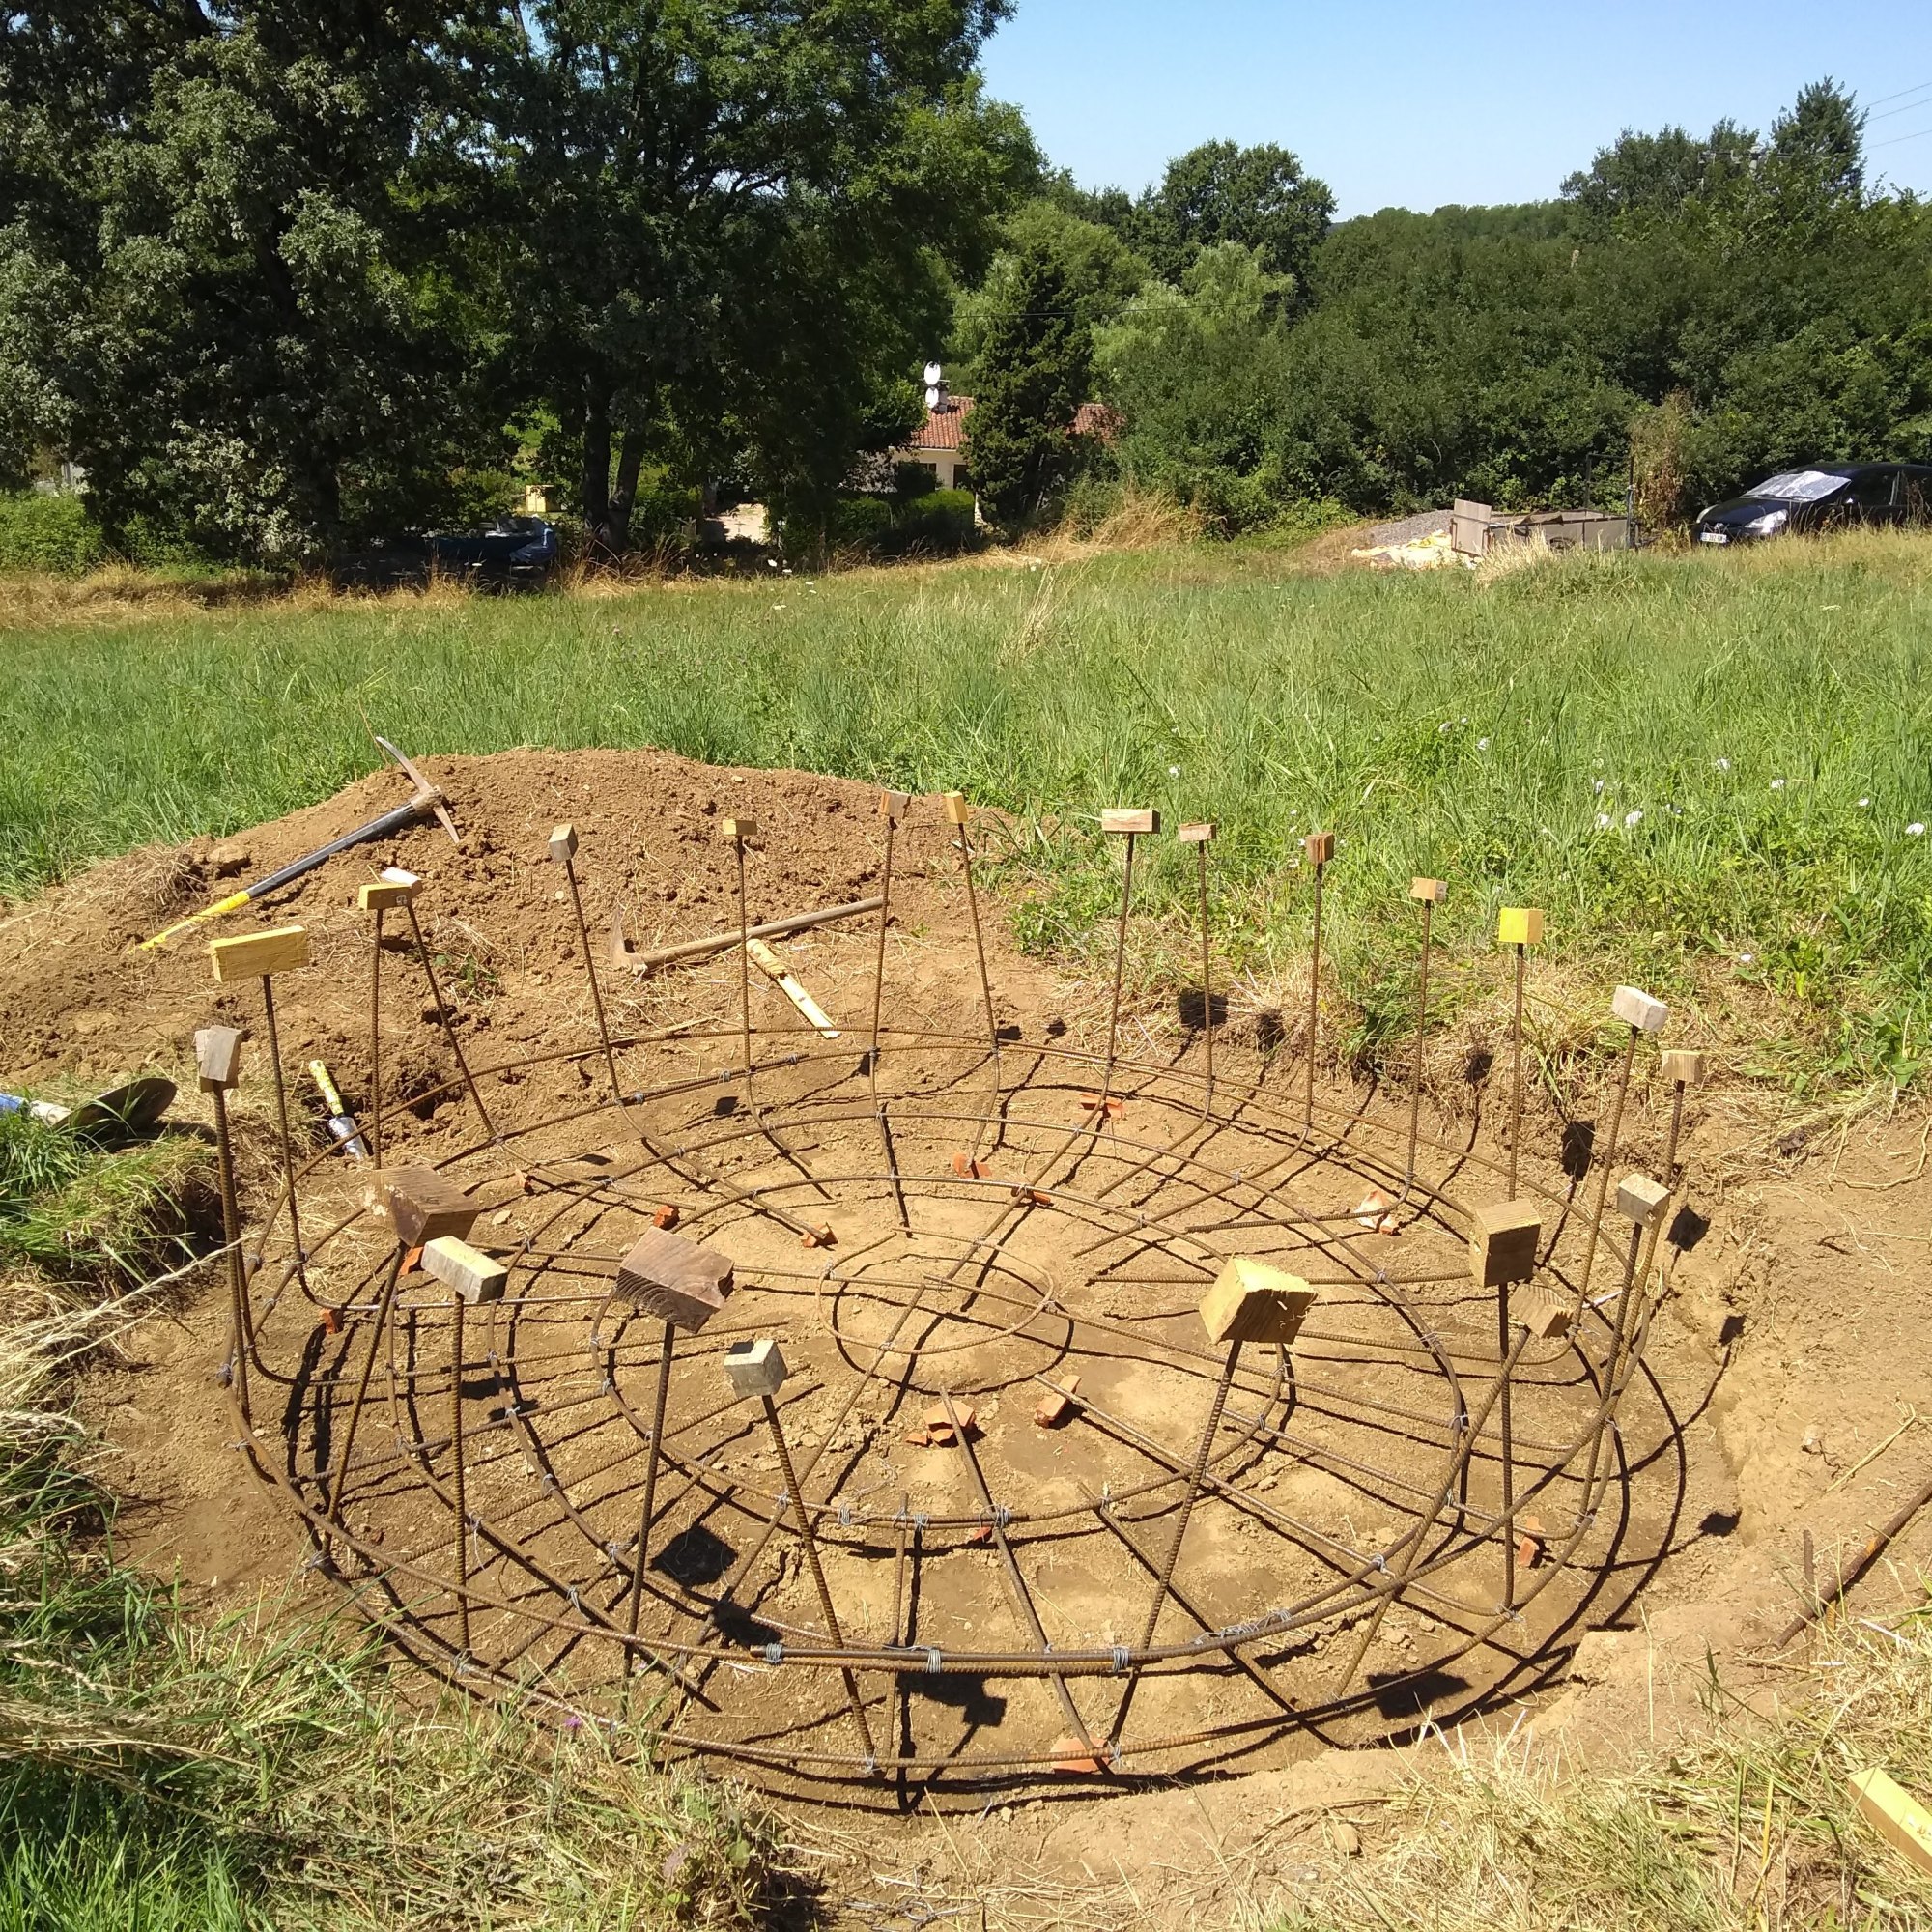
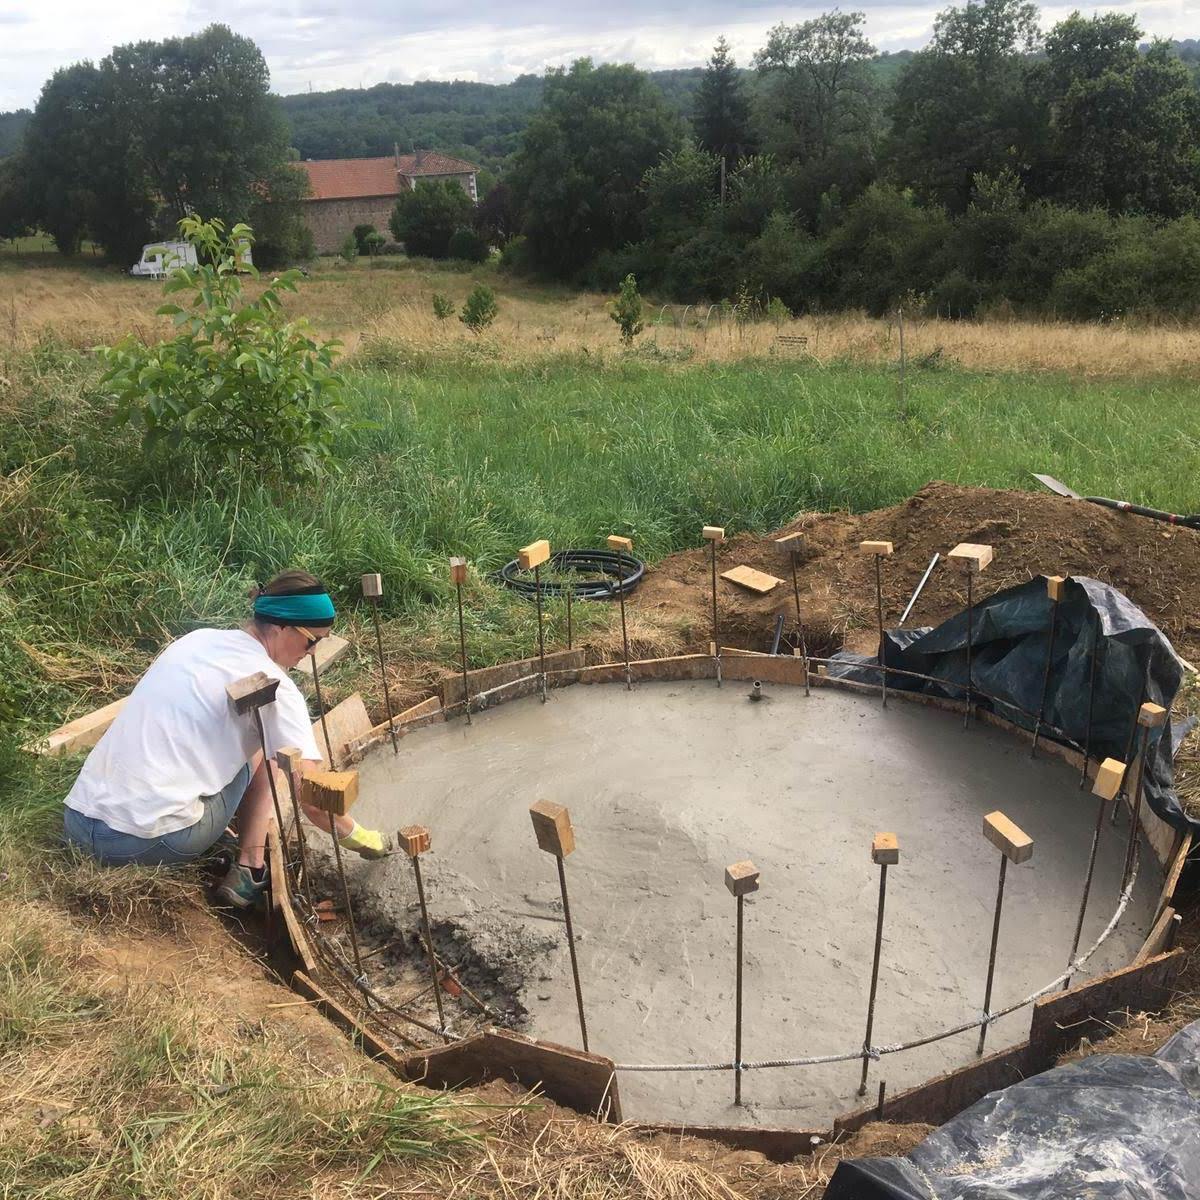
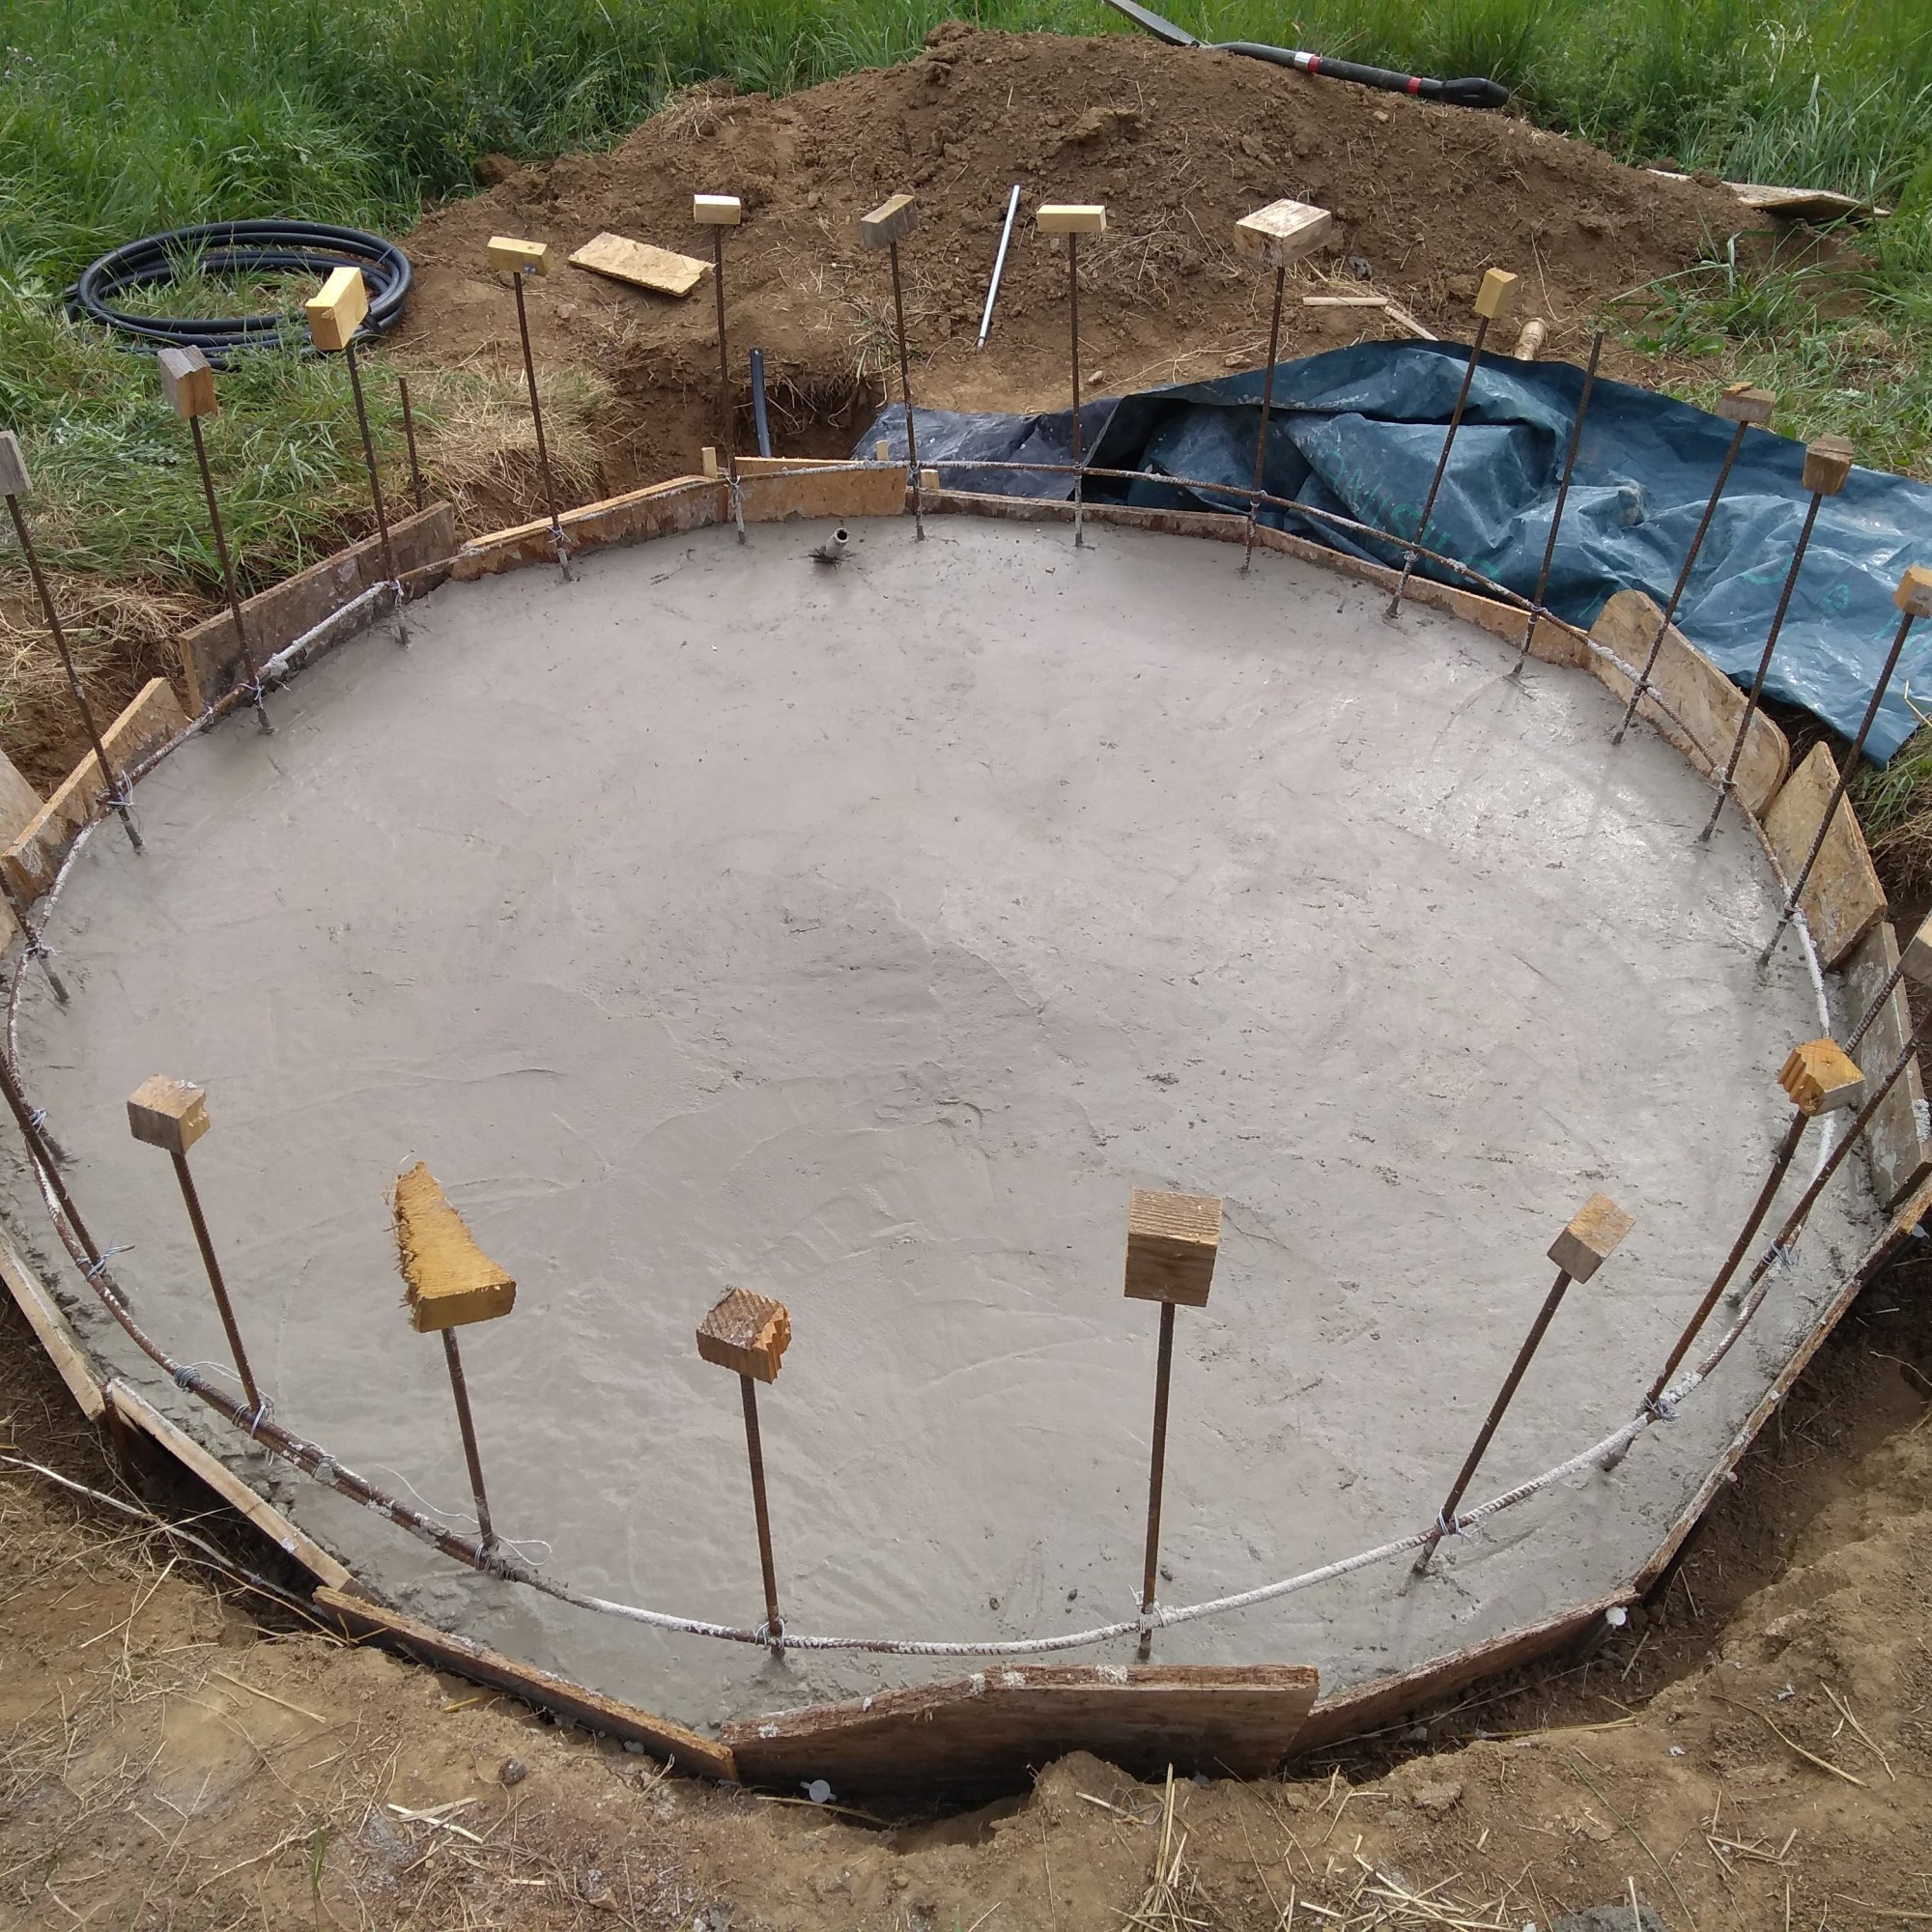
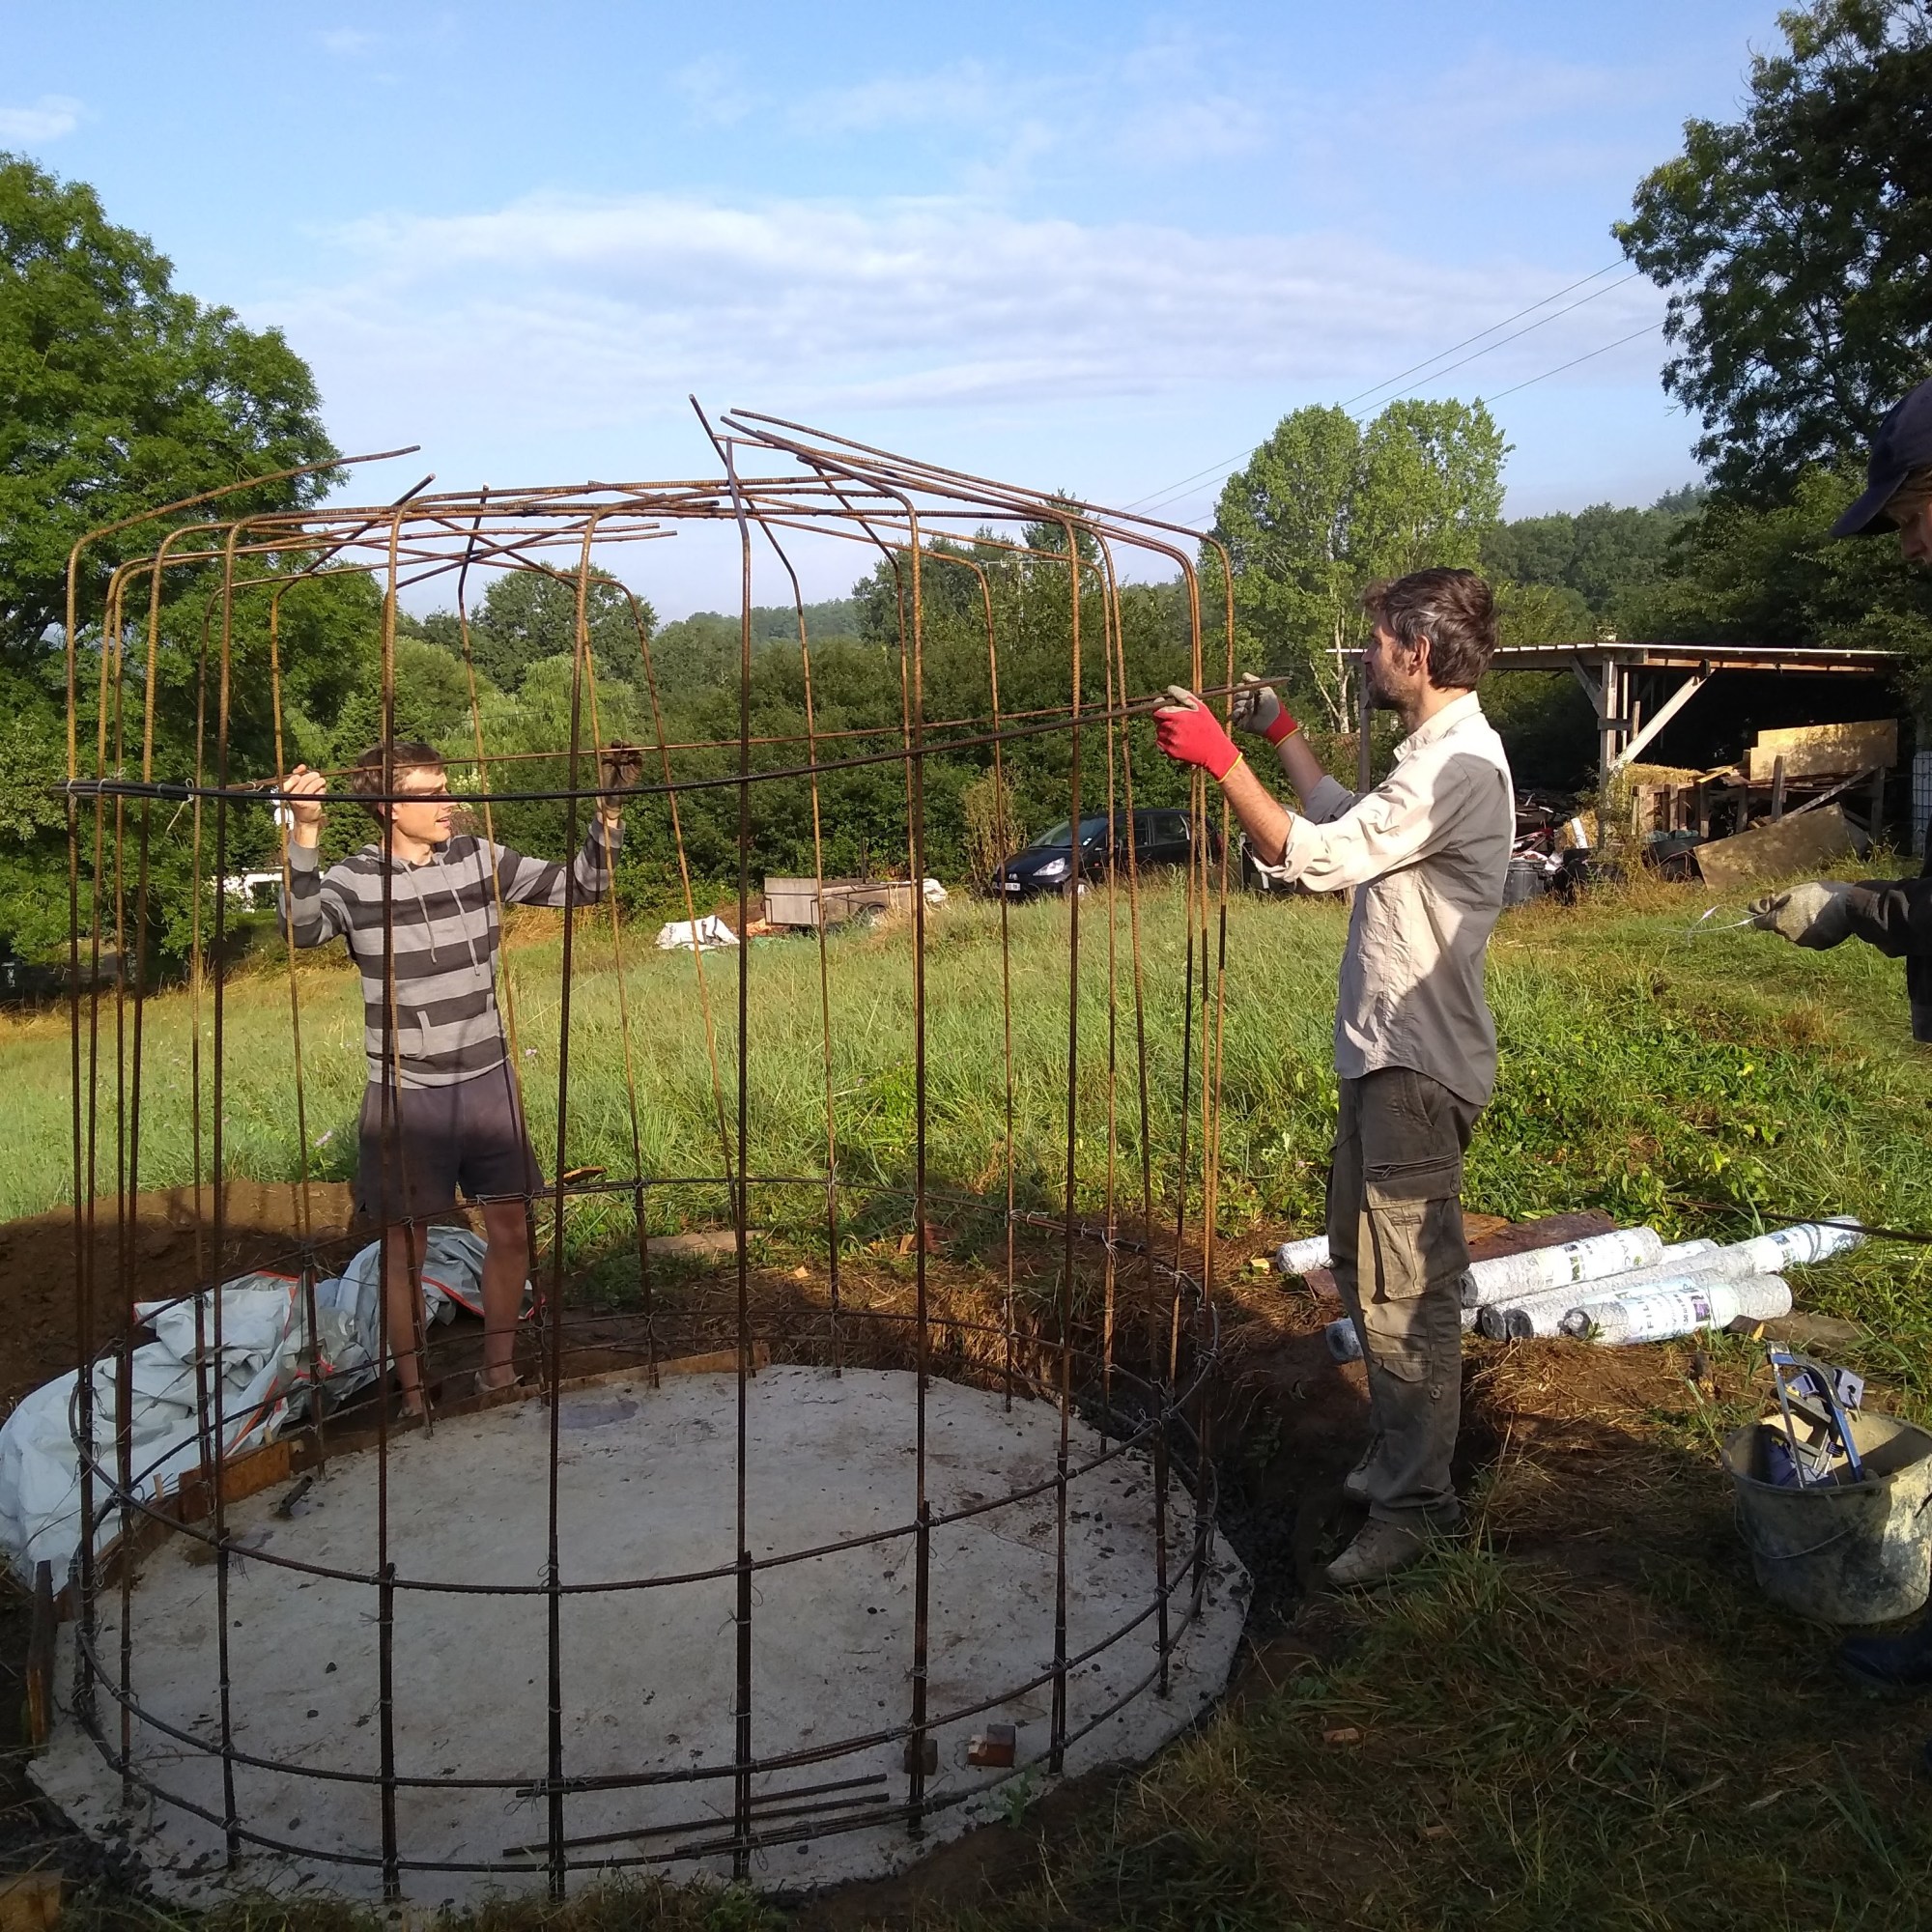
Practically-speaking, the tank is split into three main stages; firstly, creating the rebar foundations and consequent structure; secondly, attaching the chicken wire mesh around the entirety of the rebar cage structure, both inside and out; and finally, cementing. Simple, right? 😳
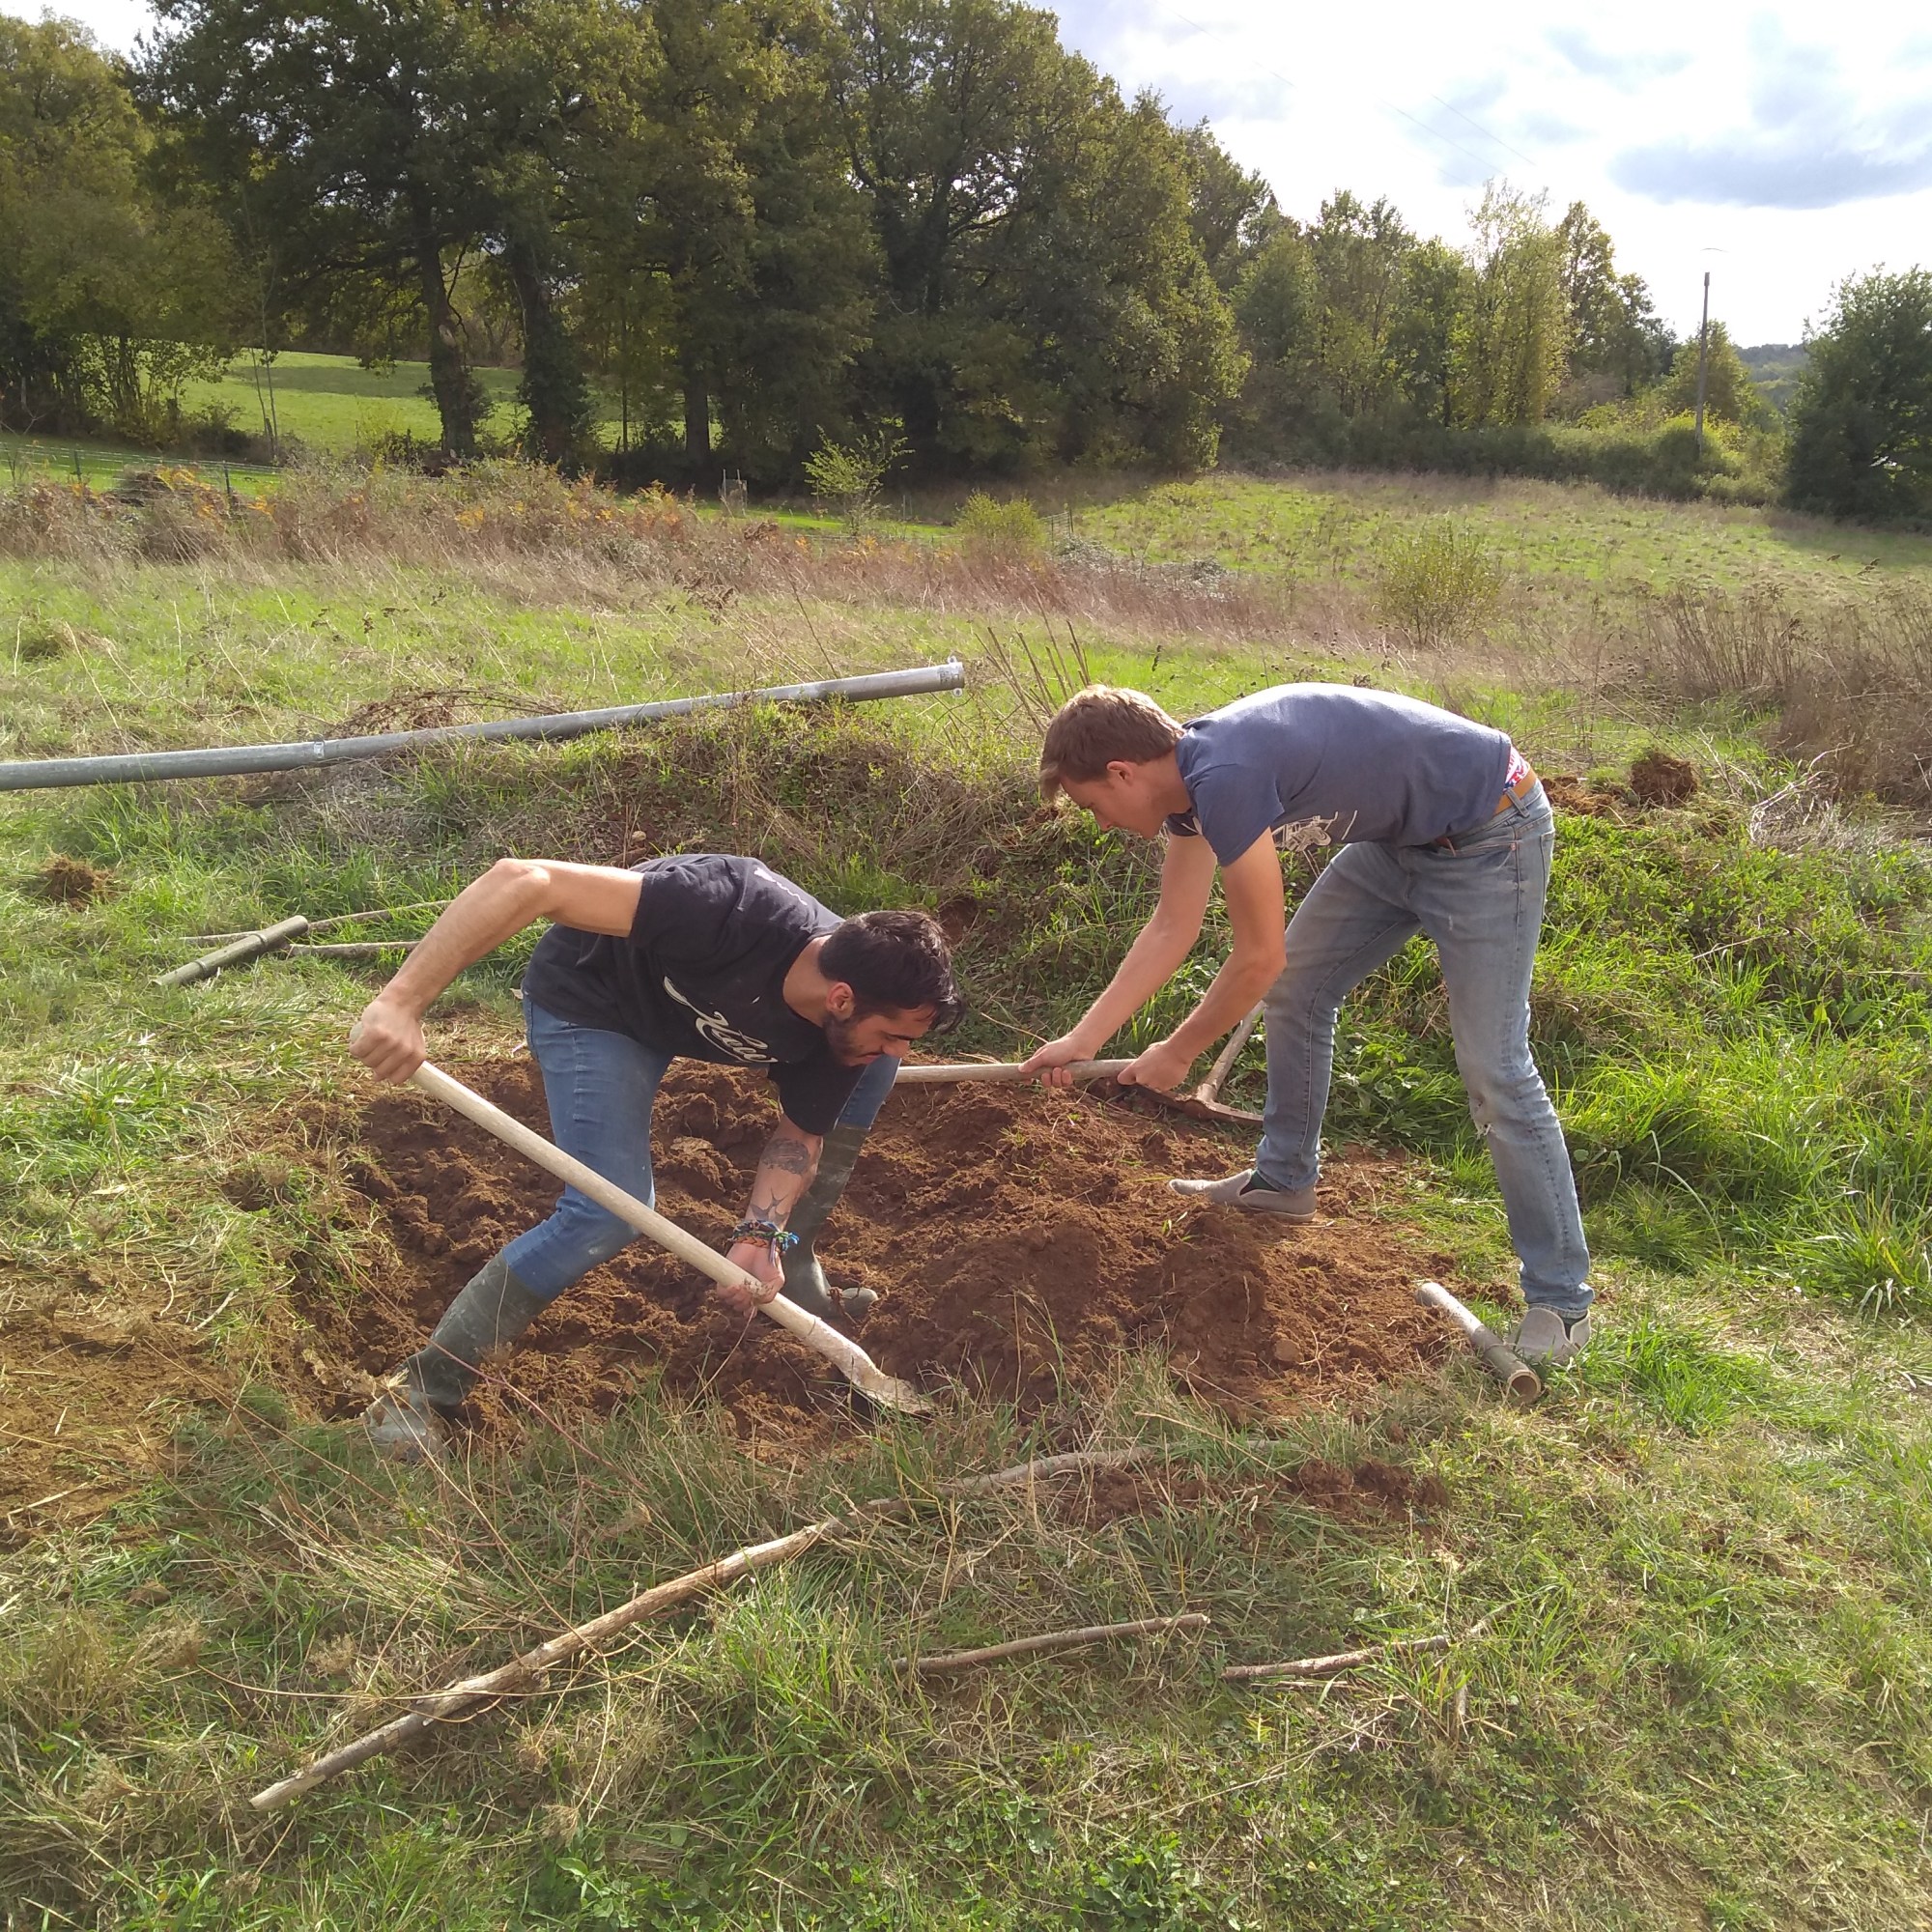
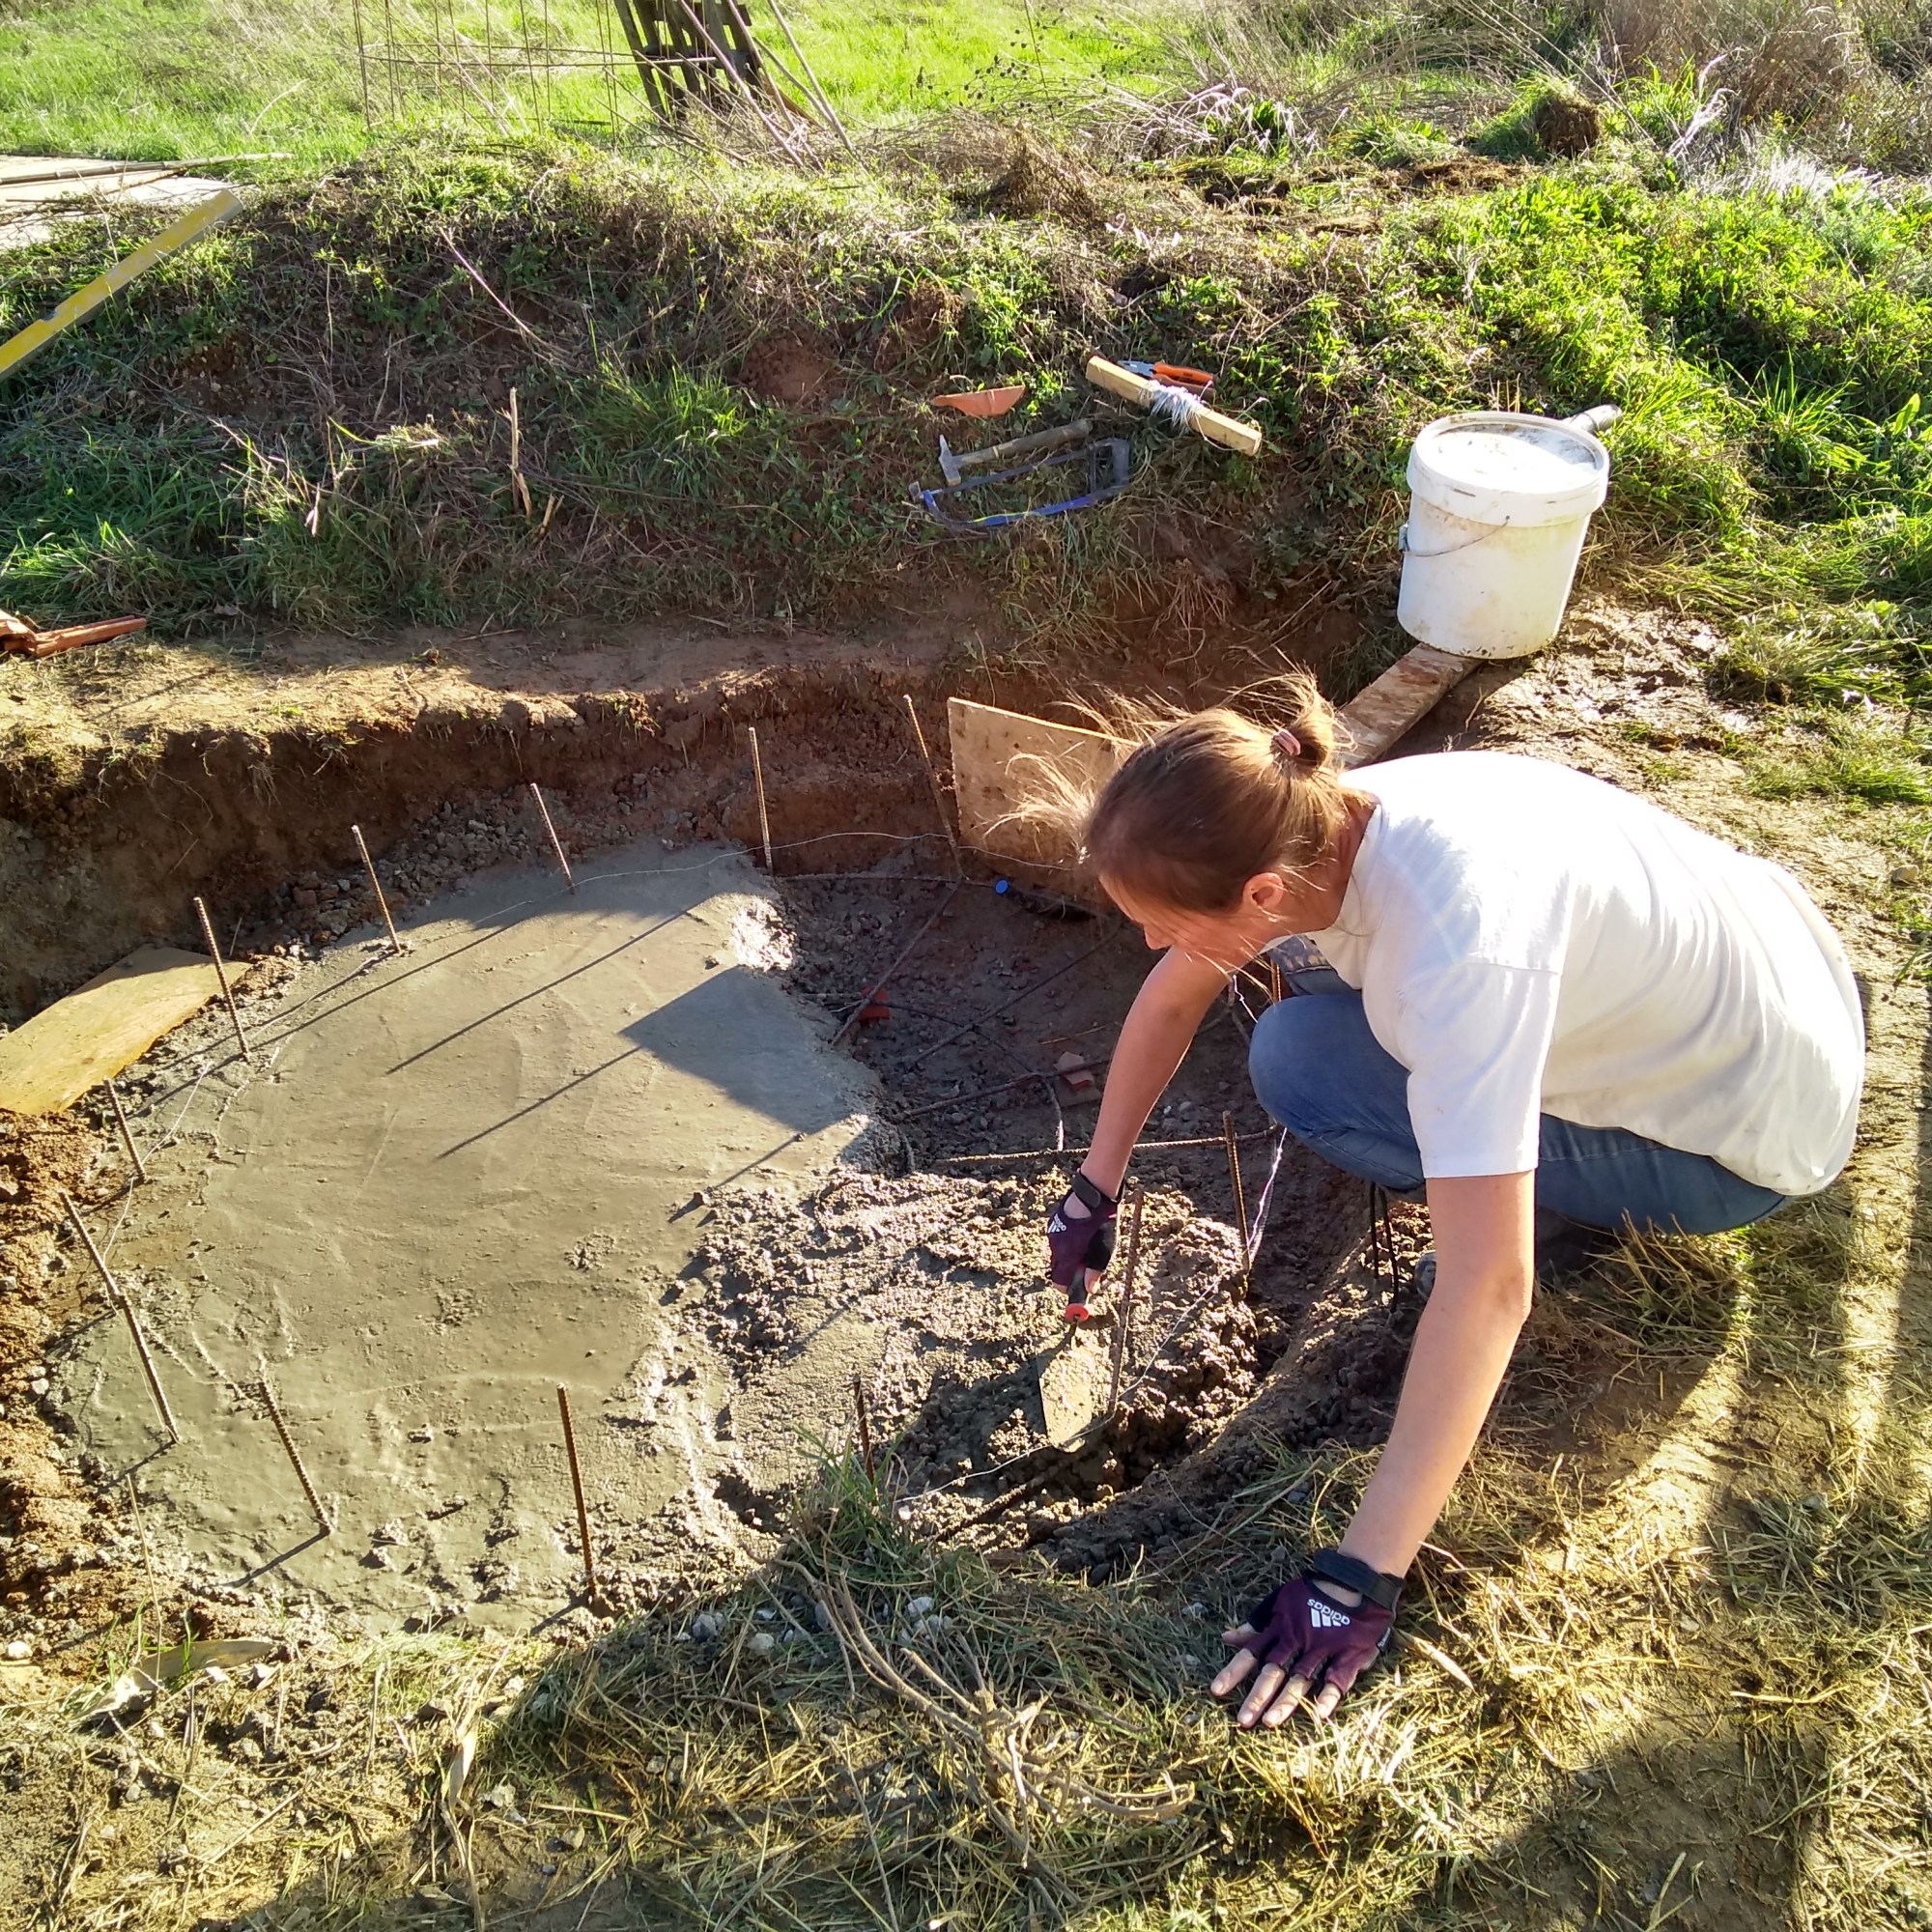
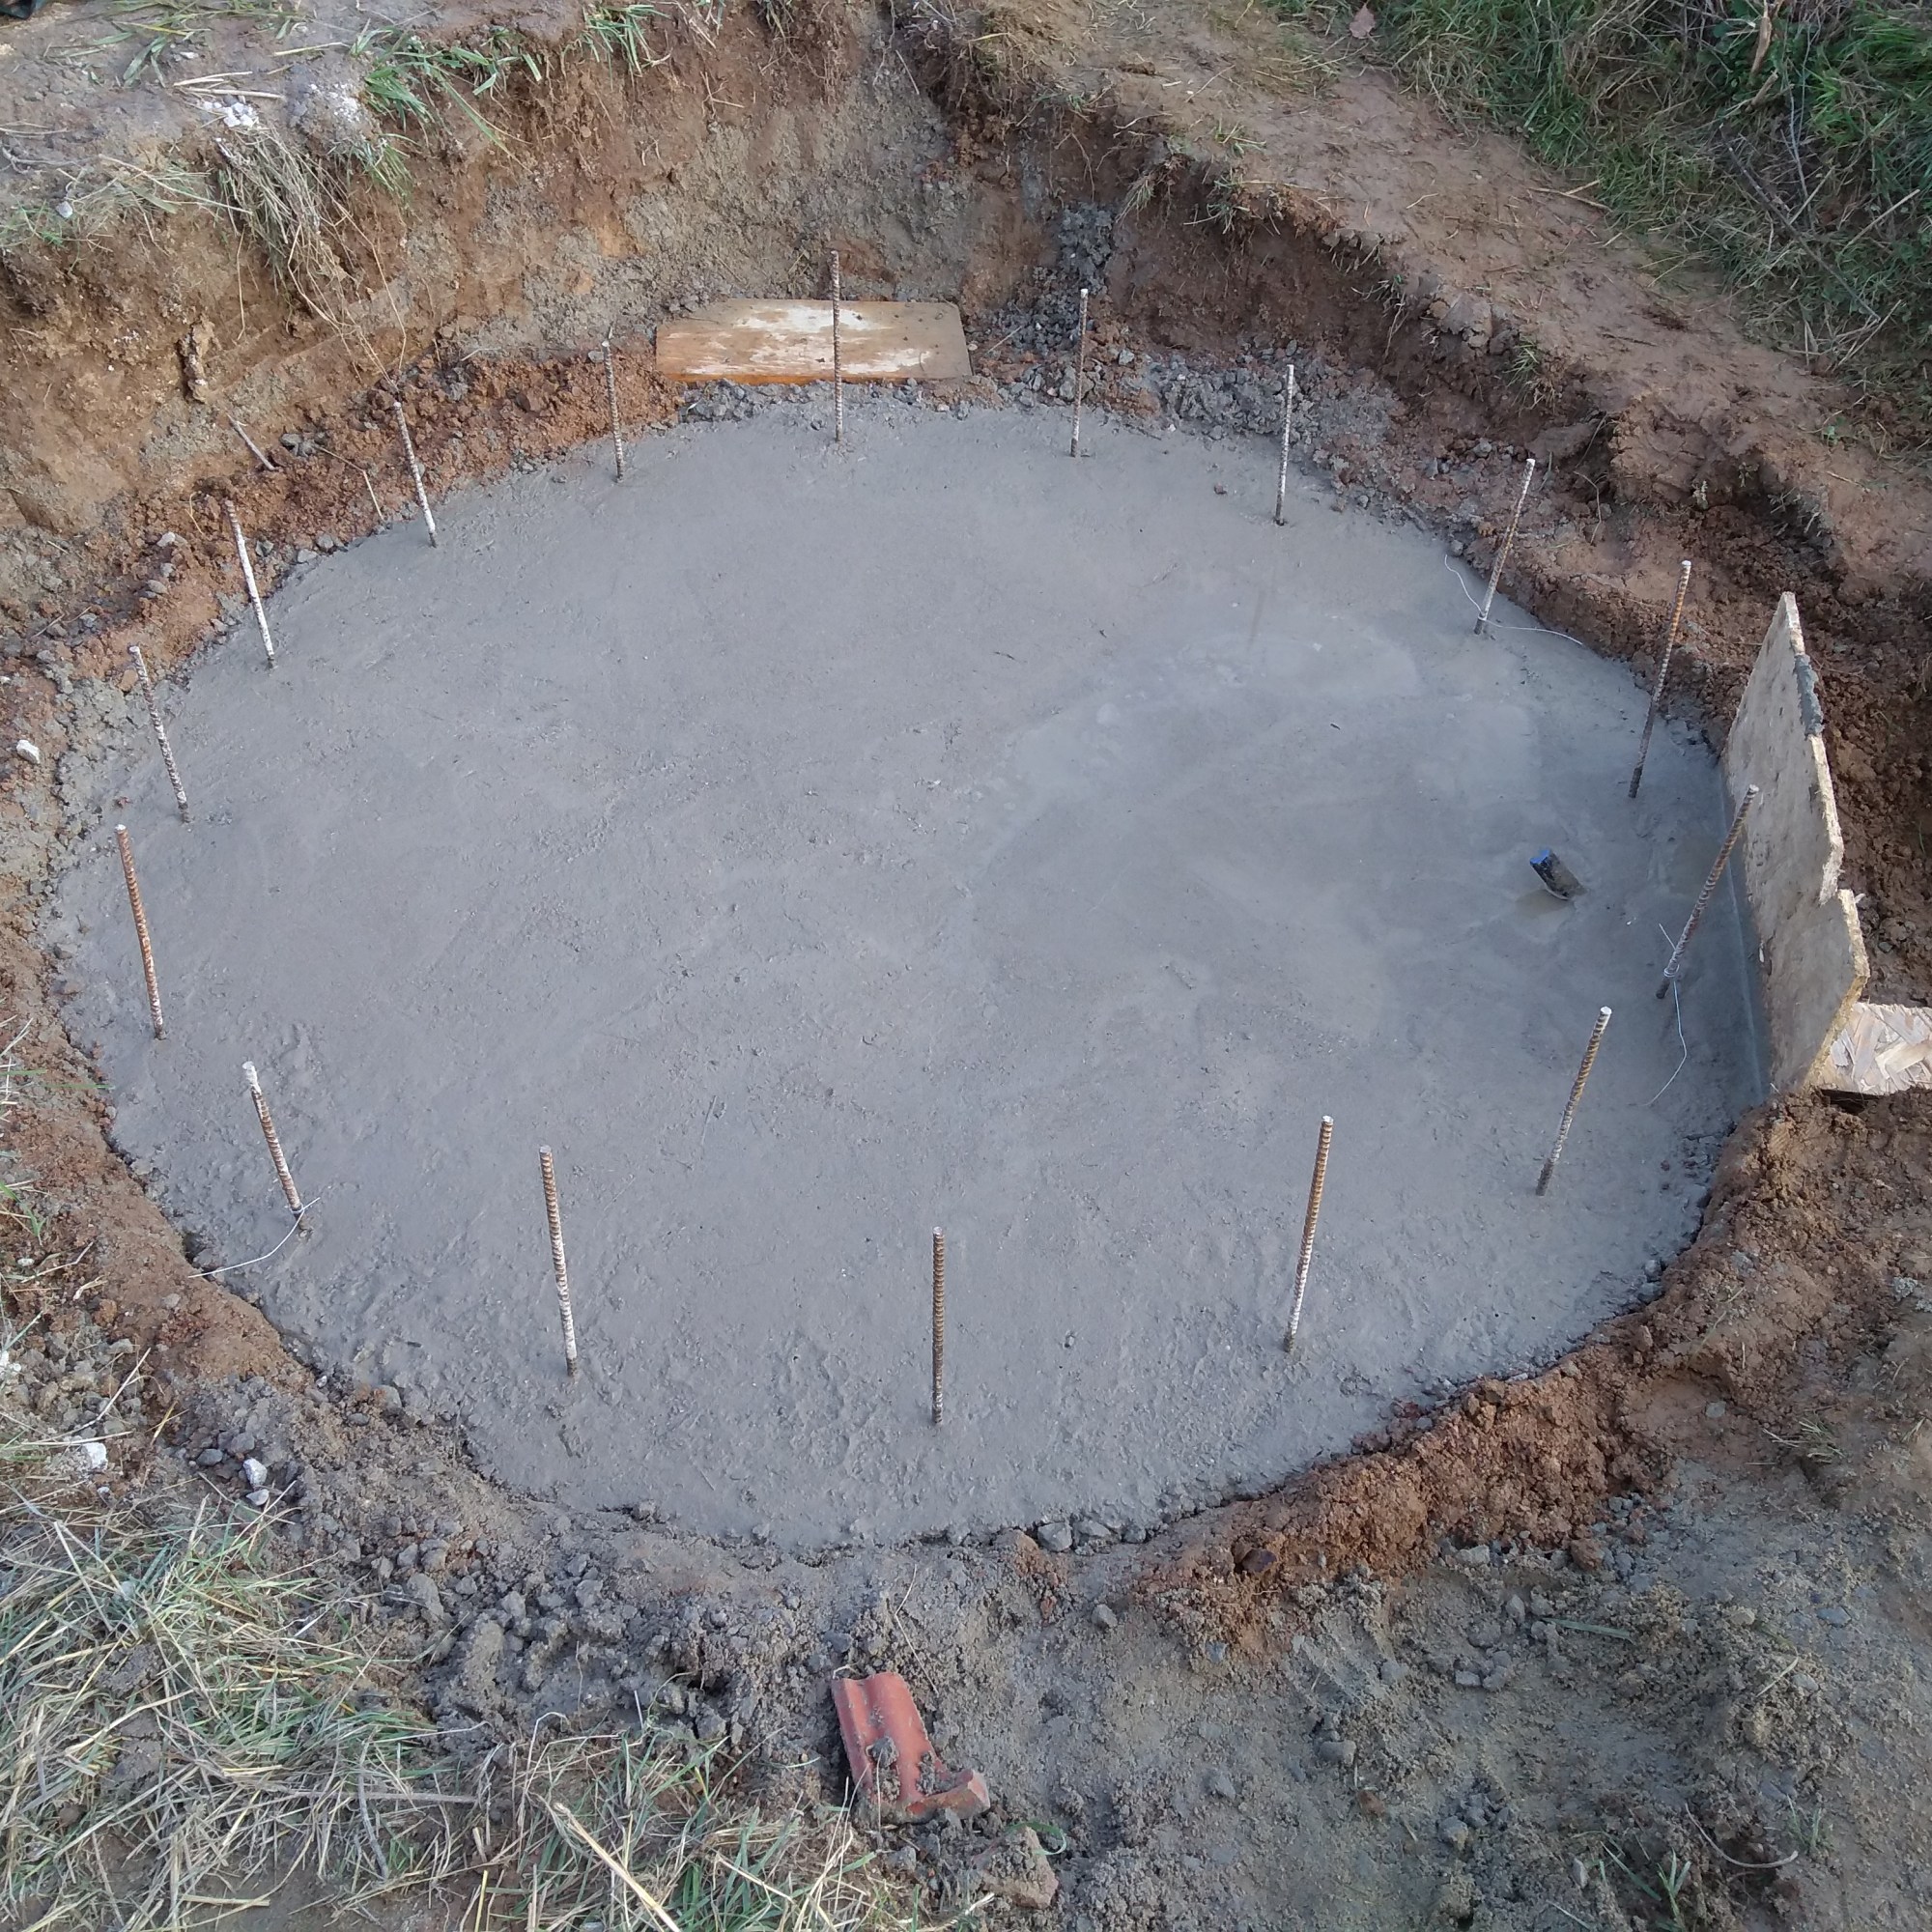
Digging the foundation was thirsty work despite help from Nils and Oscar. Once dug, we raised it slightly in the middle with sand – think the bottom of a wine bottle. This is to add strength to the overall structure.
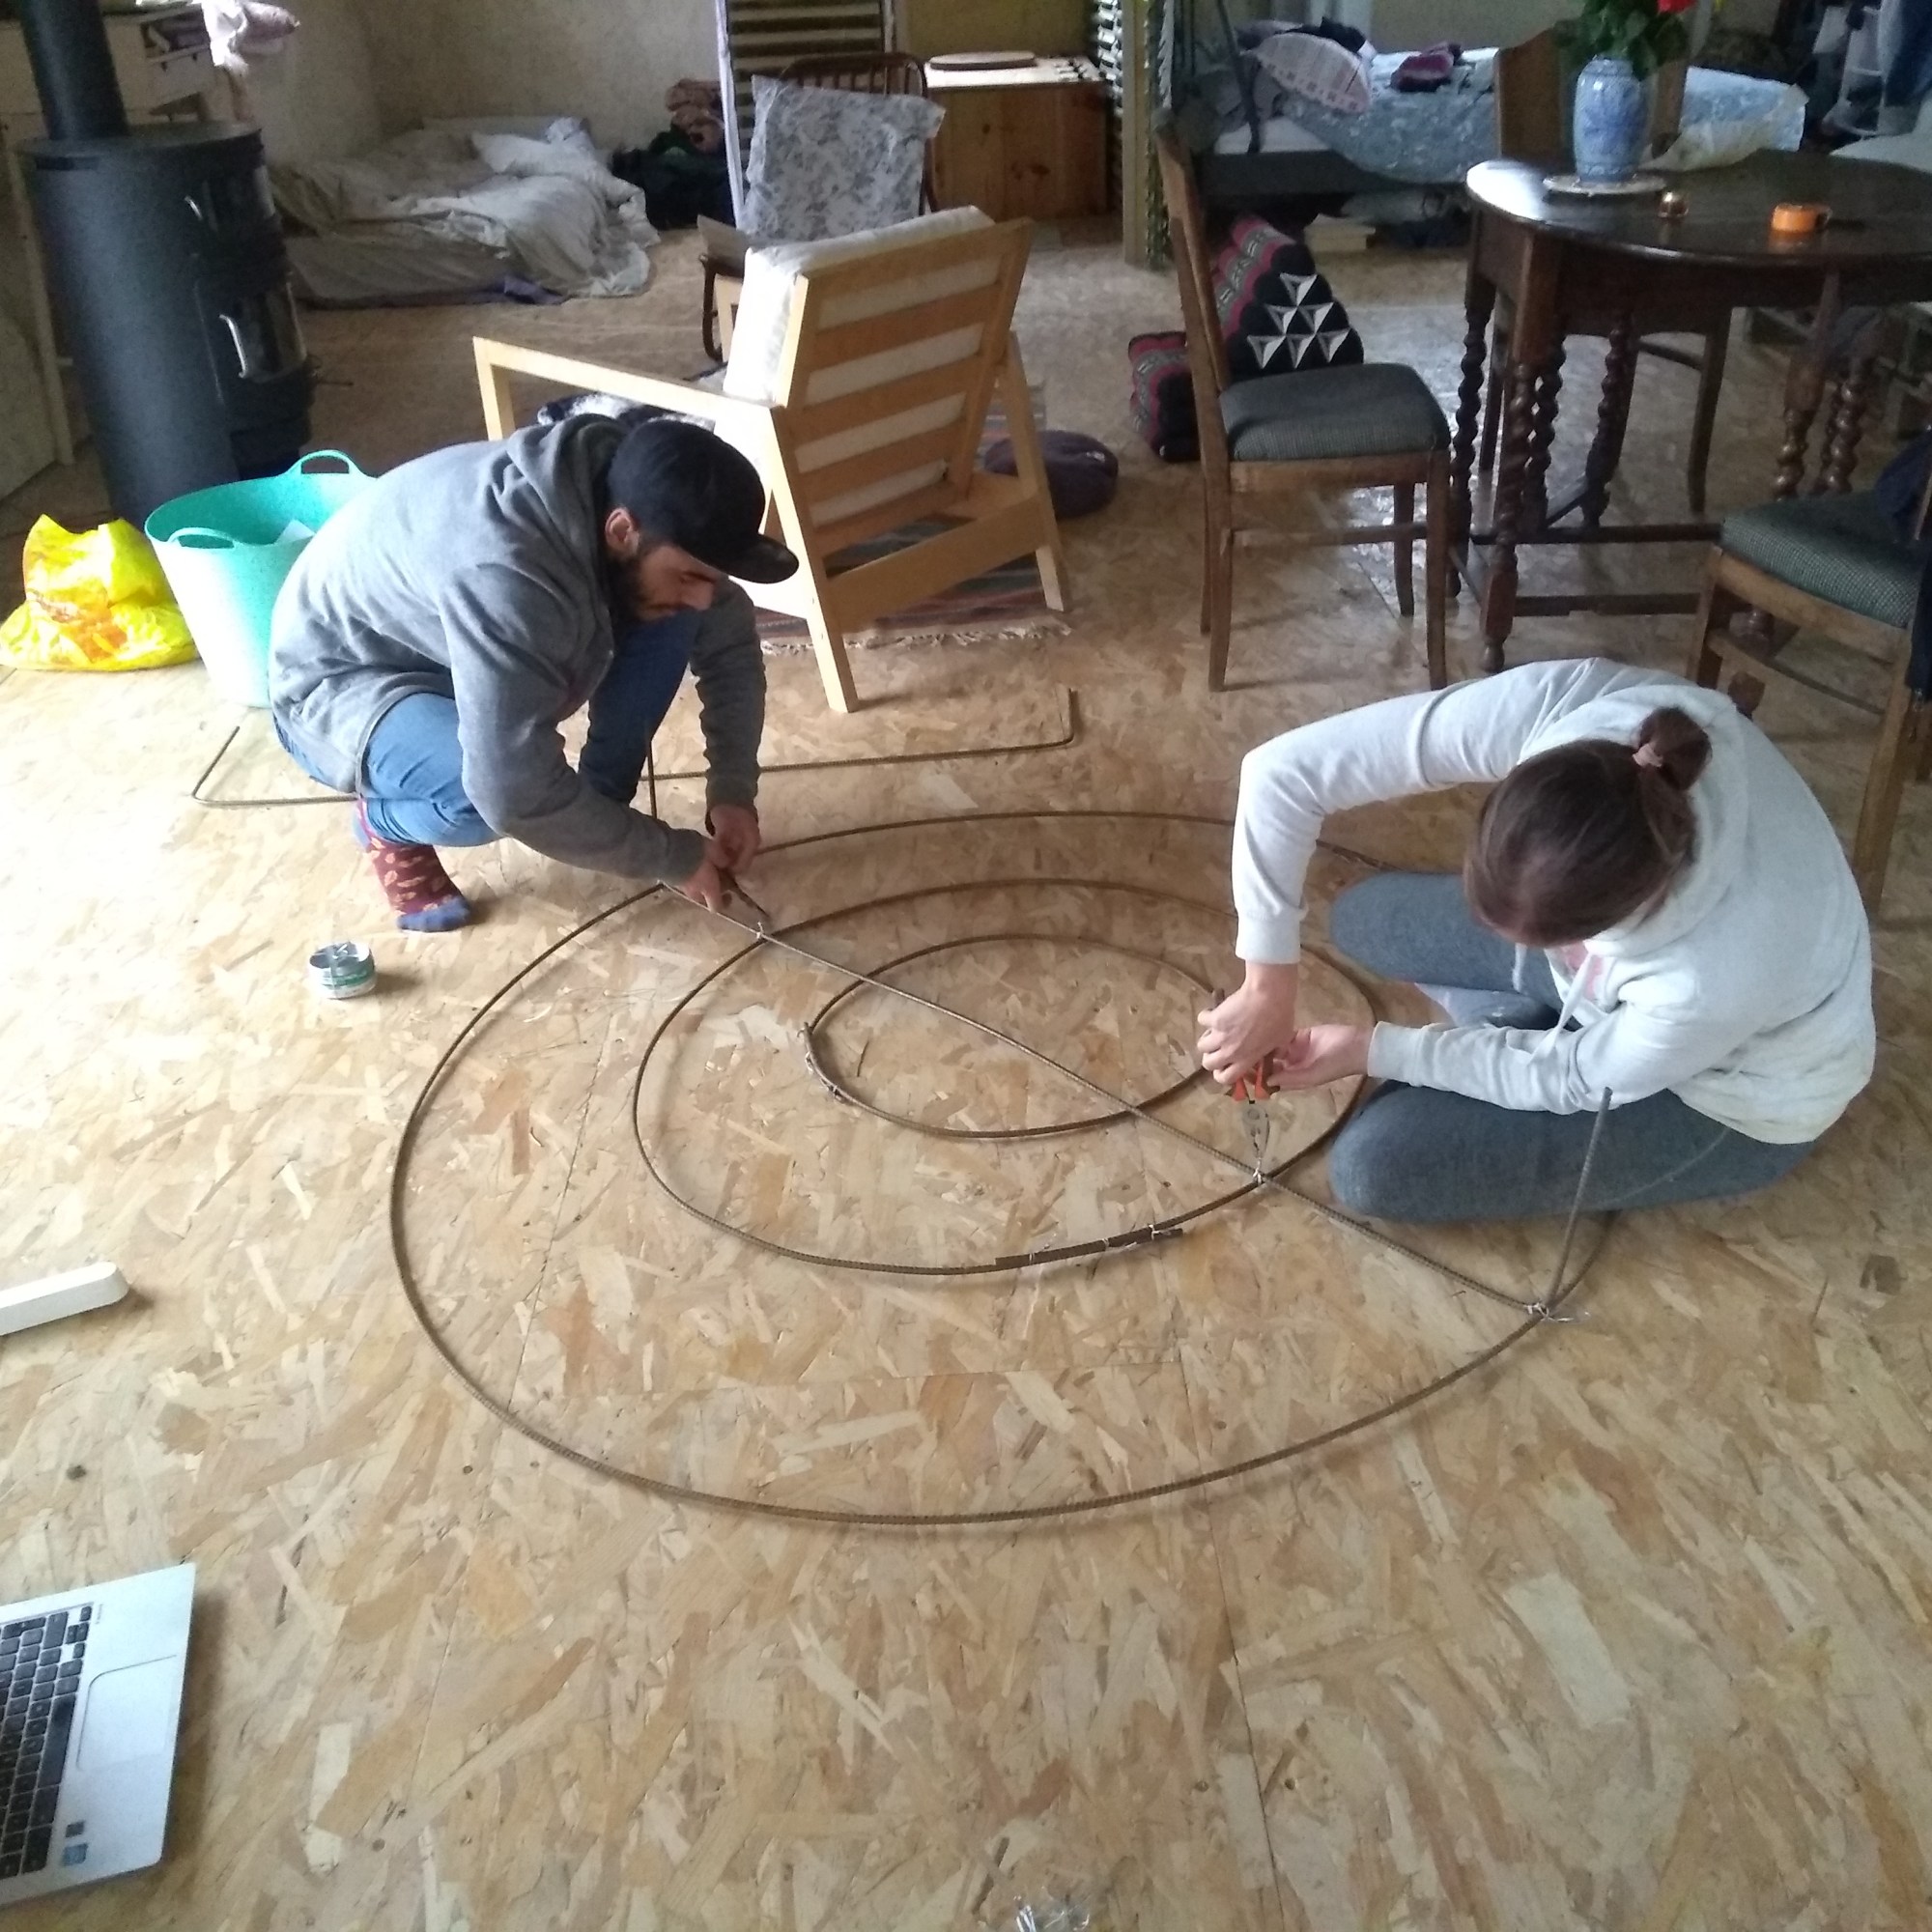
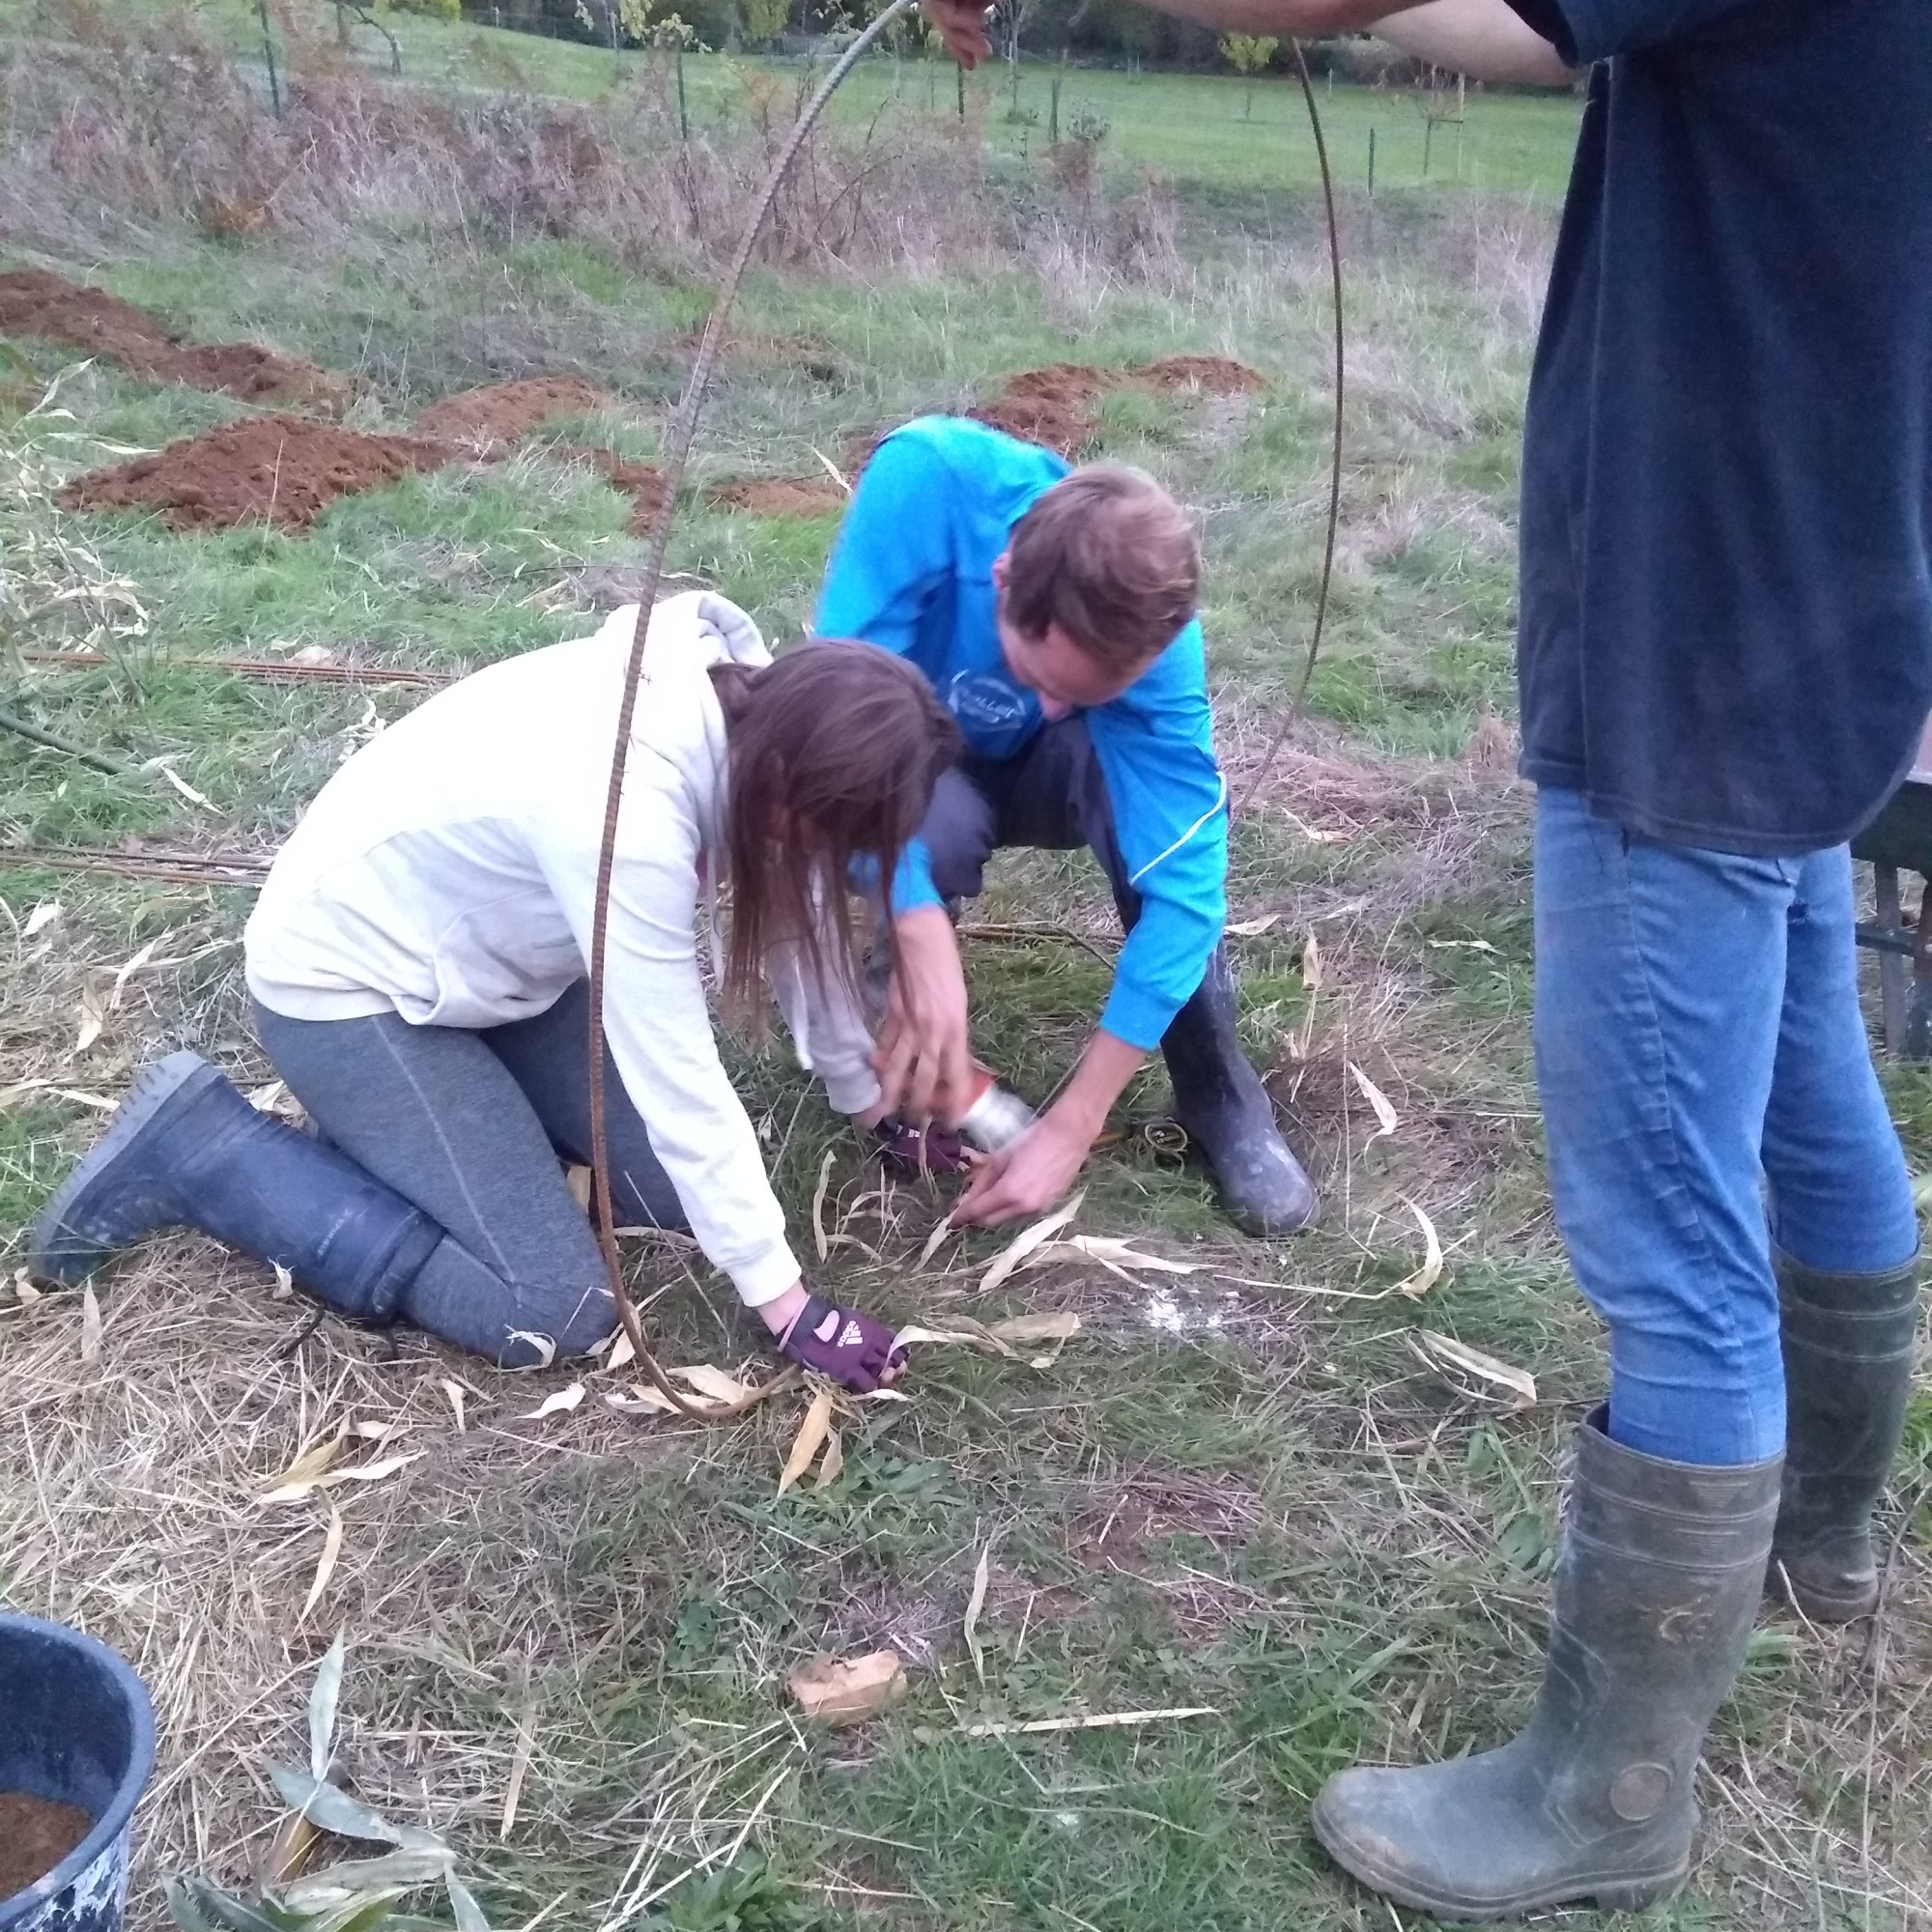
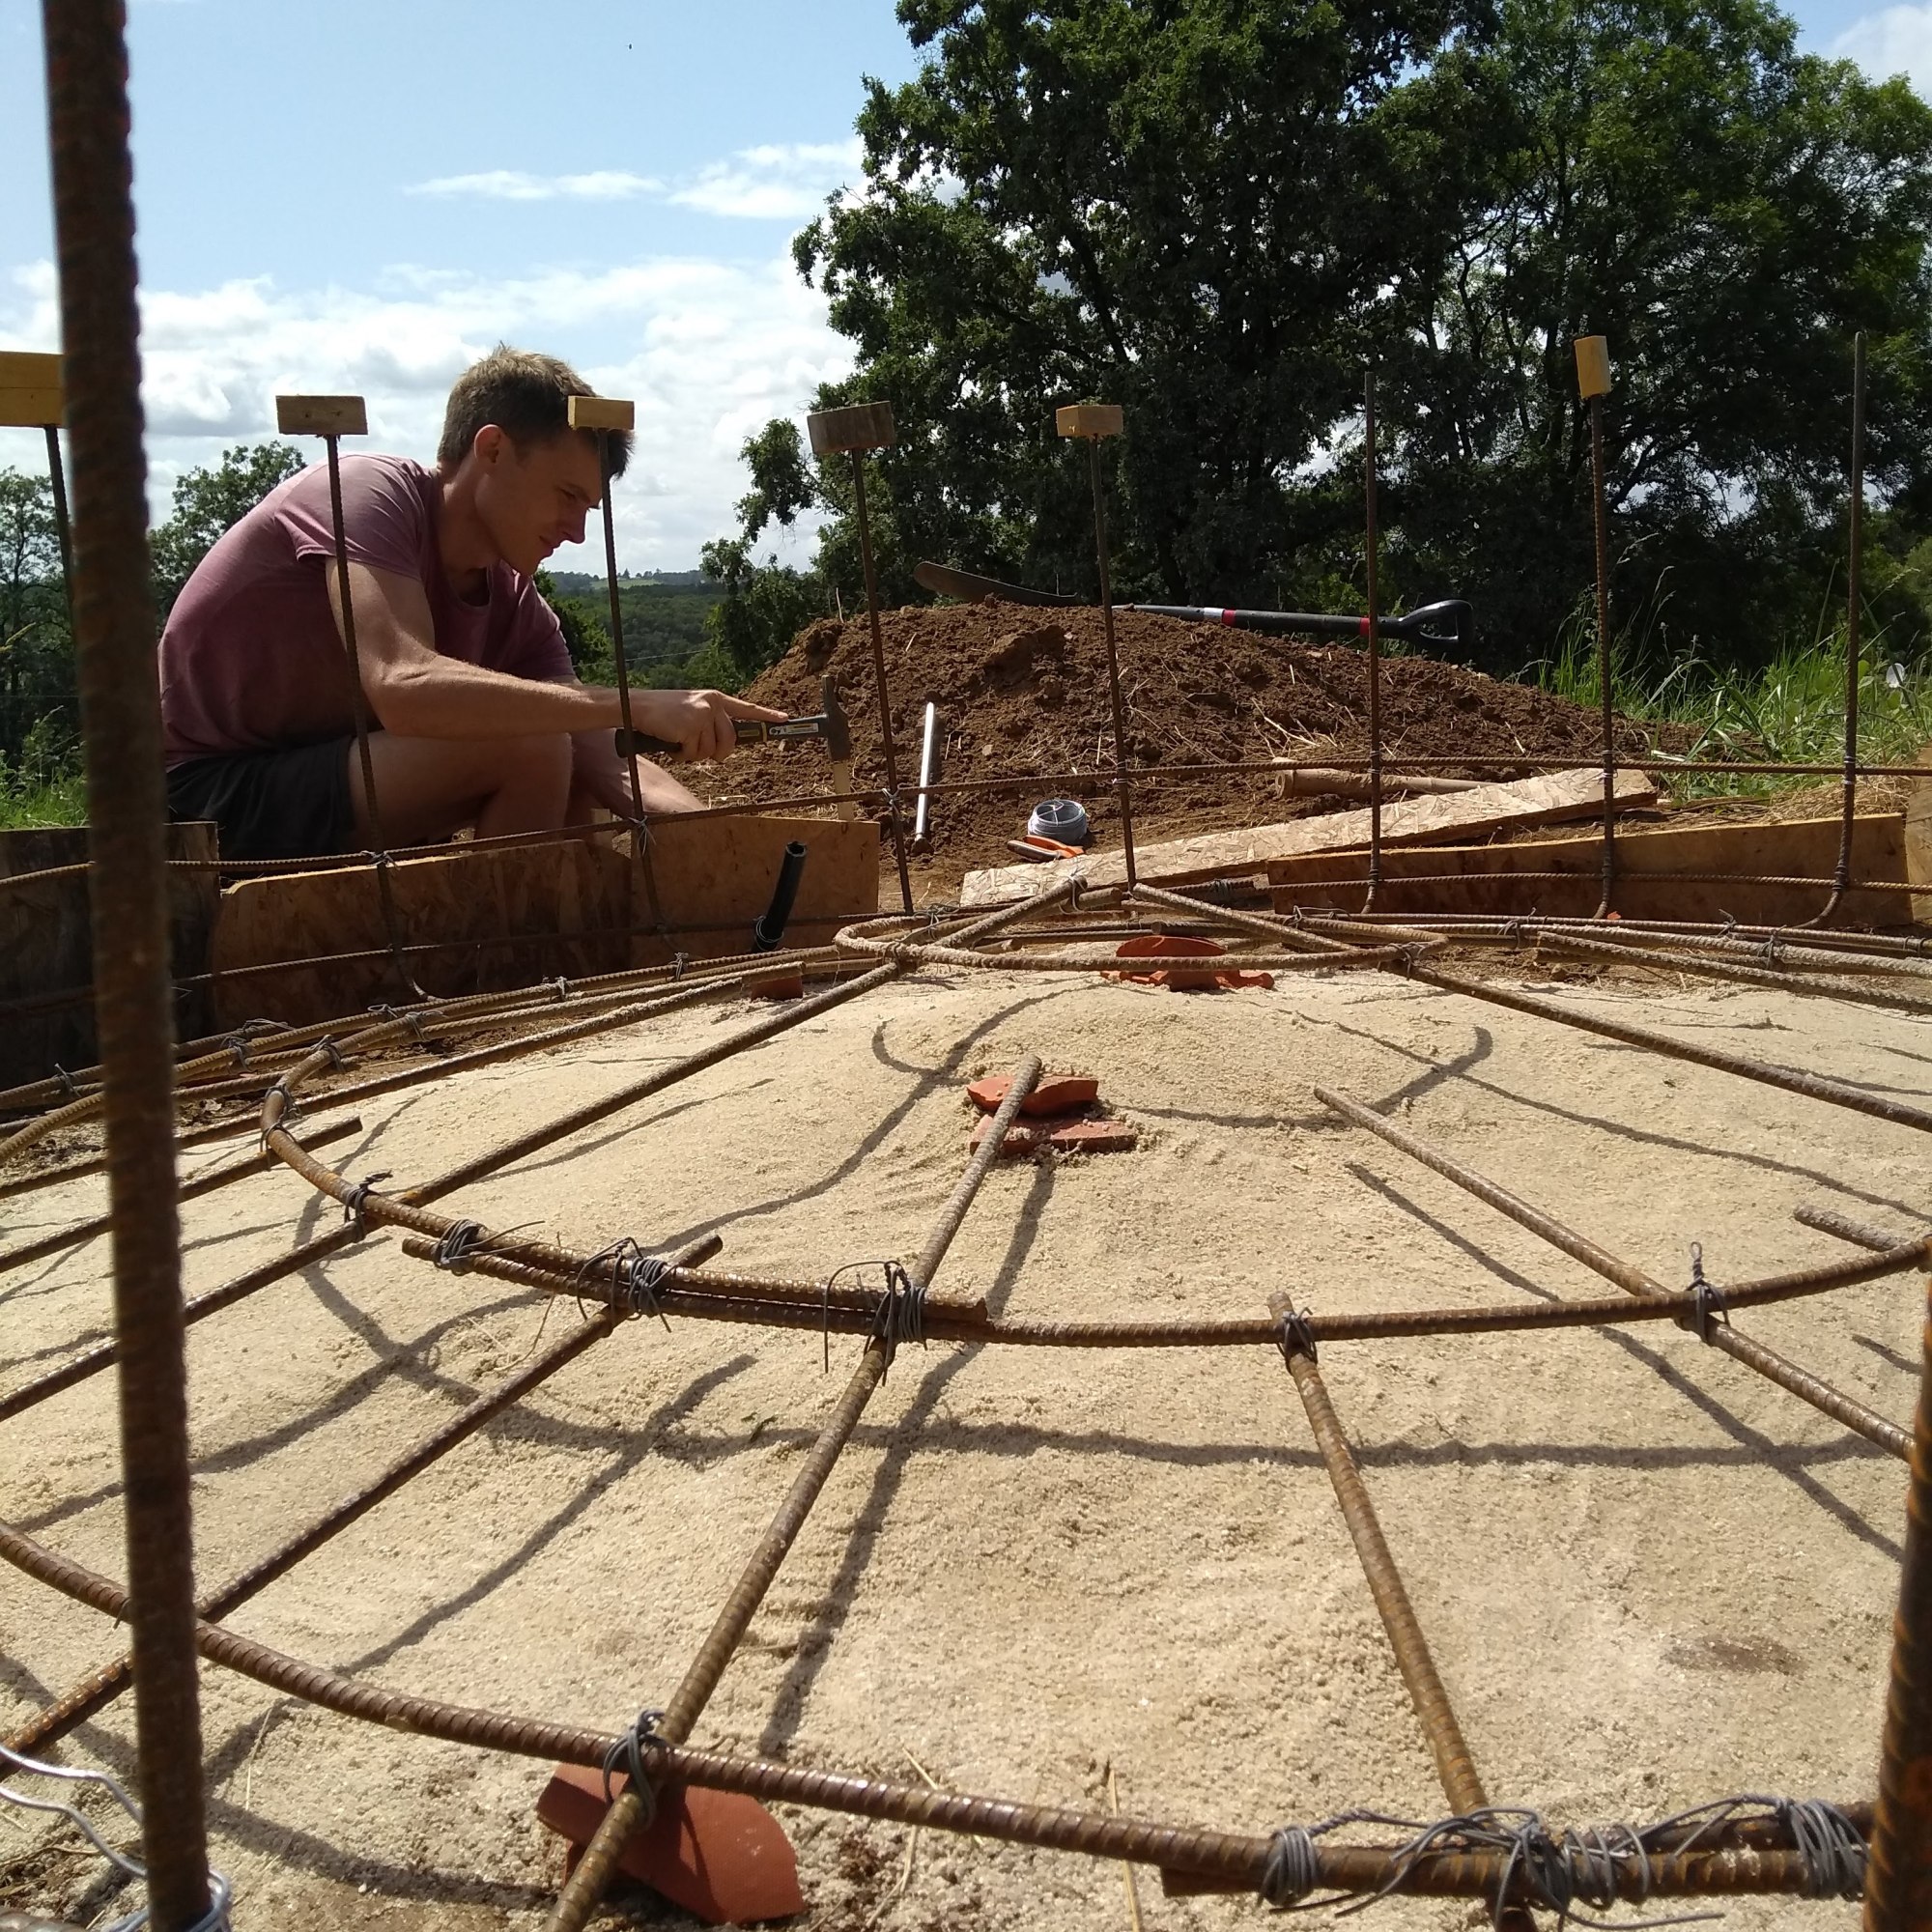
Having never worked with cement, creating the first cement foundation was, ahem, a veritable disaster. Our ratios of water: sand: gravel: cement were all kinds of dodgy! It required a second attempt, which was far more successful. The foundation has a series of concentric rebar rings inside, pre attached to each other to give strength to the foundation. Each rebar strut connecting the circles was bent up to create a fixing point for the rest of the cage structure once the foundation had set.
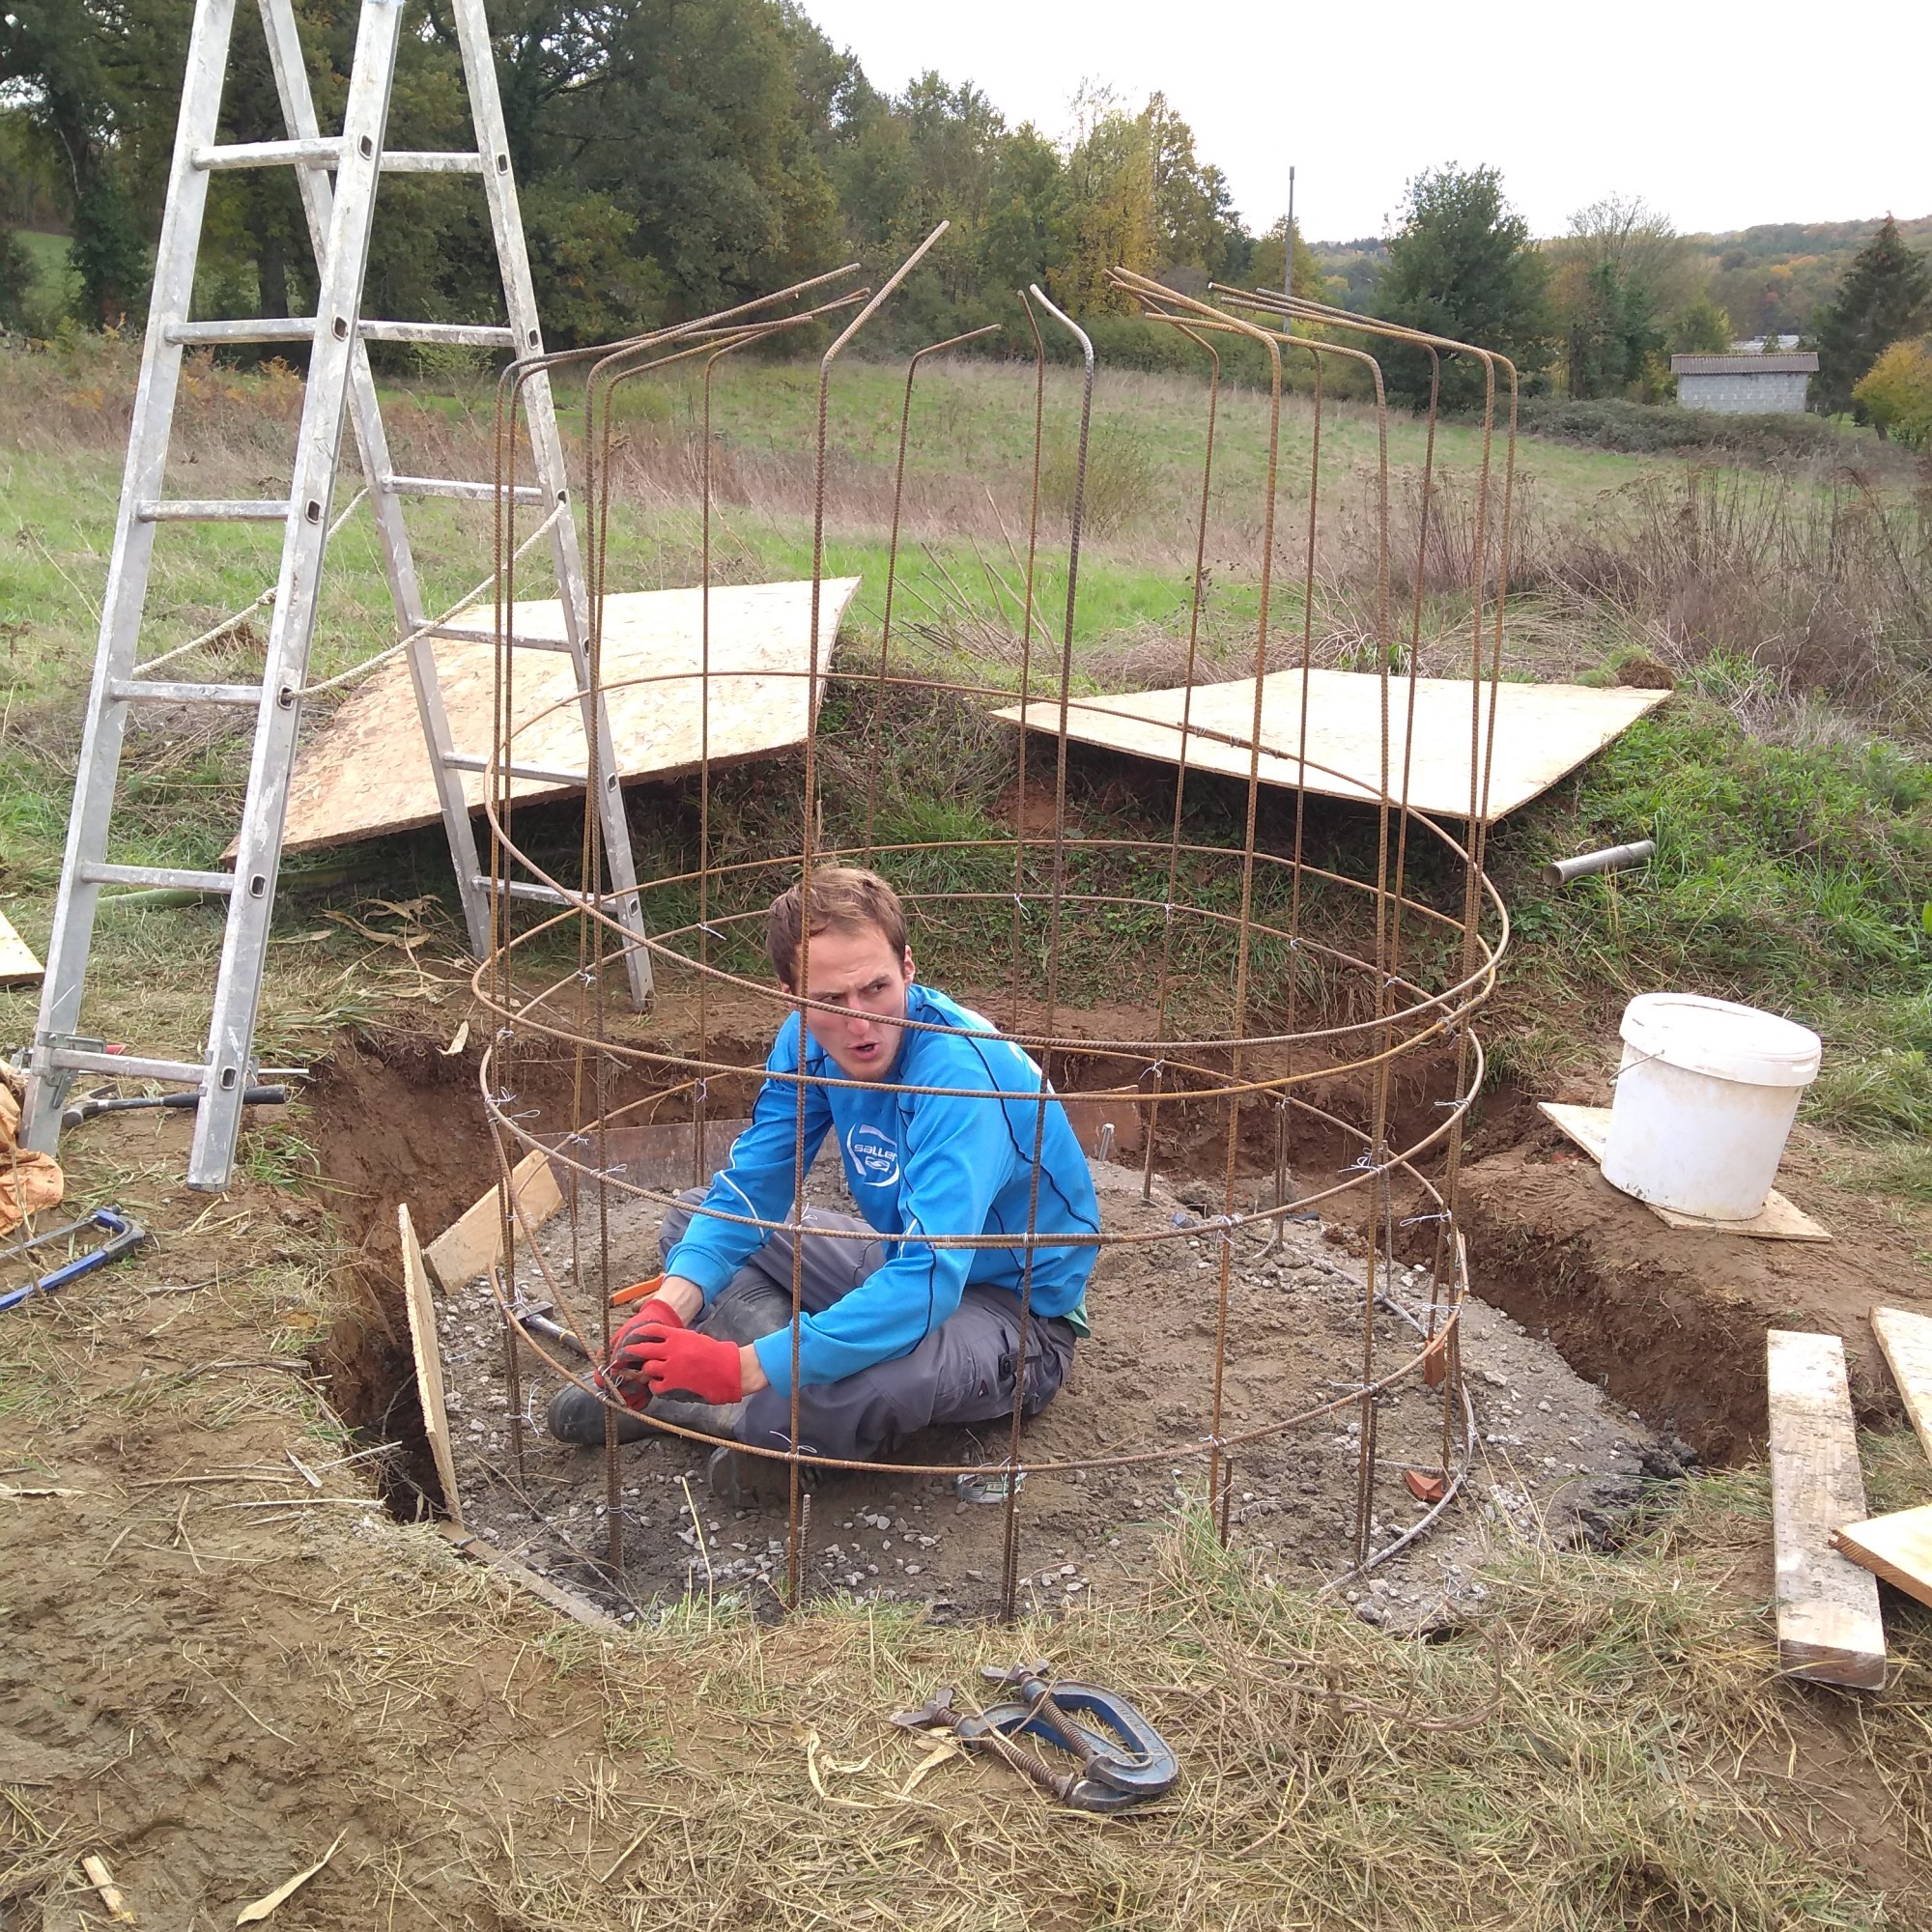
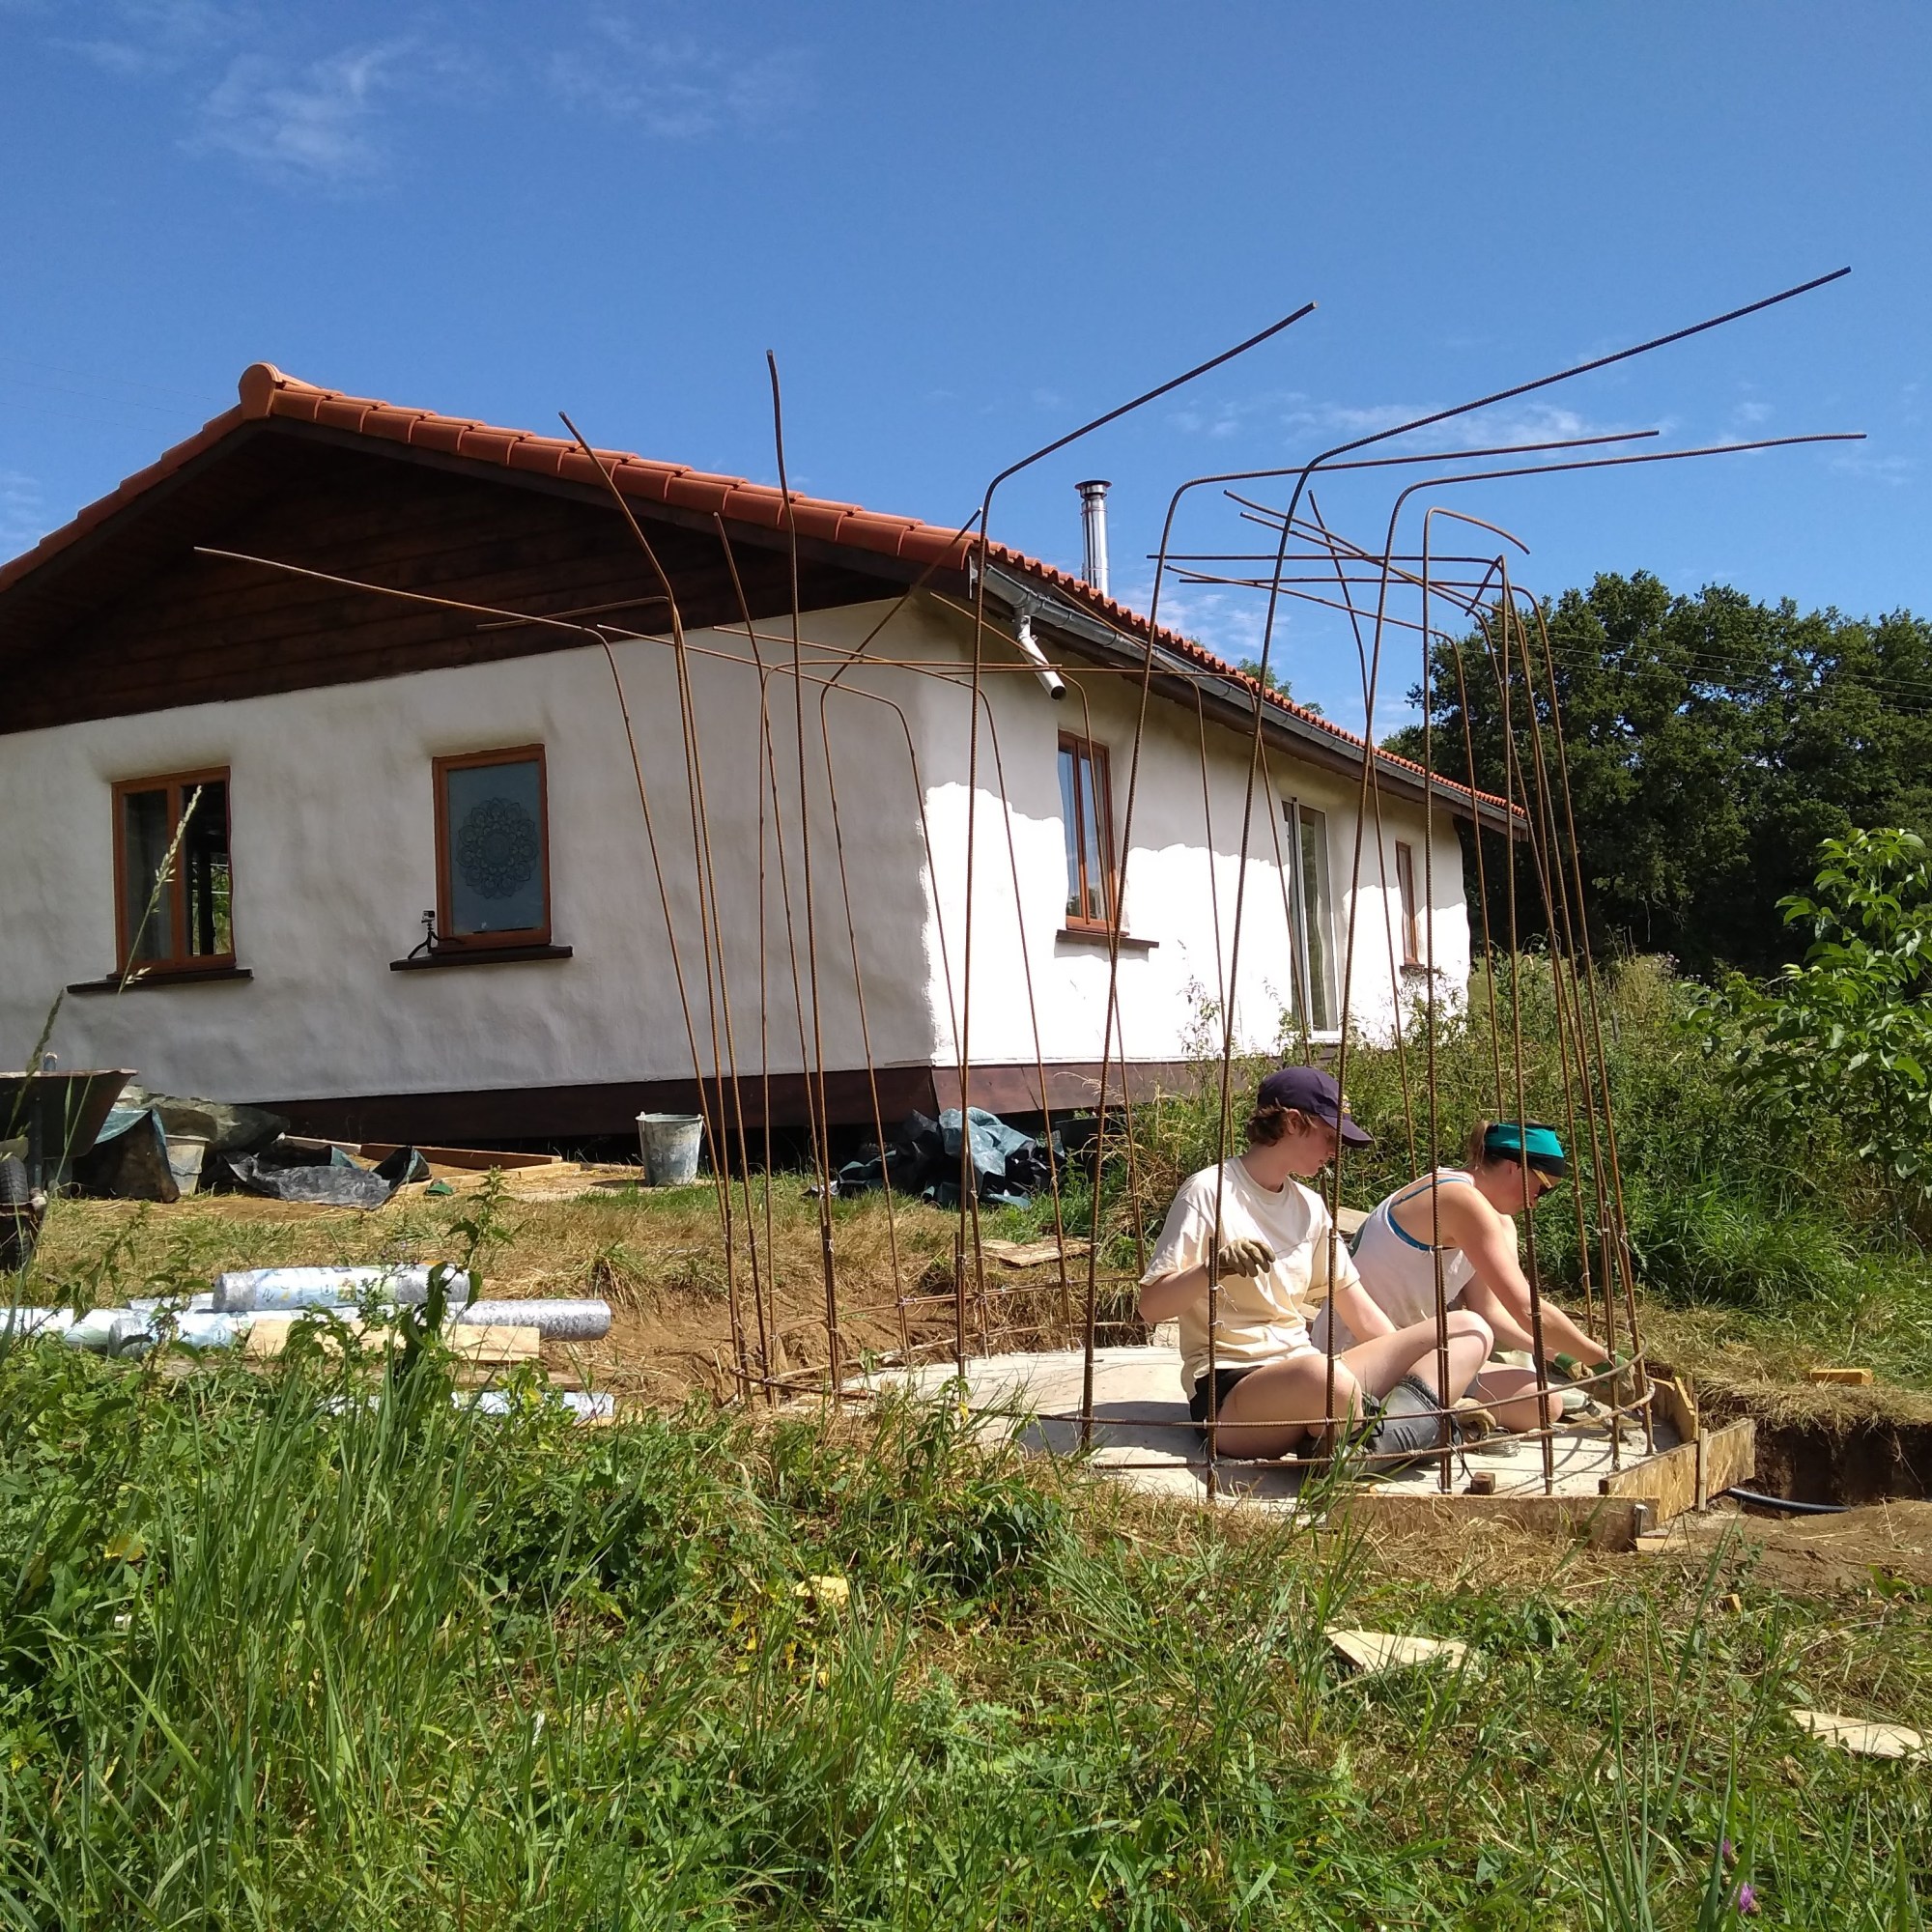
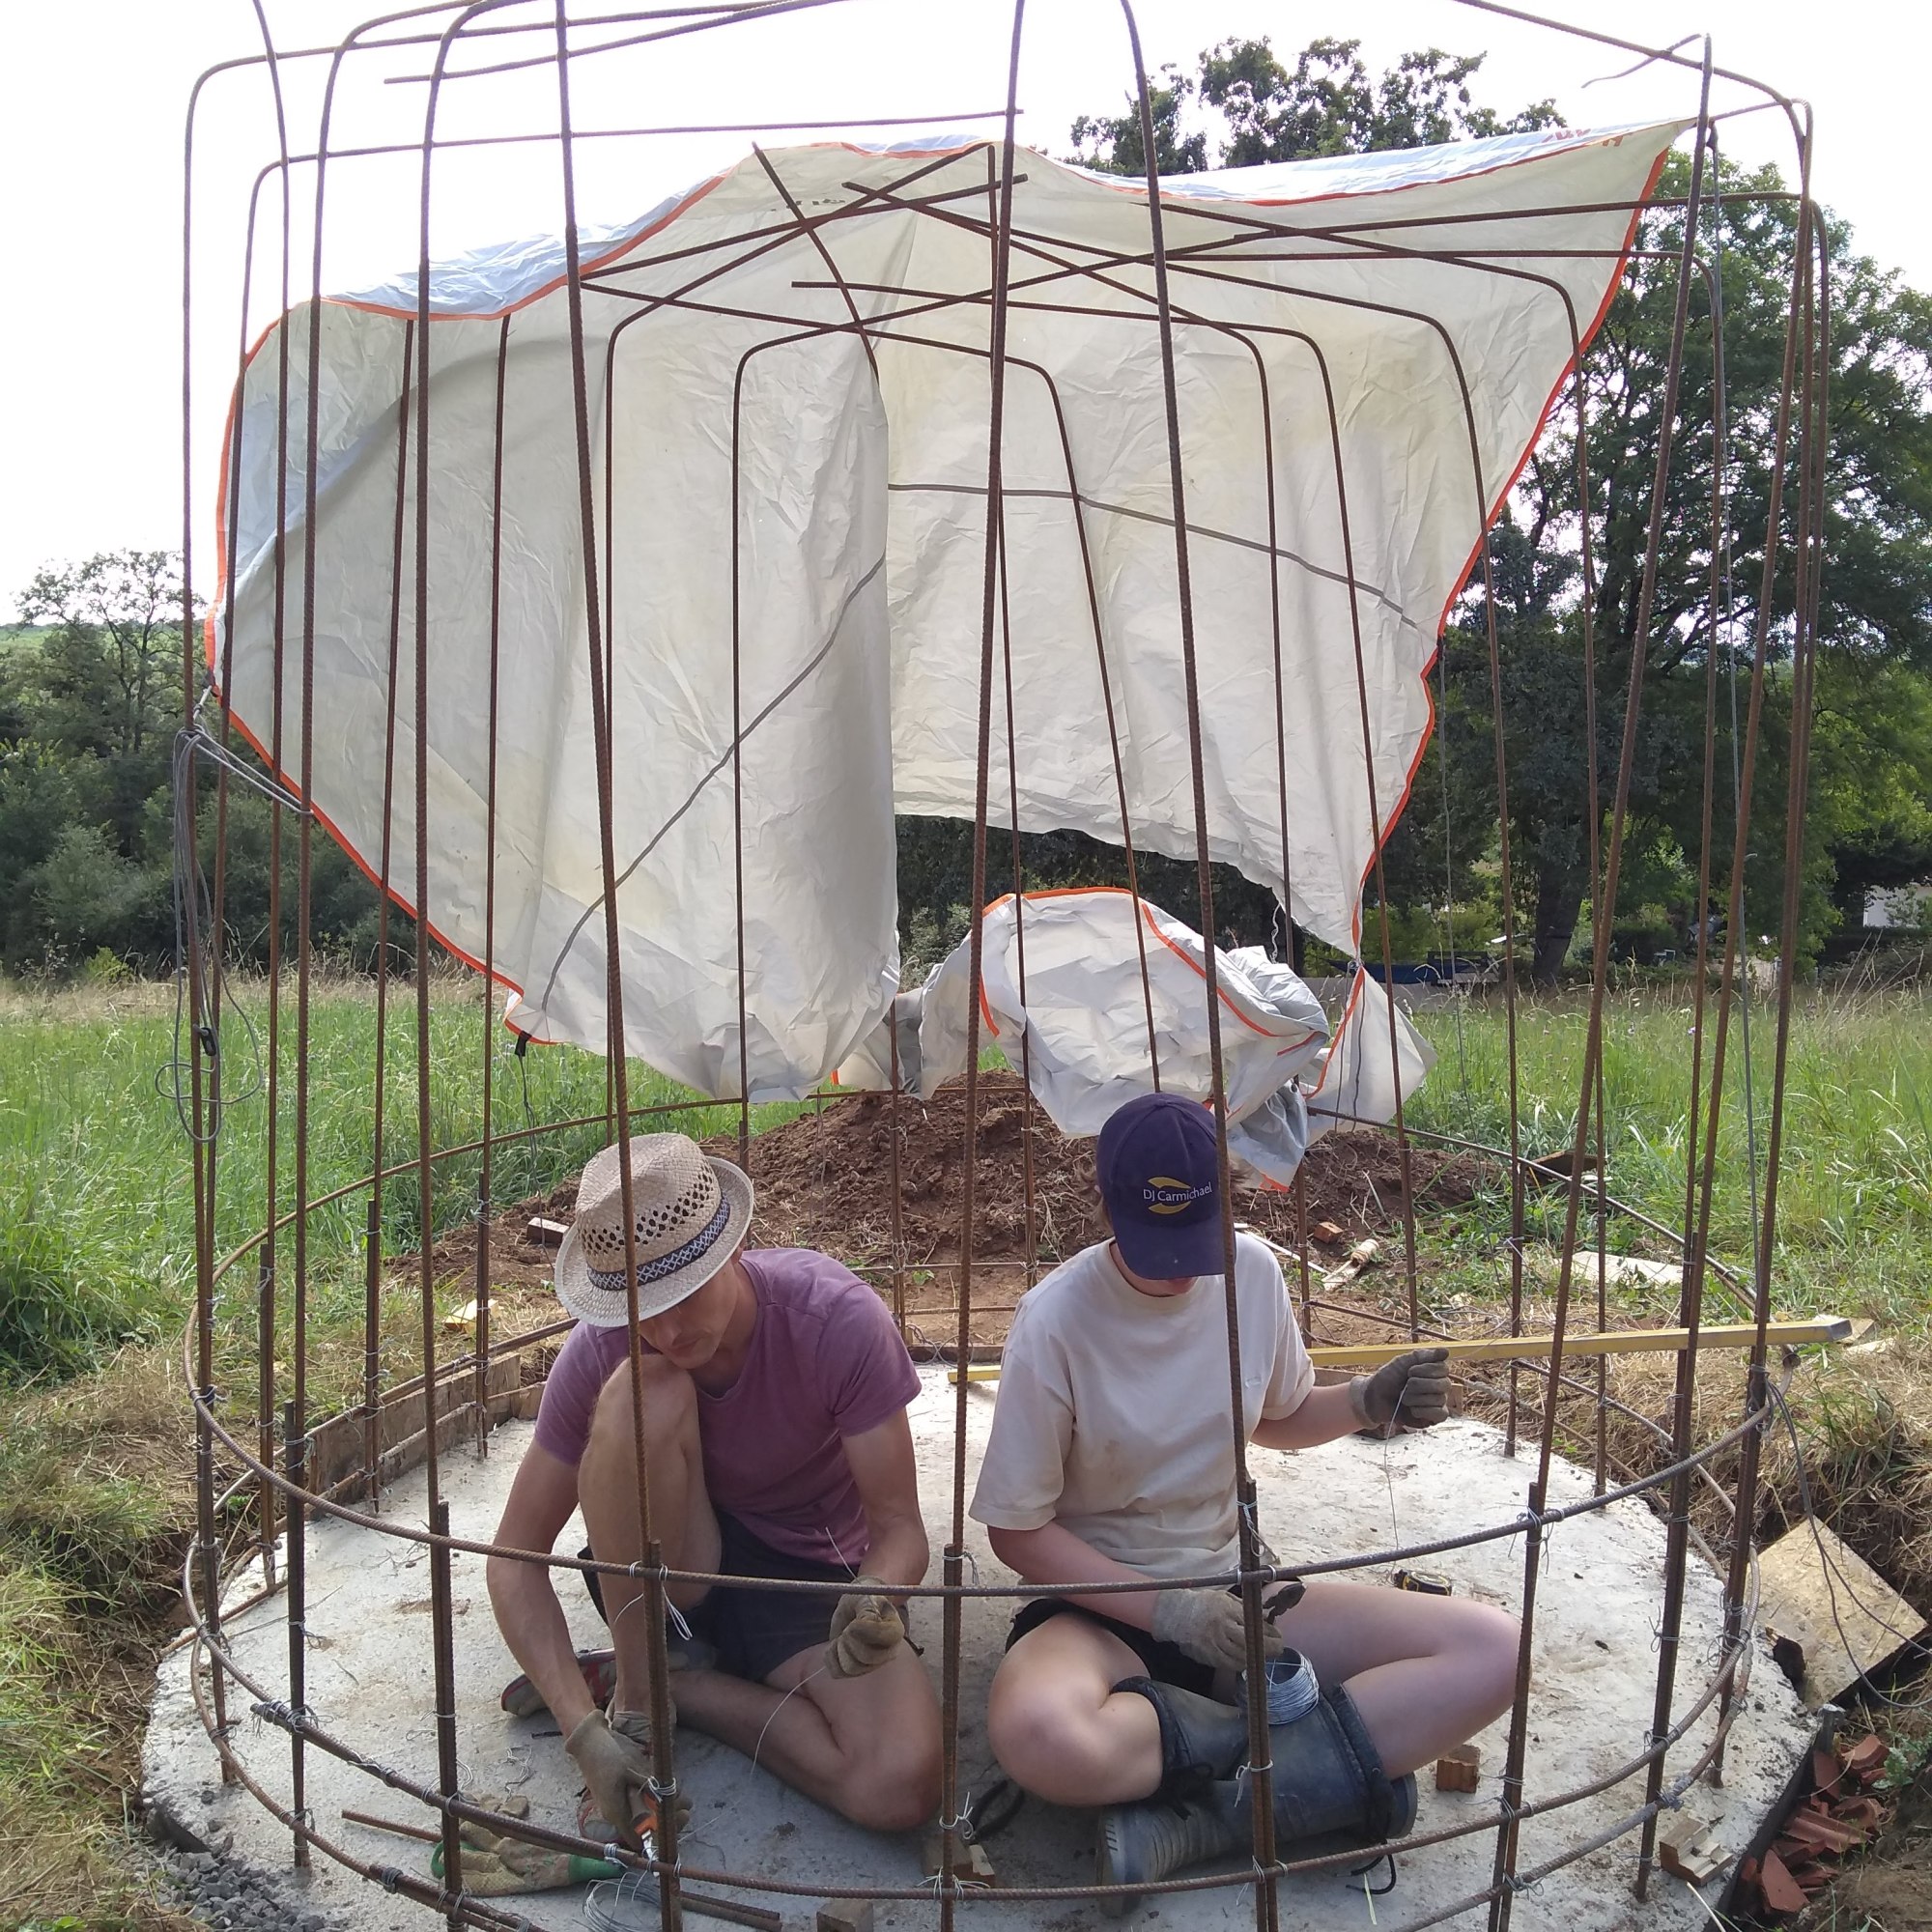
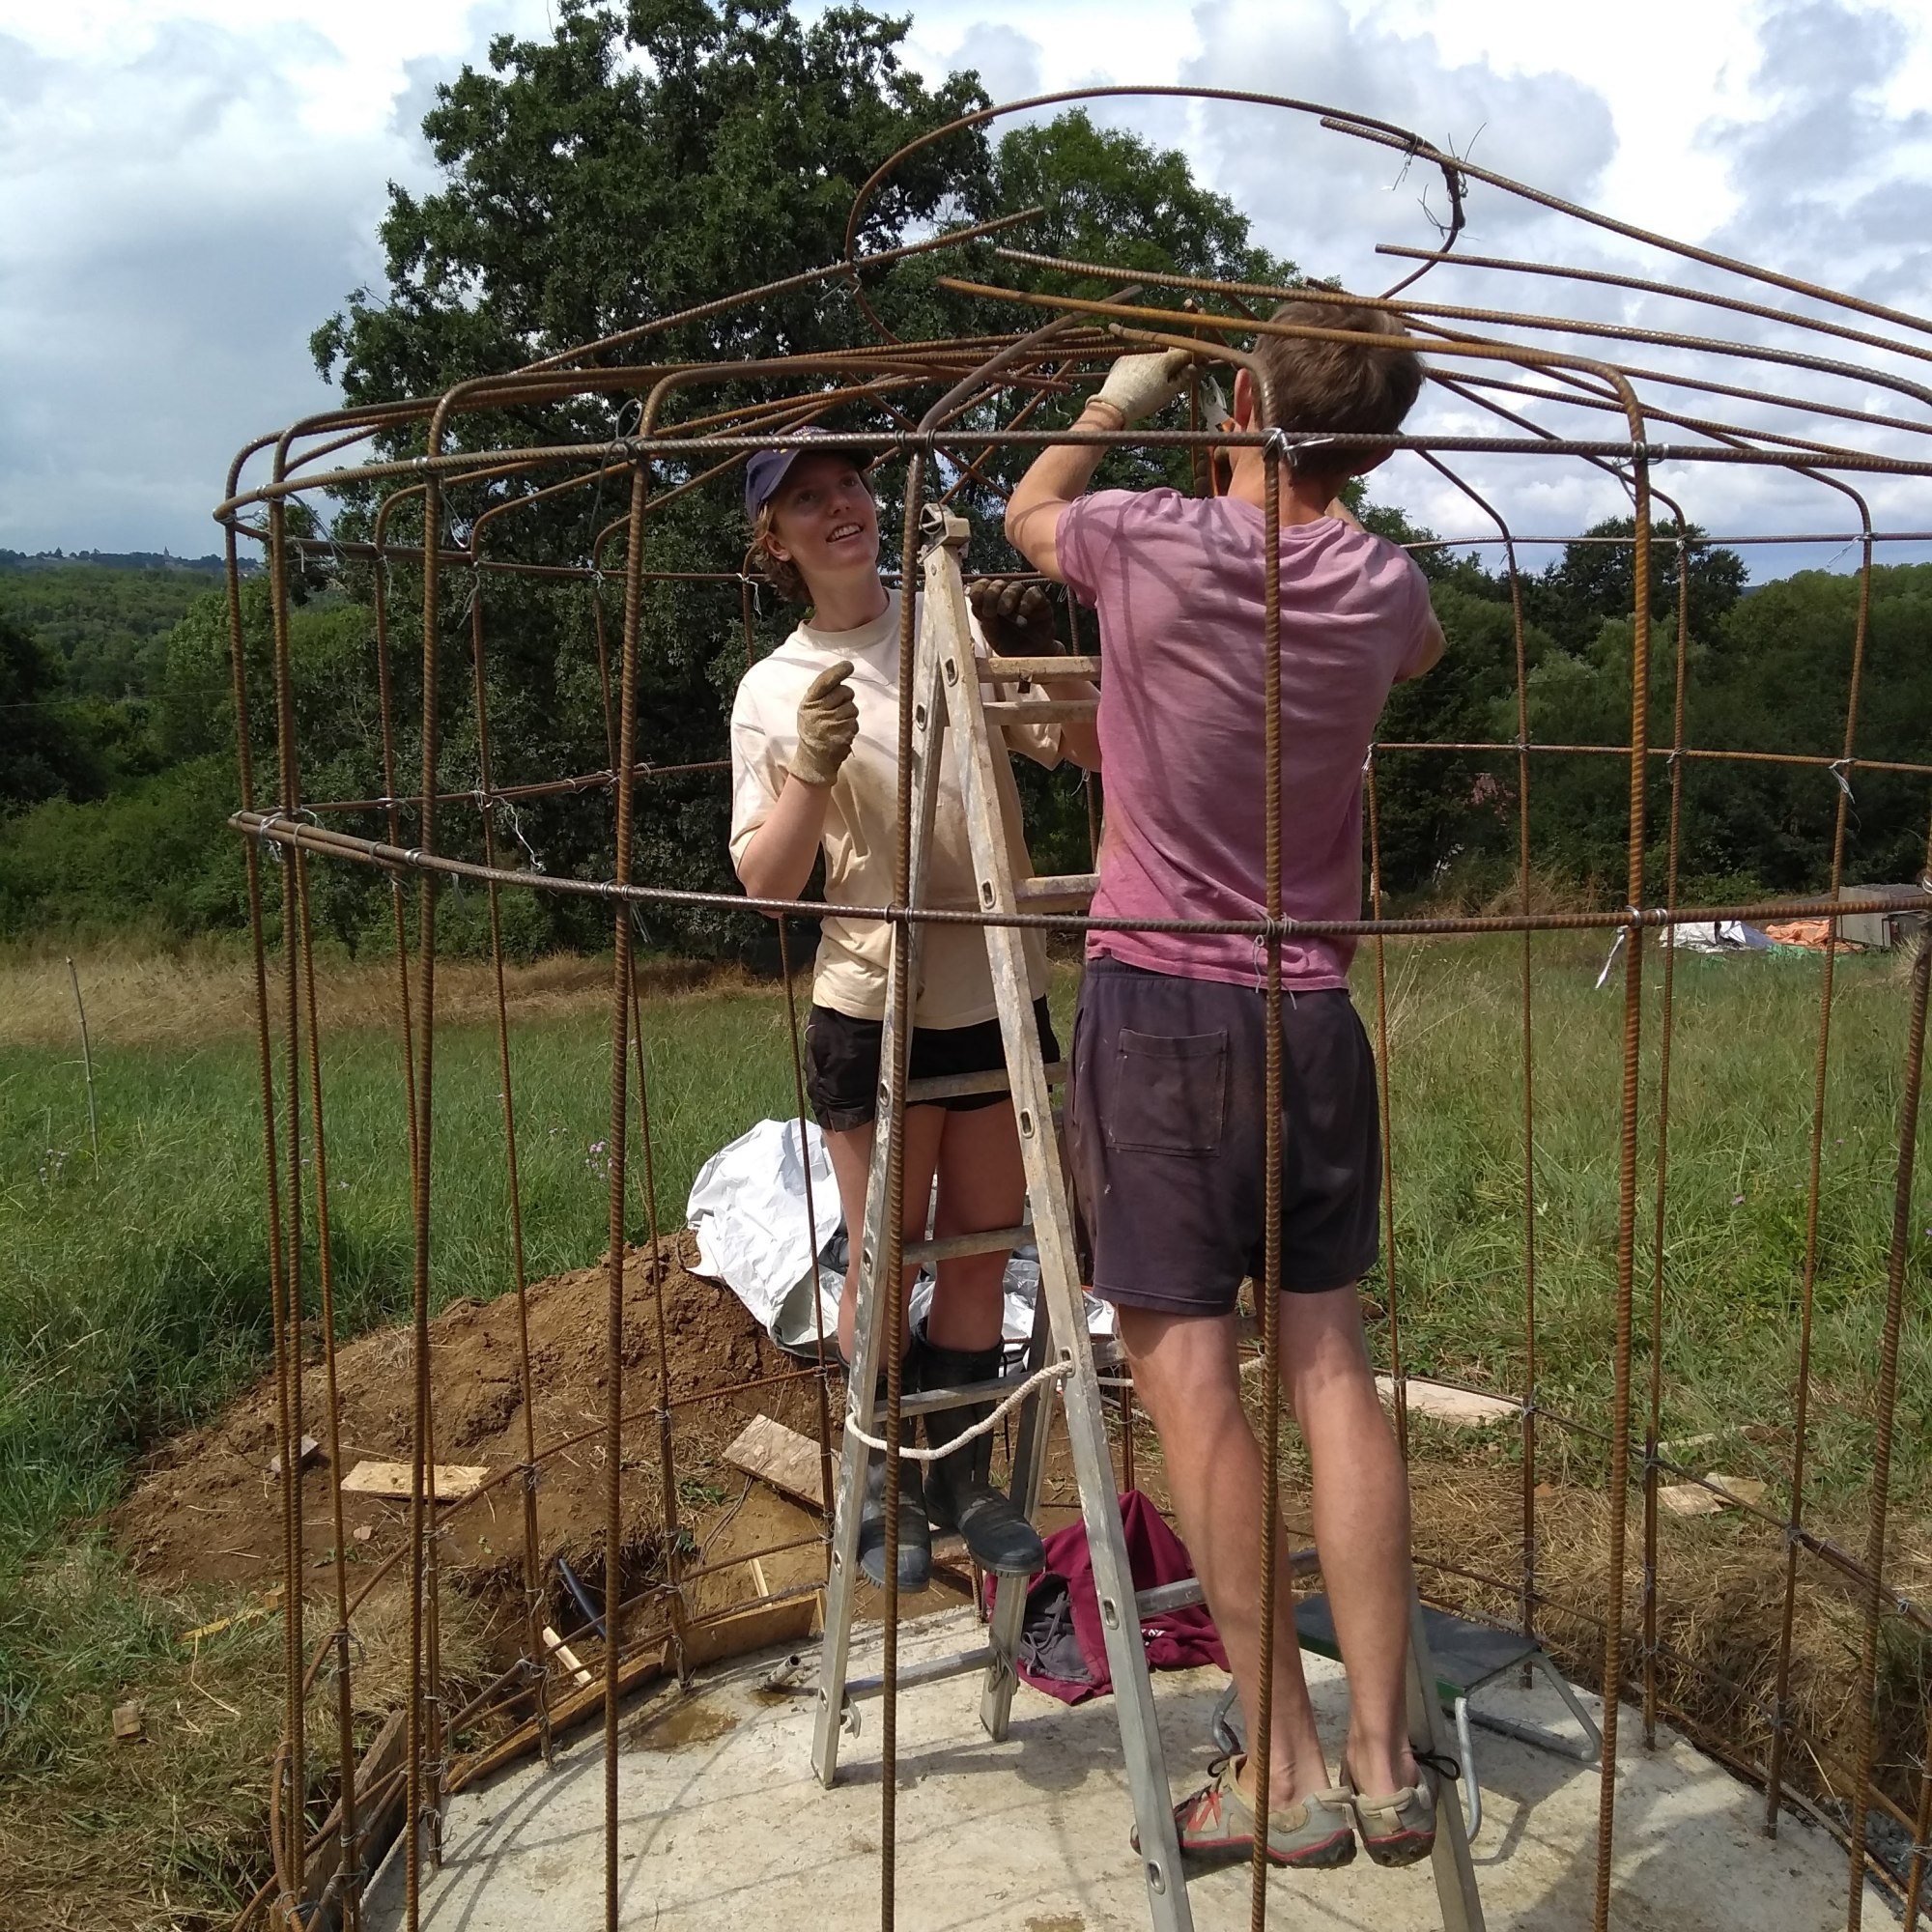
The Metalwork
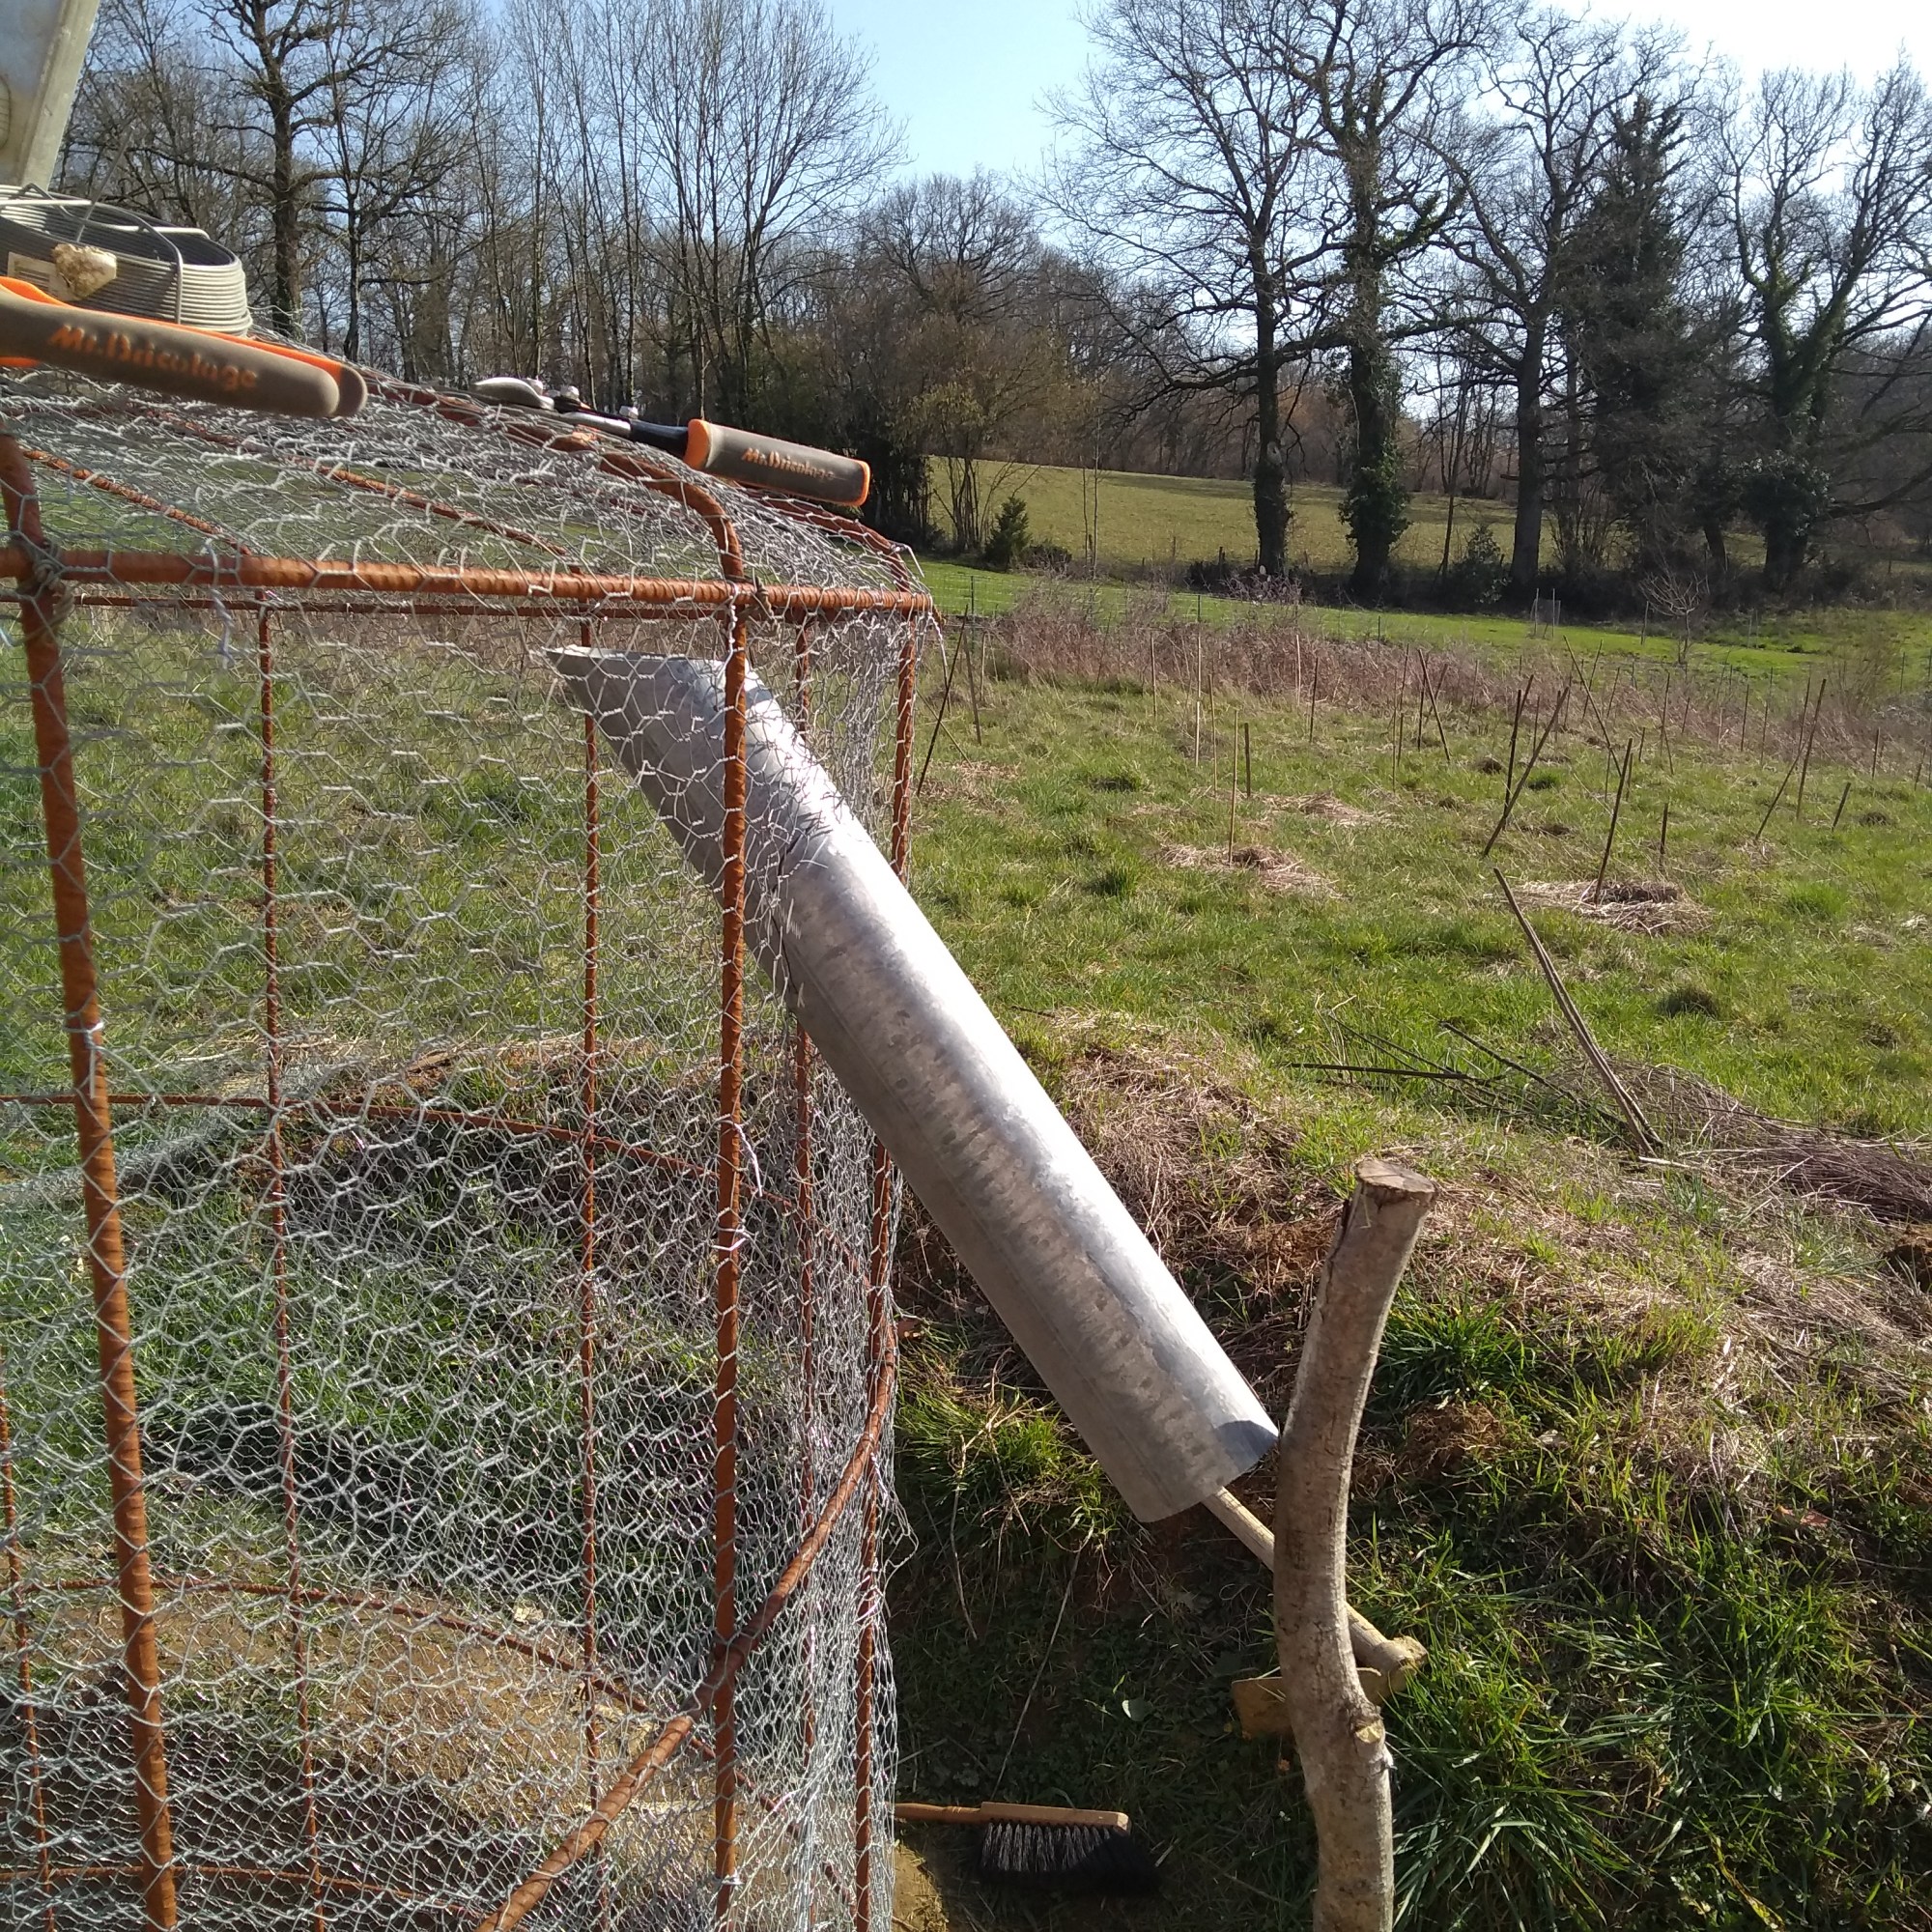
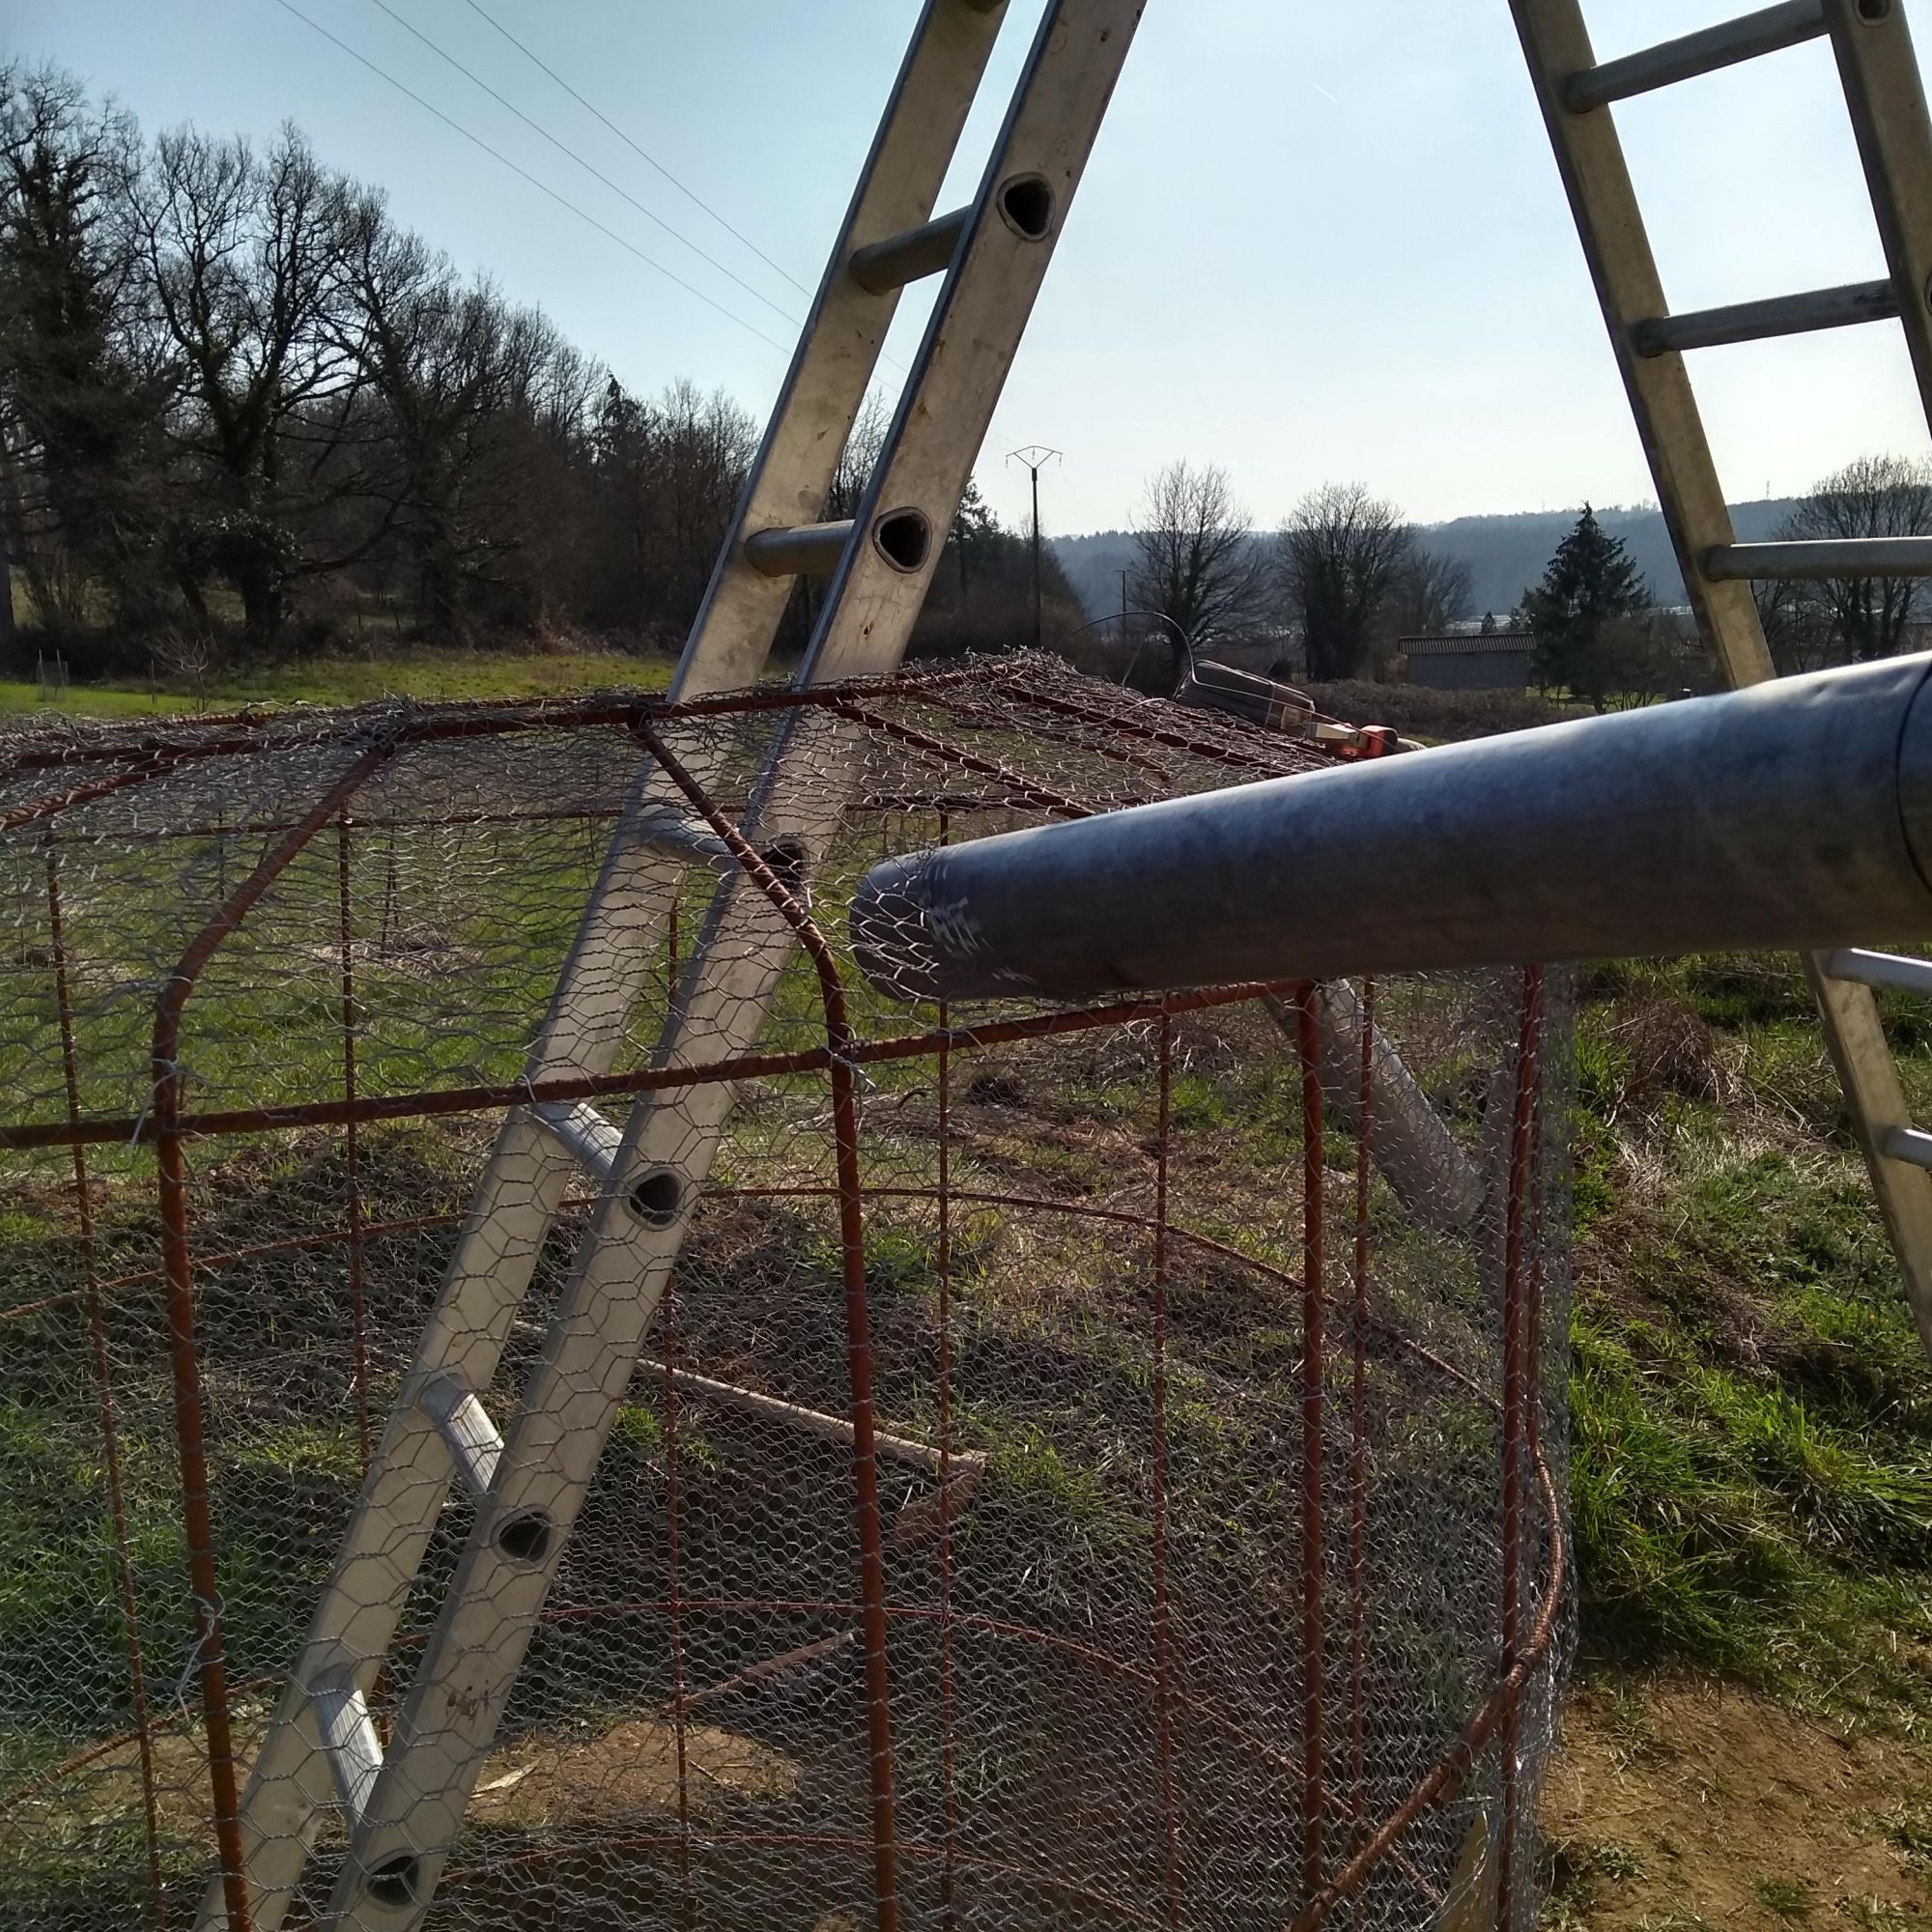
The cage structure had to incorporate all the inlets and openings from the outset, and this really allowed us the flexibility to ensure the tank was correctly situated in relation to the down pipe from the roof.
Once the rebar was all connected, we began to attach the chicken wire to both sides. At this point our neighbours asked us what type of animal we were getting….
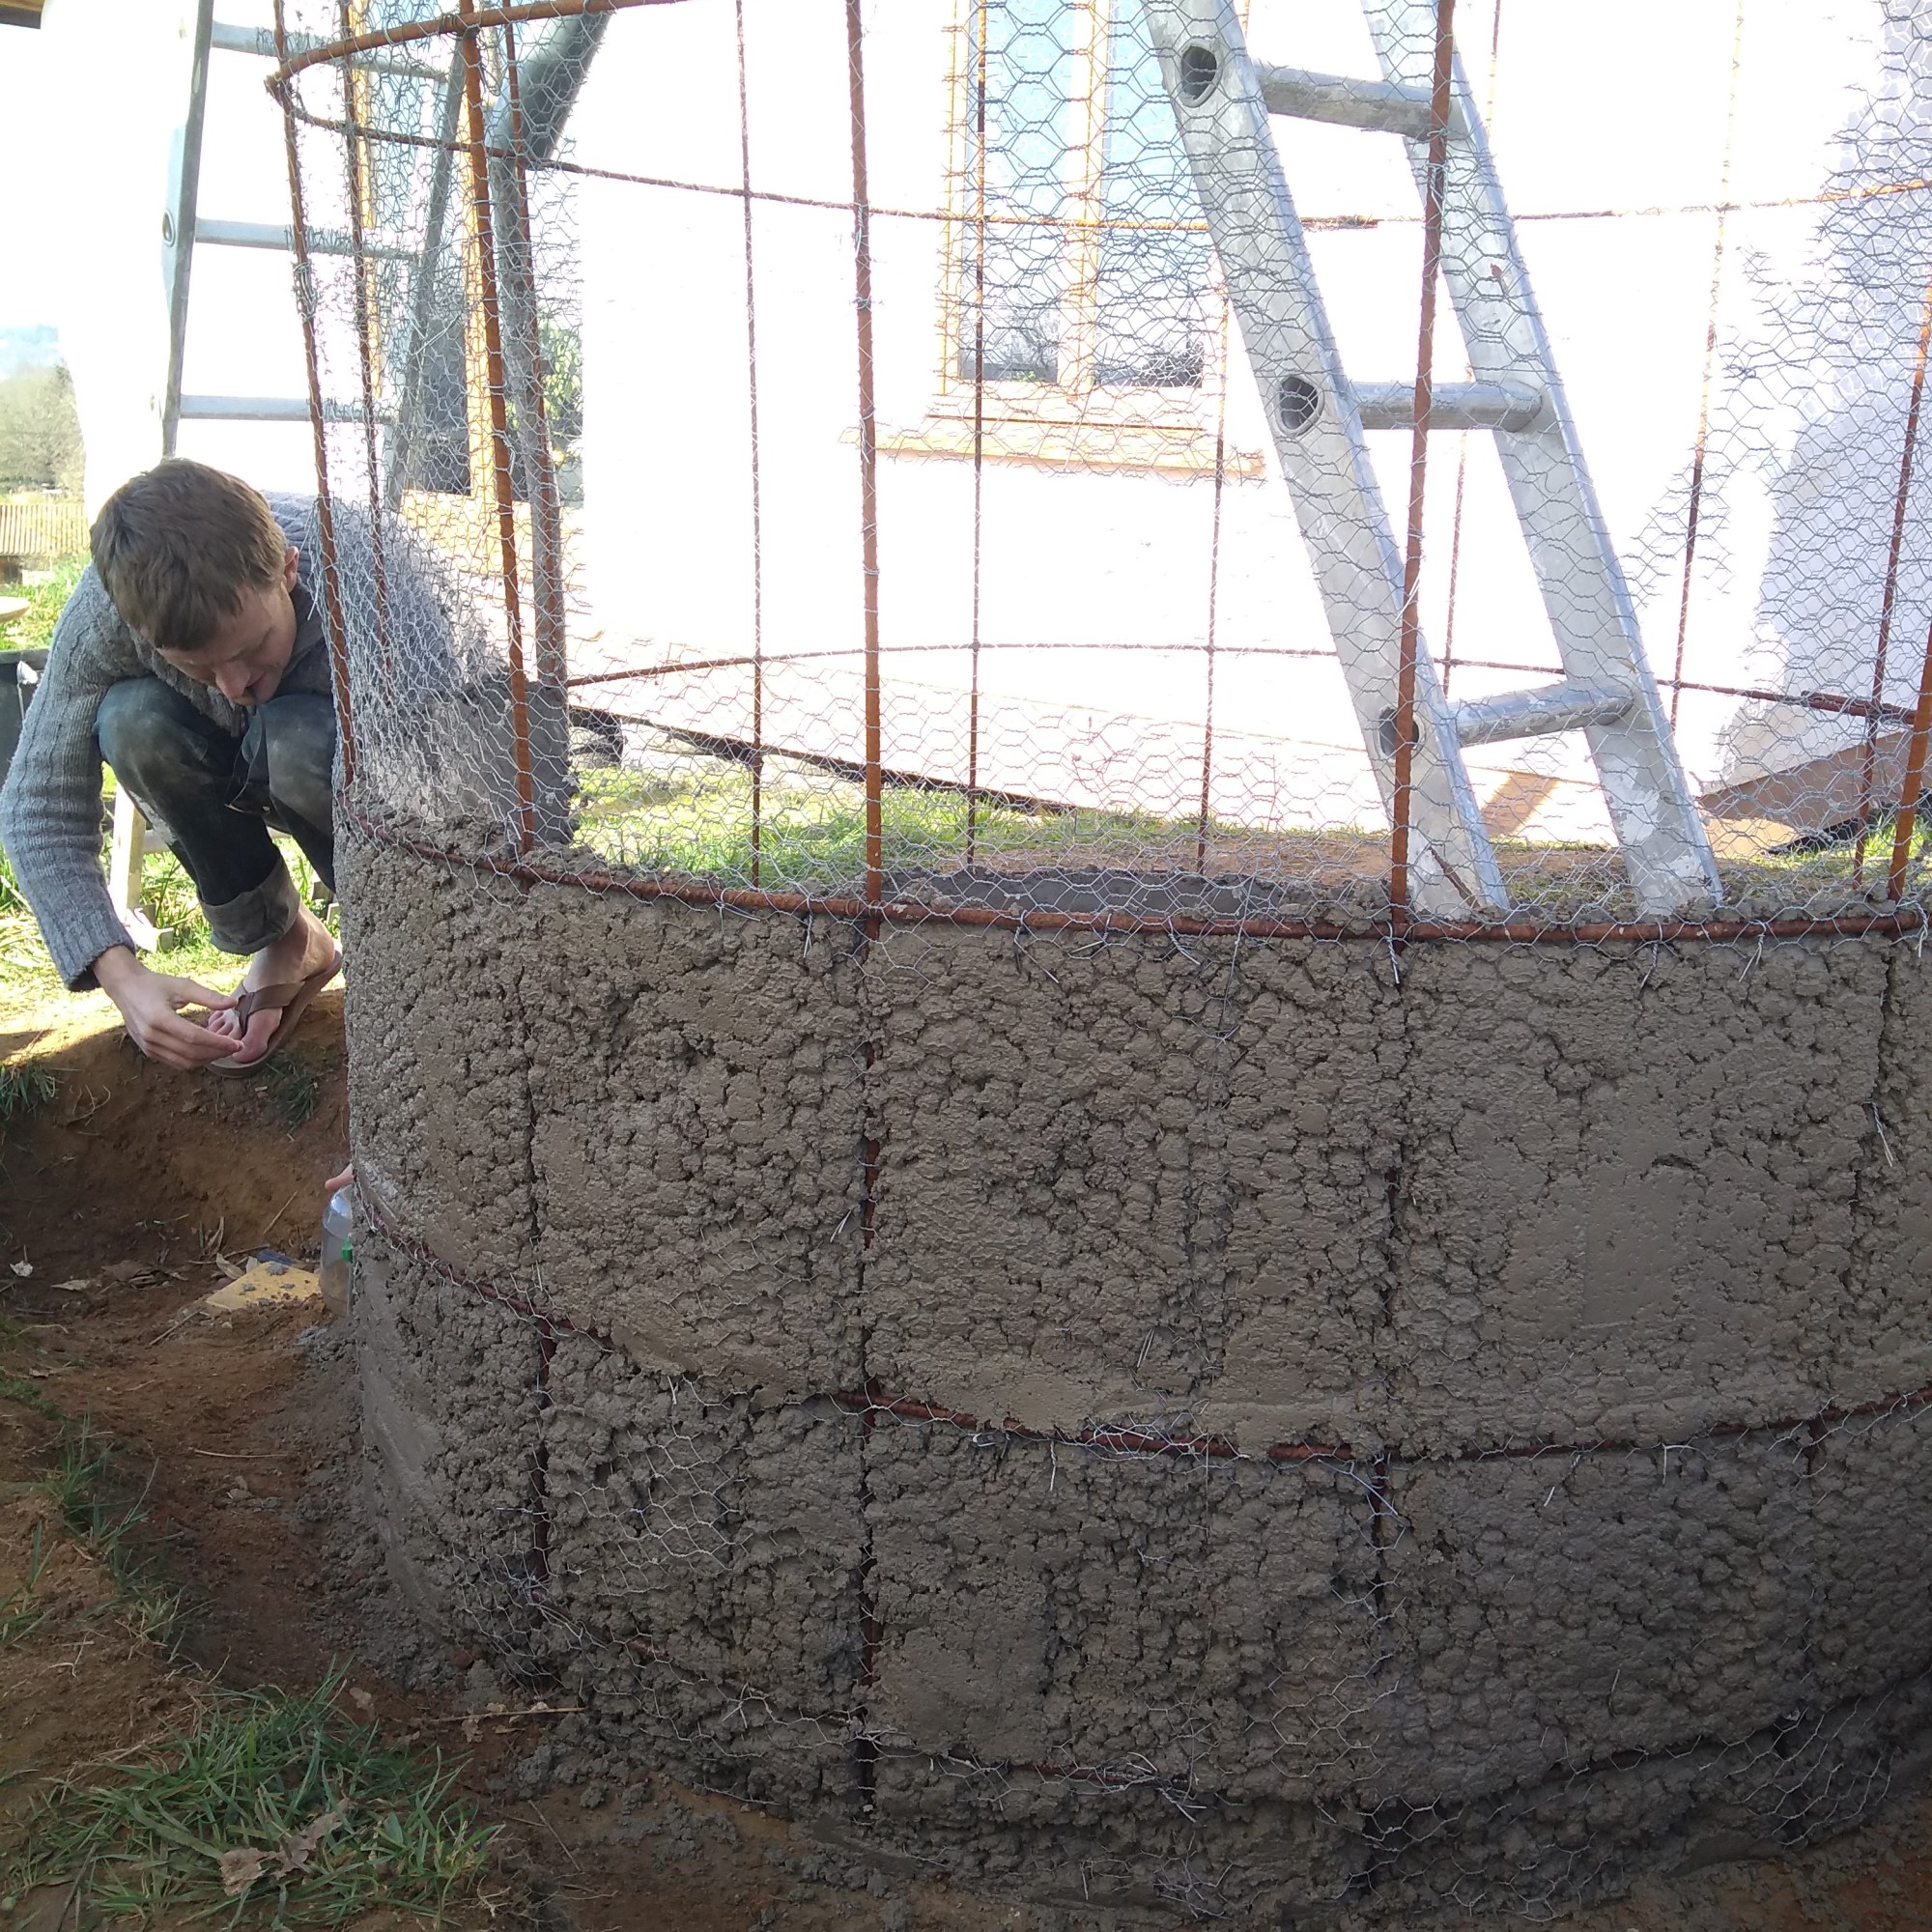
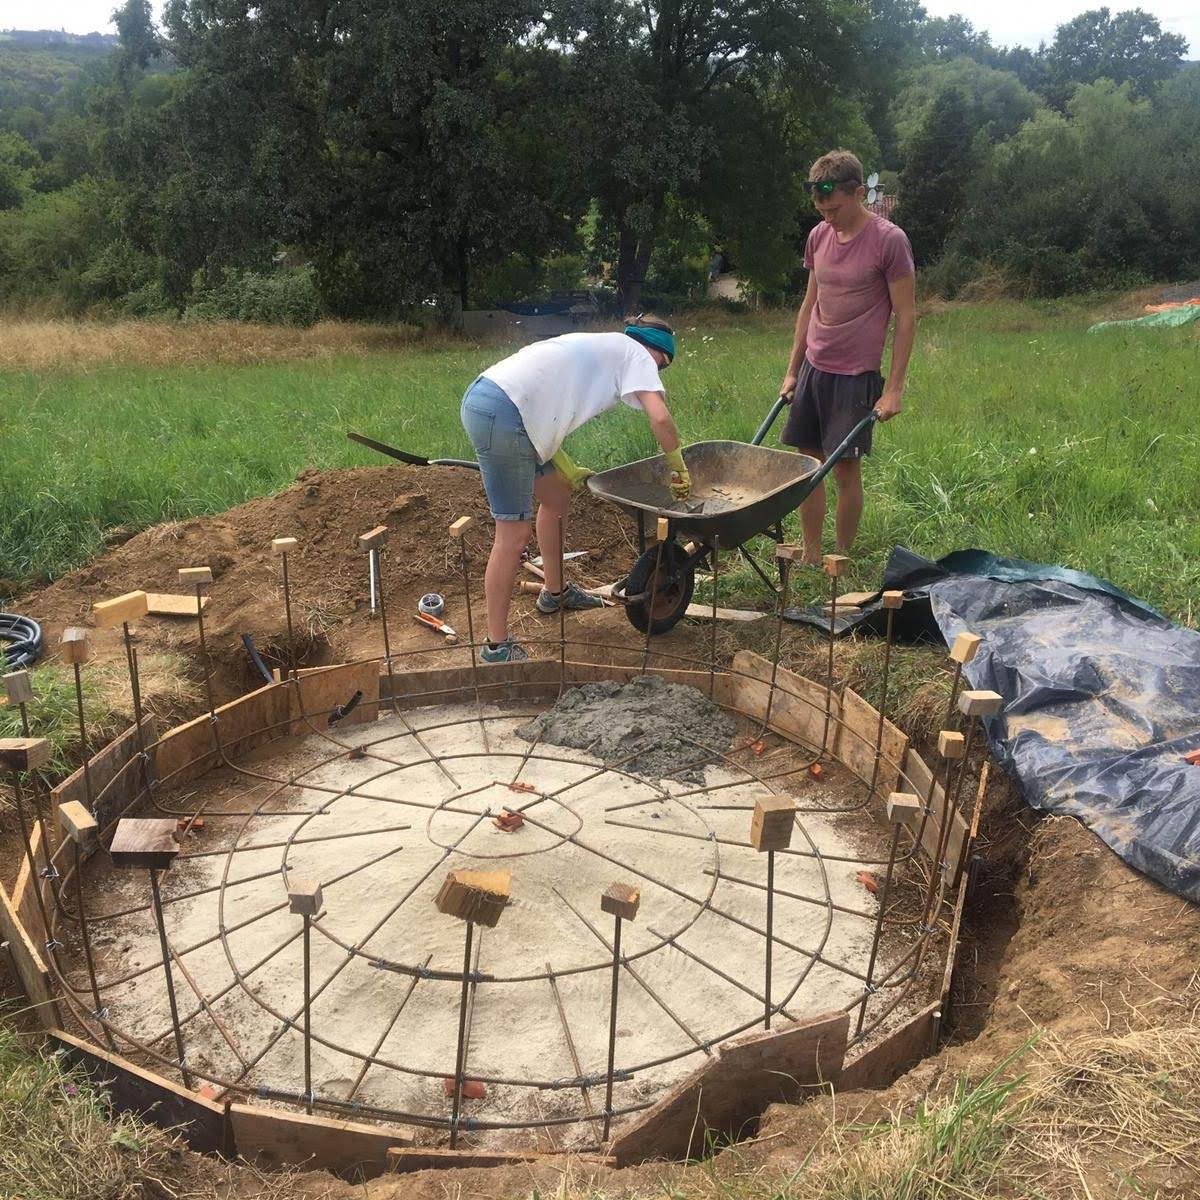
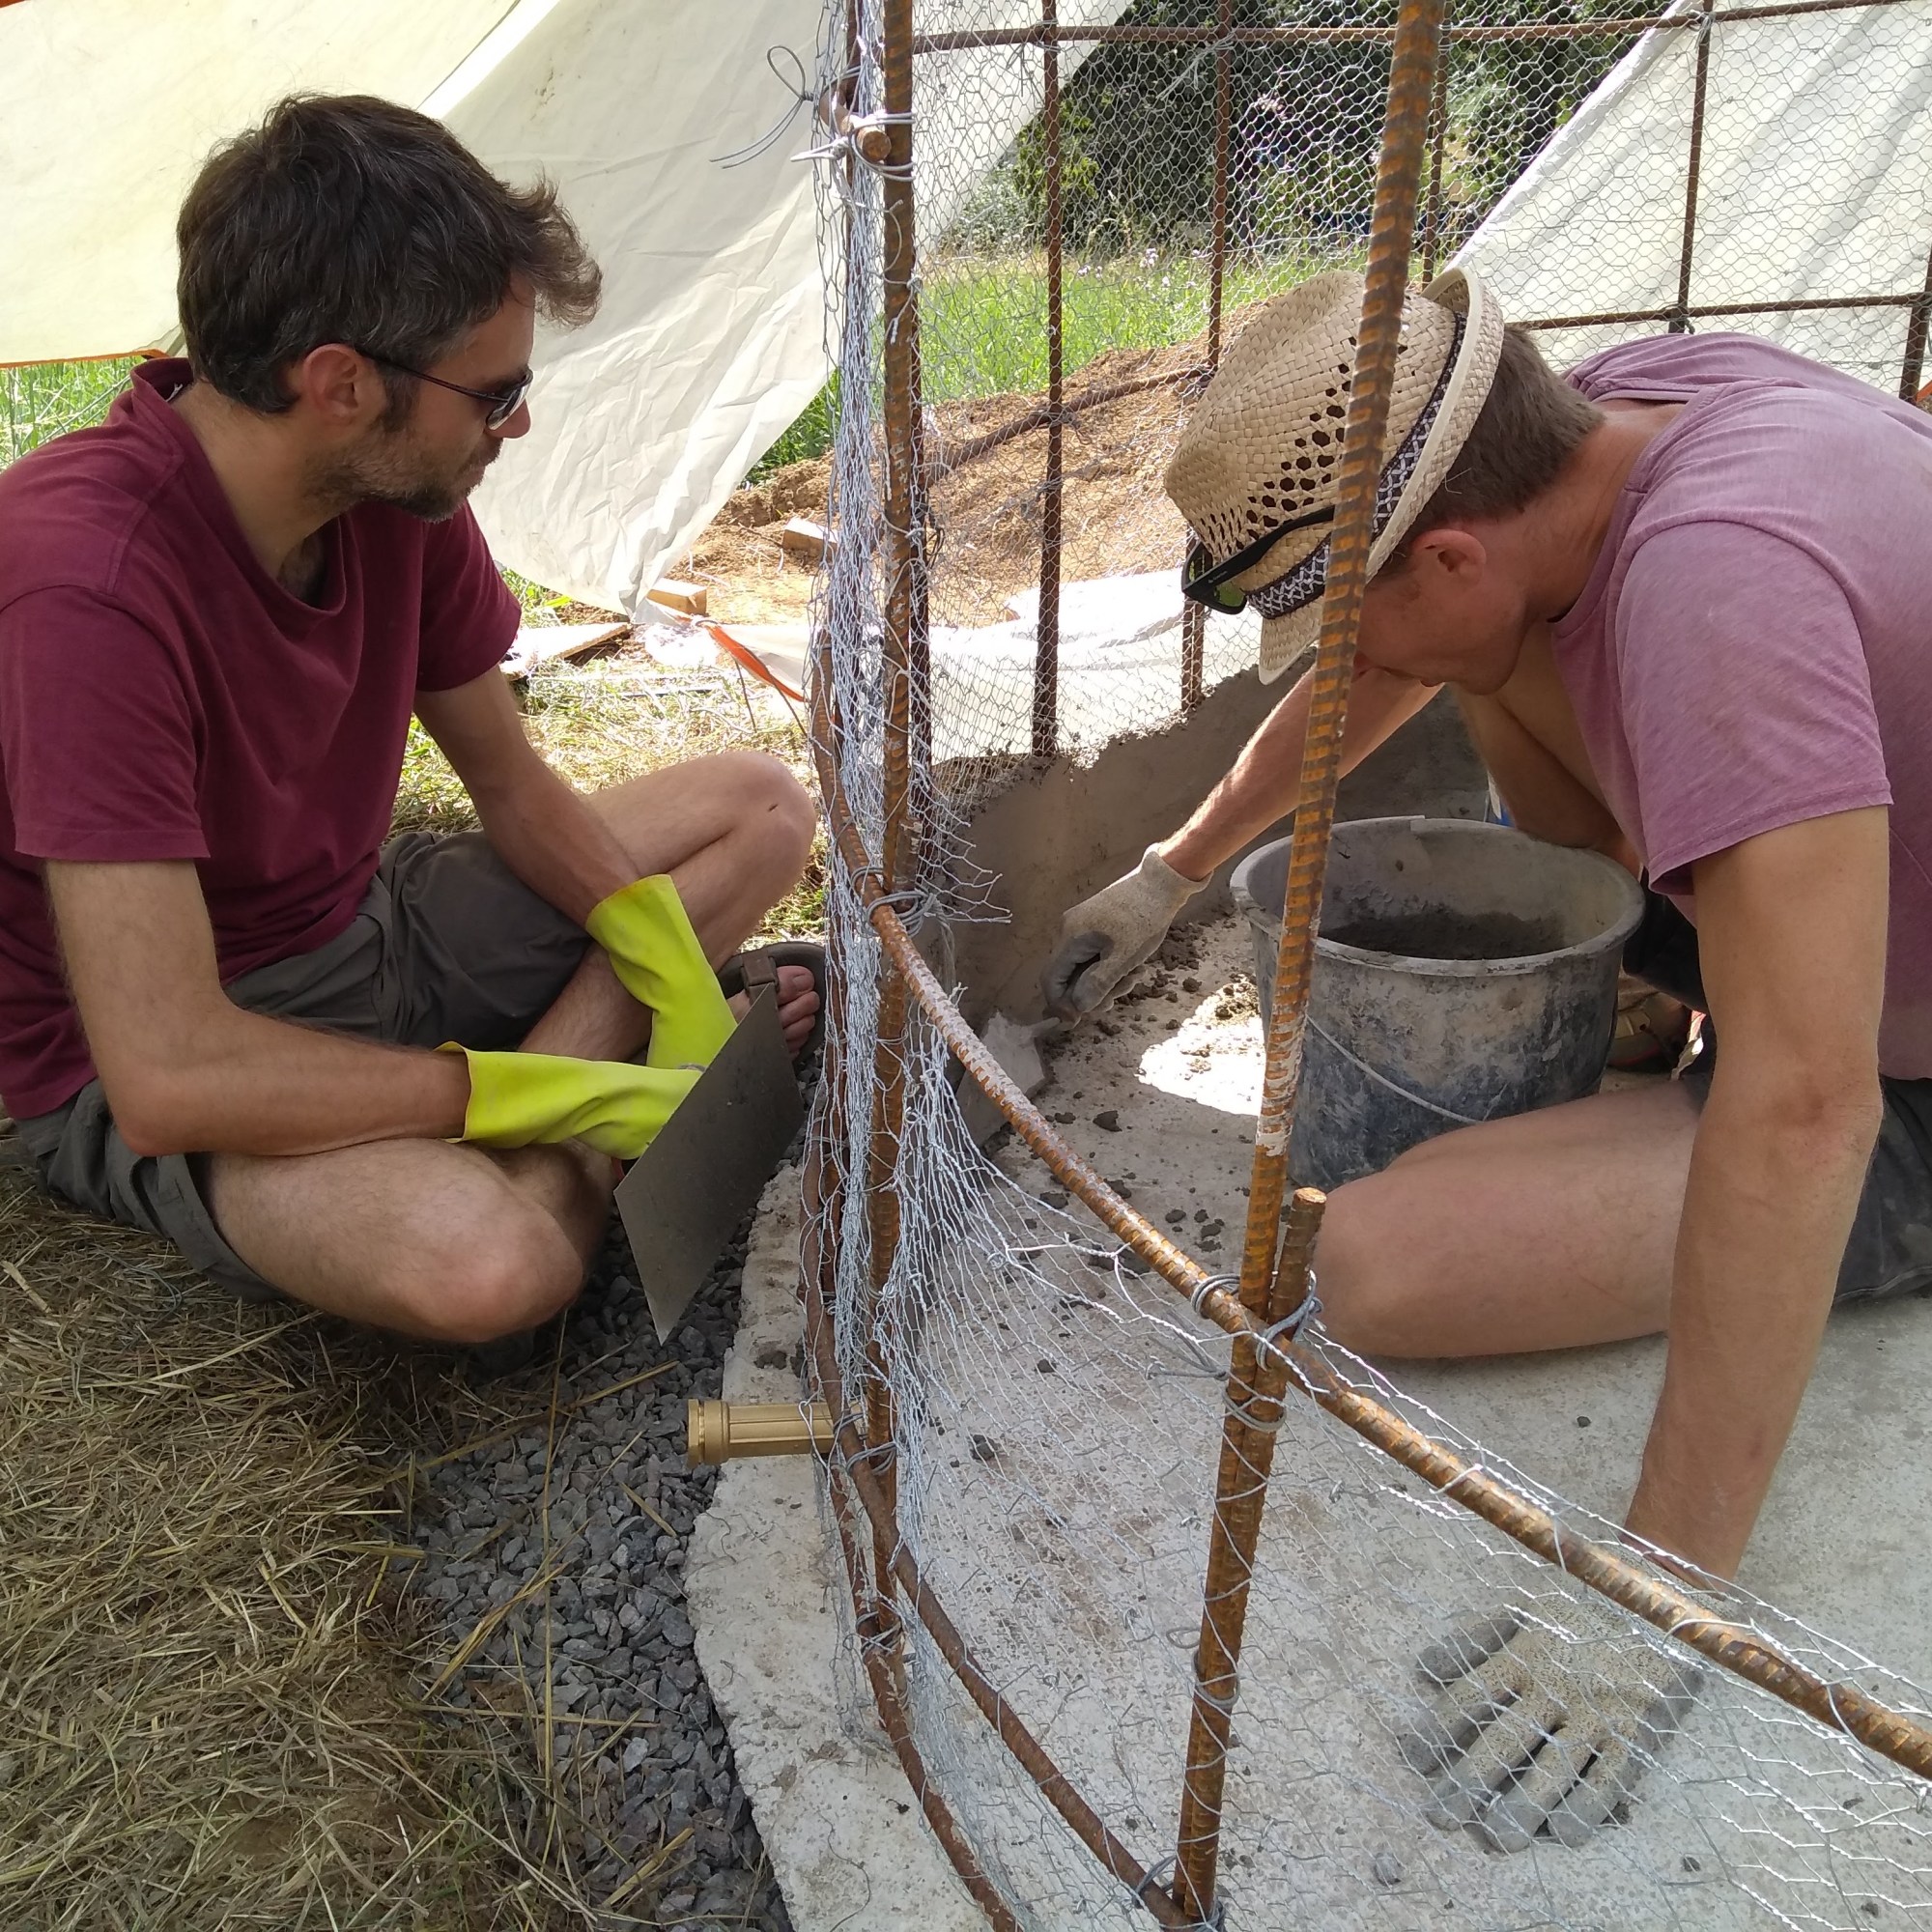
Cementing
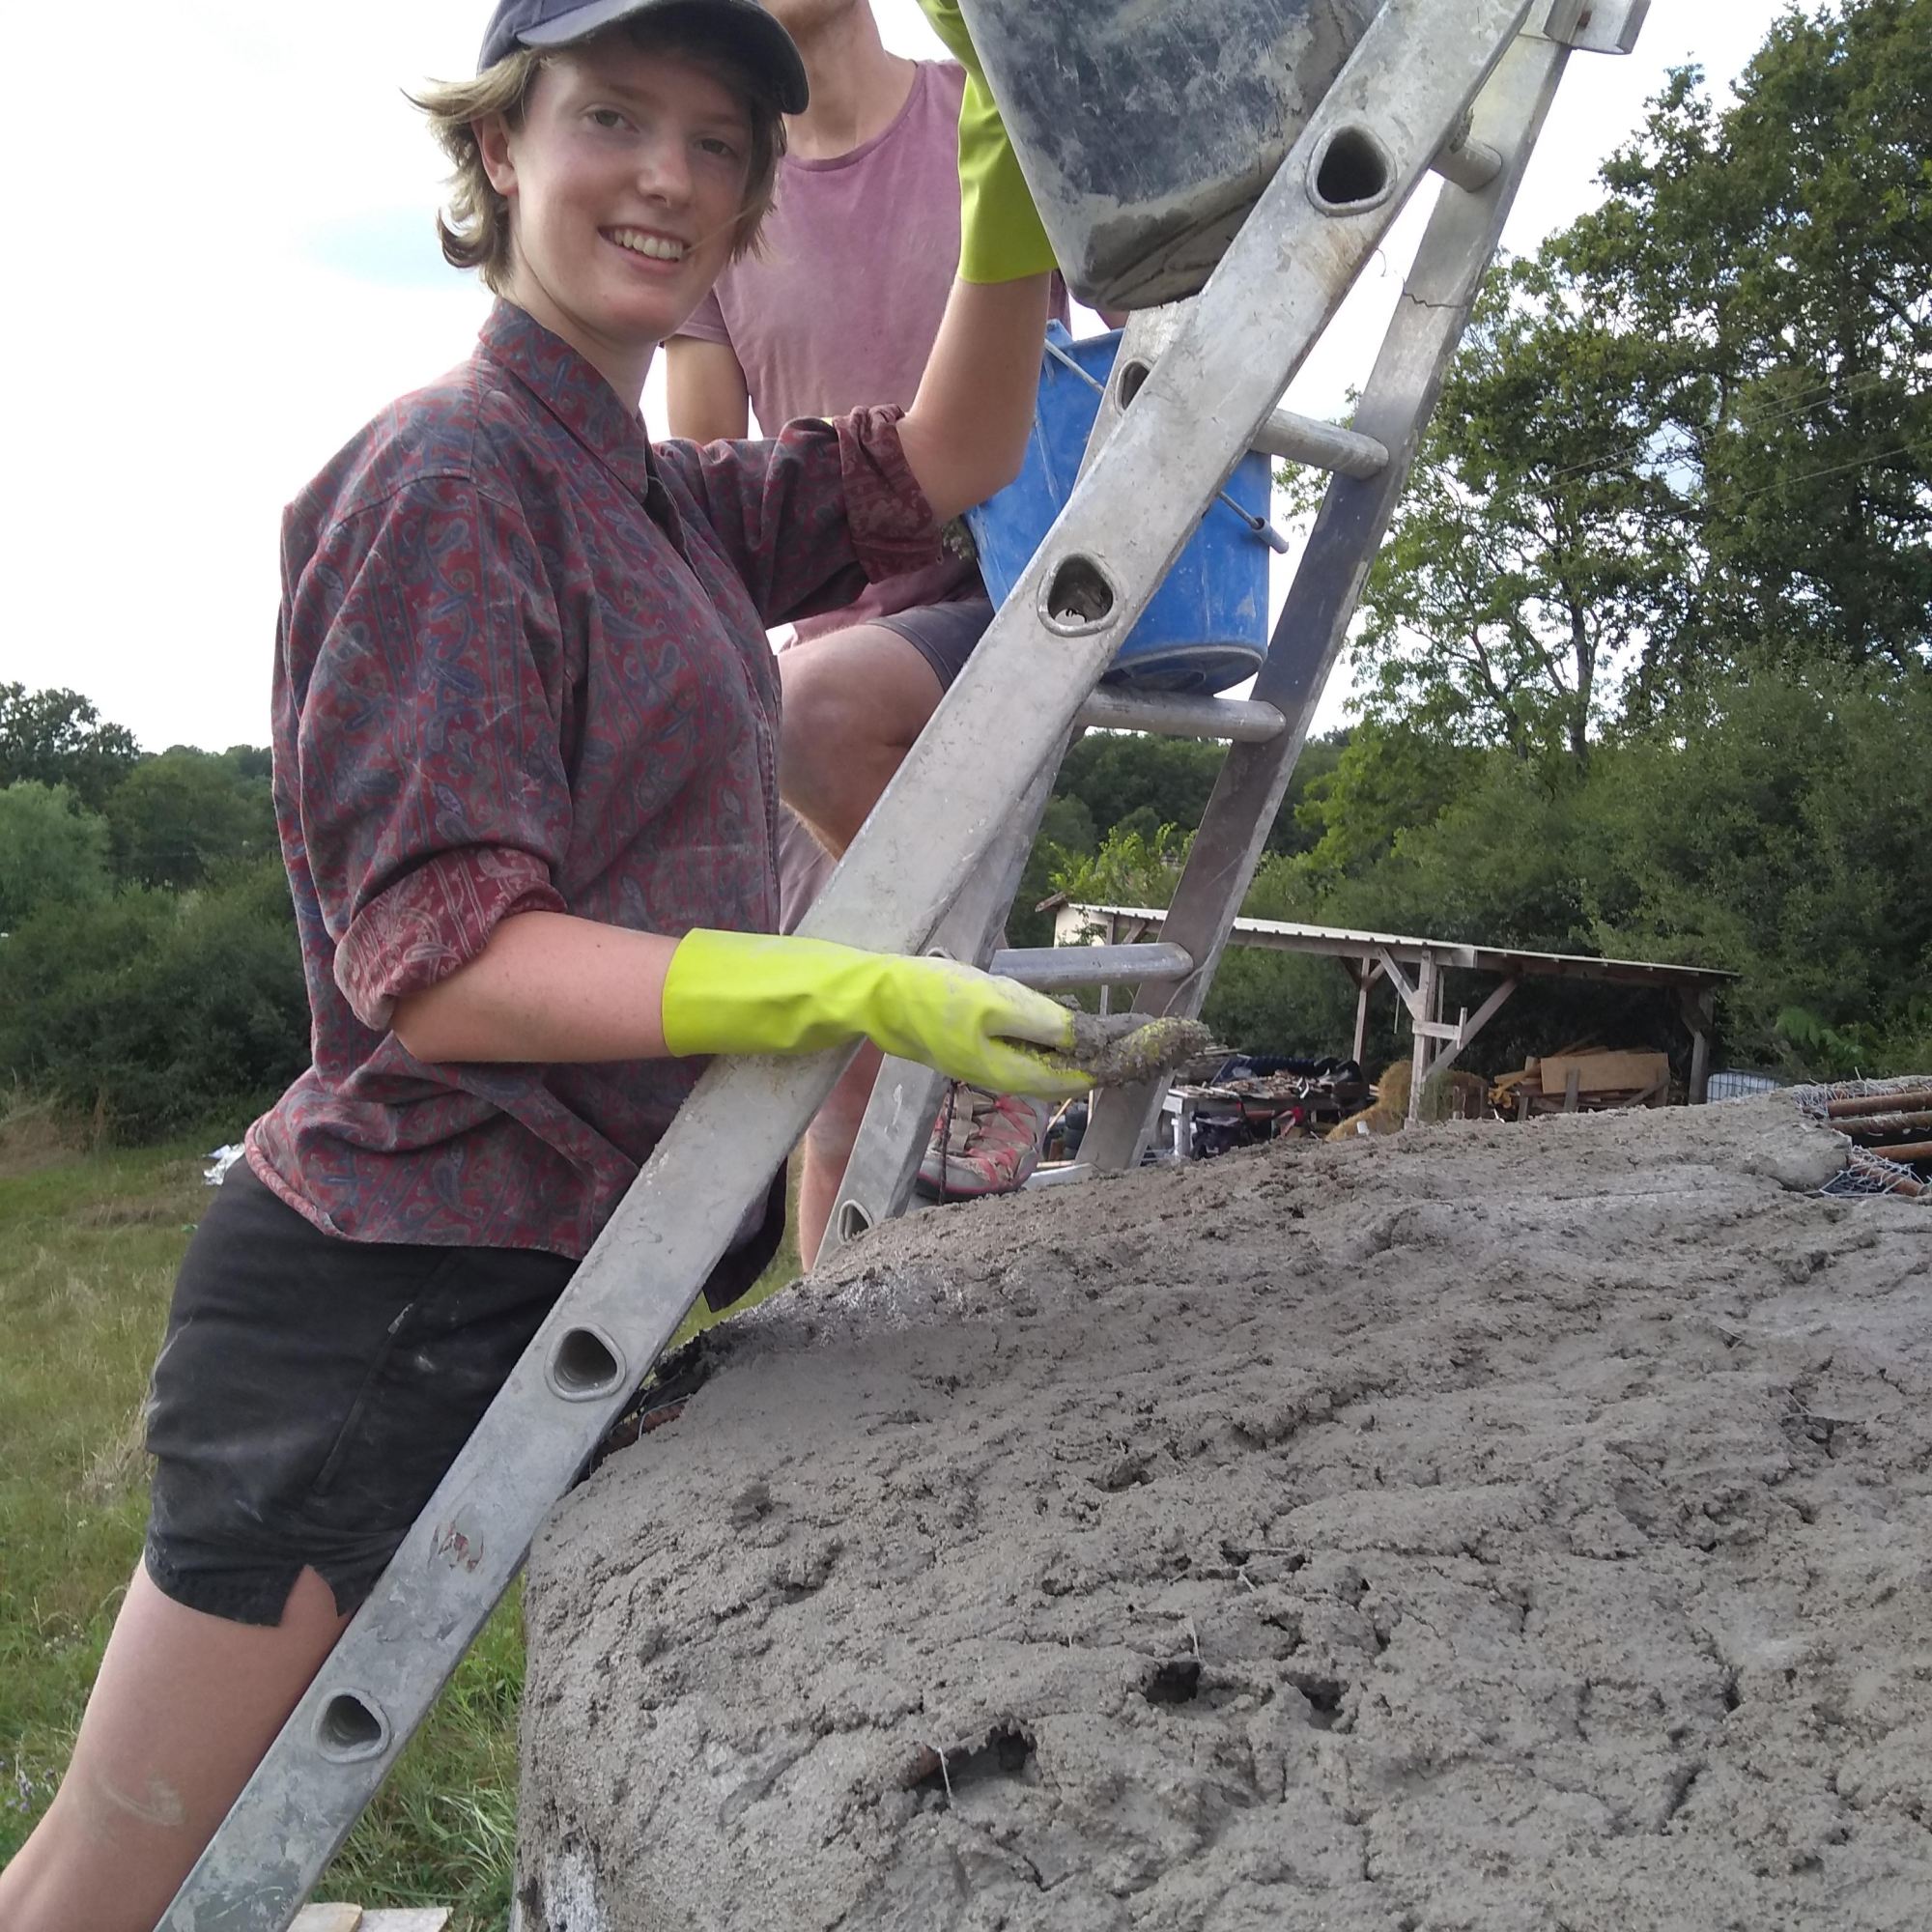
After the metal-work came the bulk of the cement. All mixed by hand (think rope work in the gym, except the rope is a giant sheet of industrial silage), it was quite the work out.
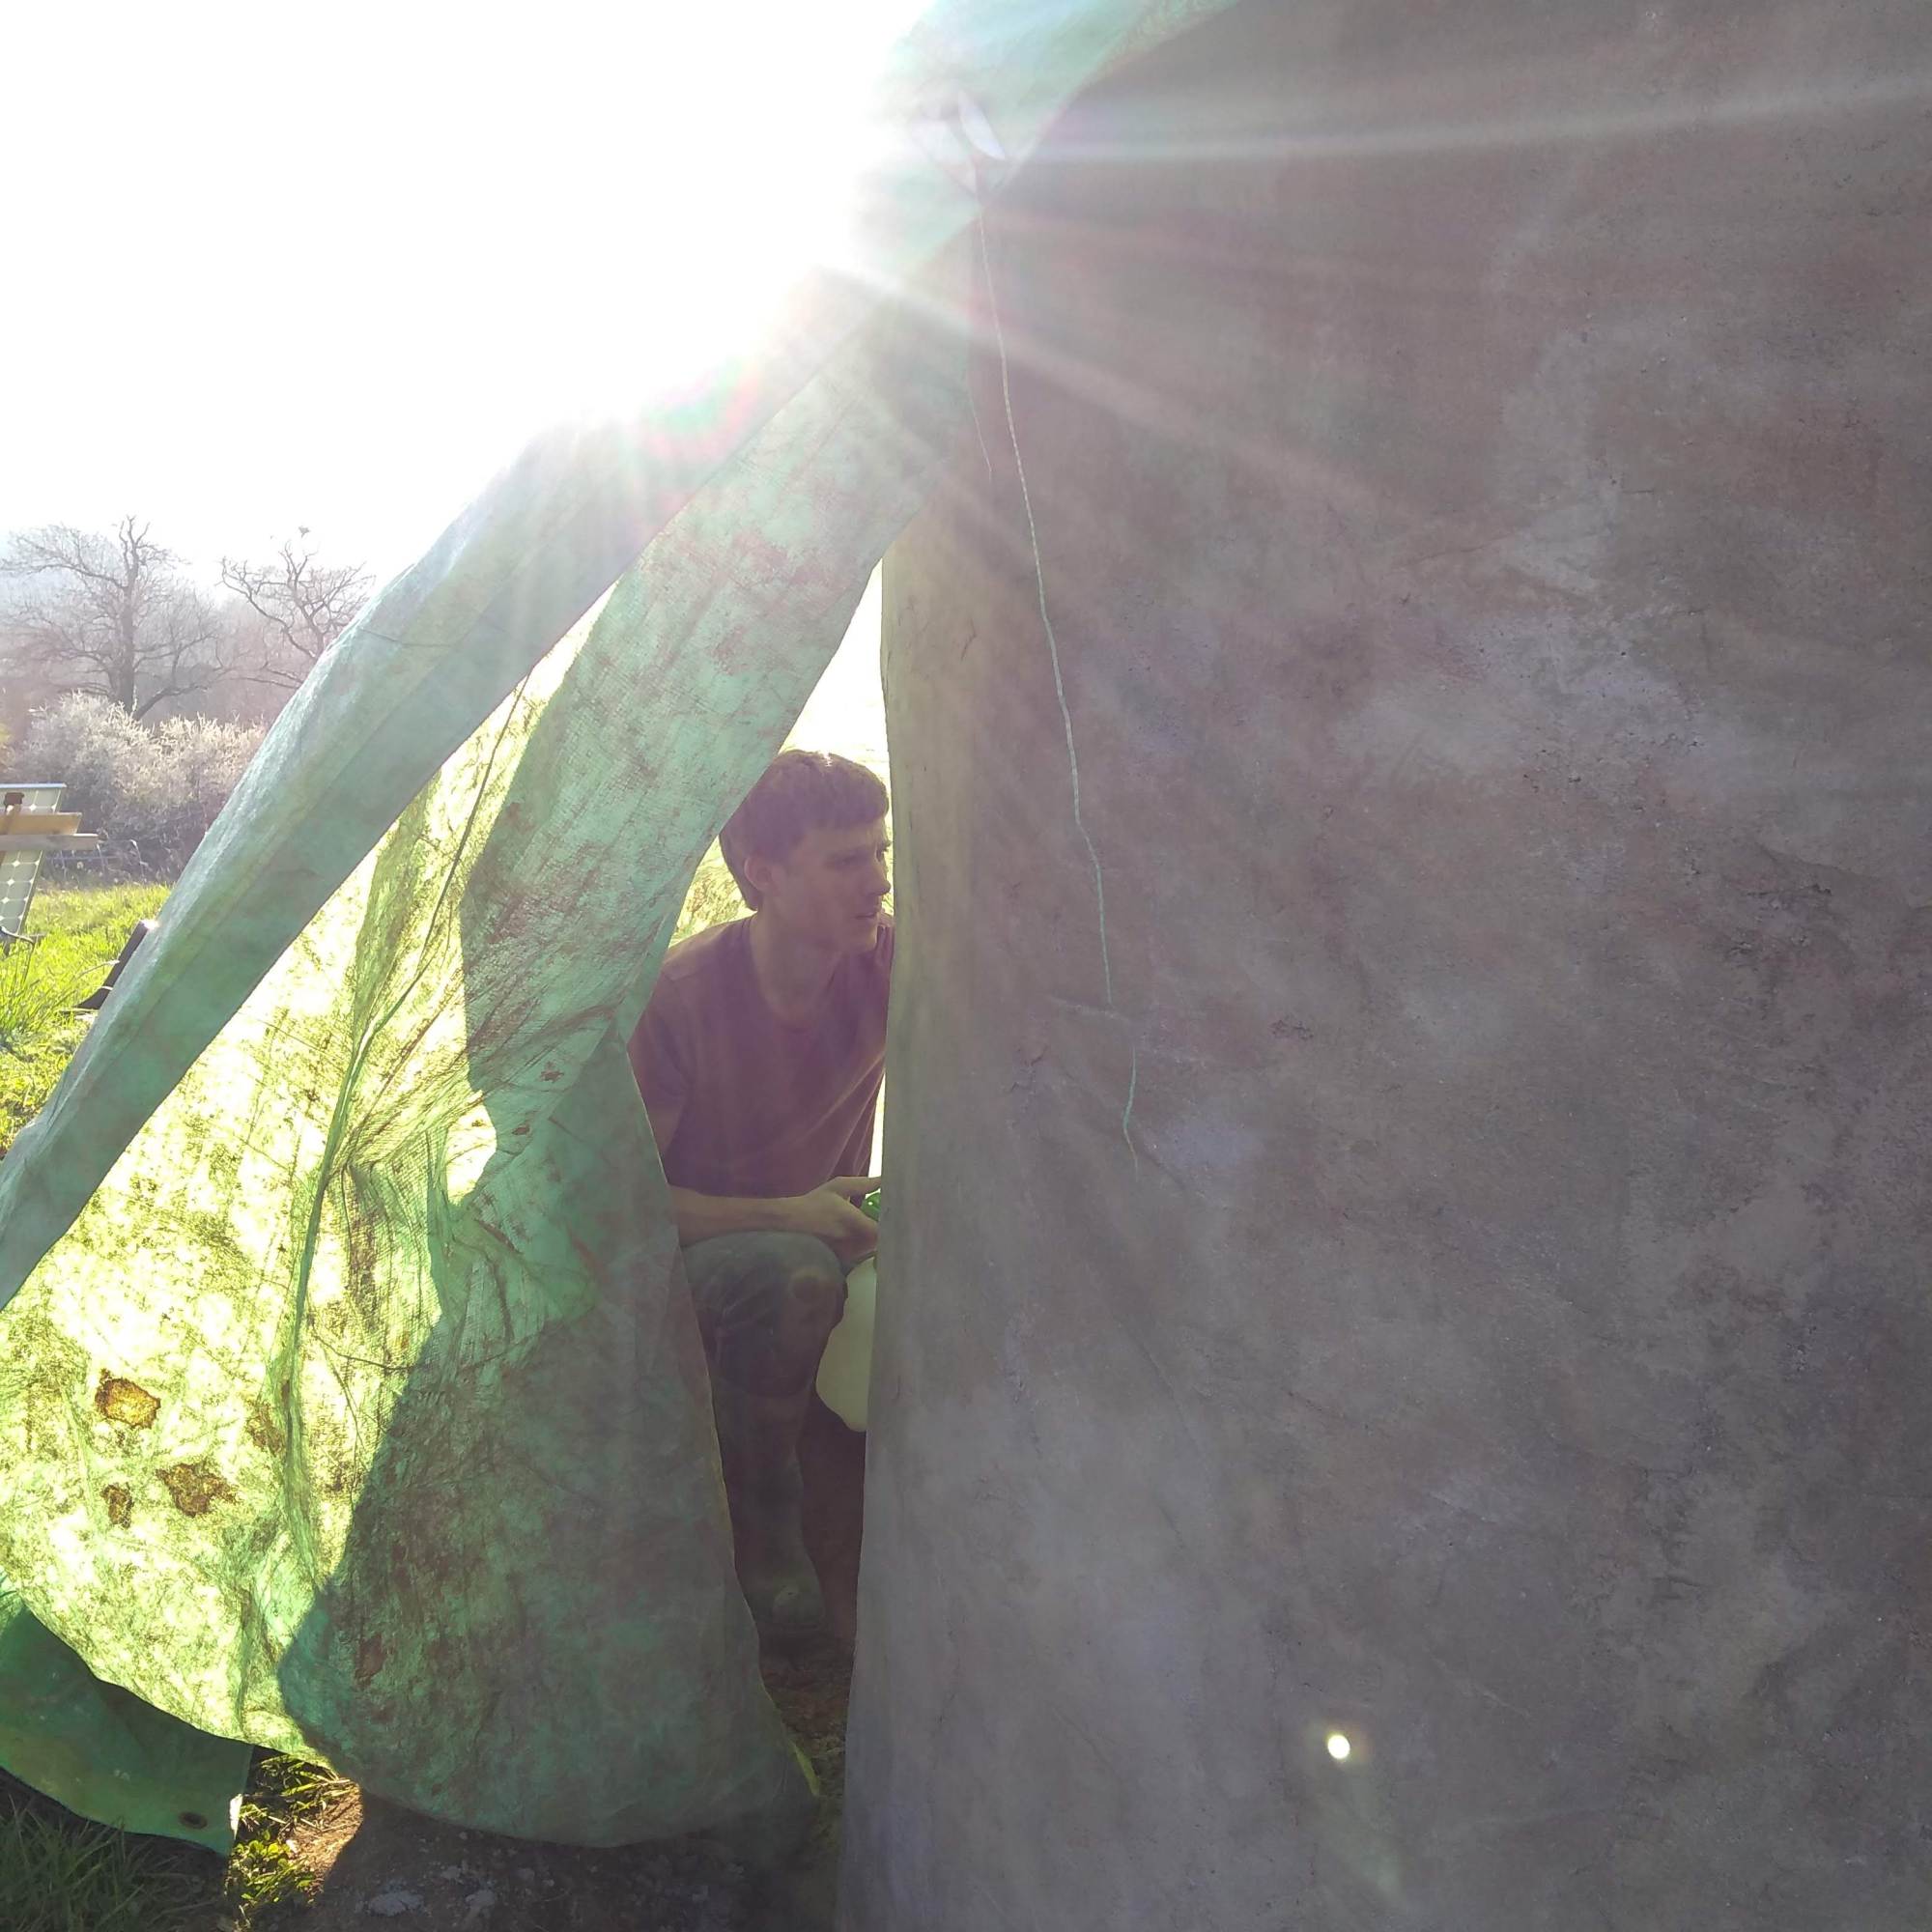
Accessing the tank had begun to be a bit more difficult by this point, enter a high makeshift step ladder. I would NOT recommend this, on Frank we left a gap in the wall for us to get in and out, which was finished only once the rest of the tank was complete. Much safer, if not as fun for the cat.
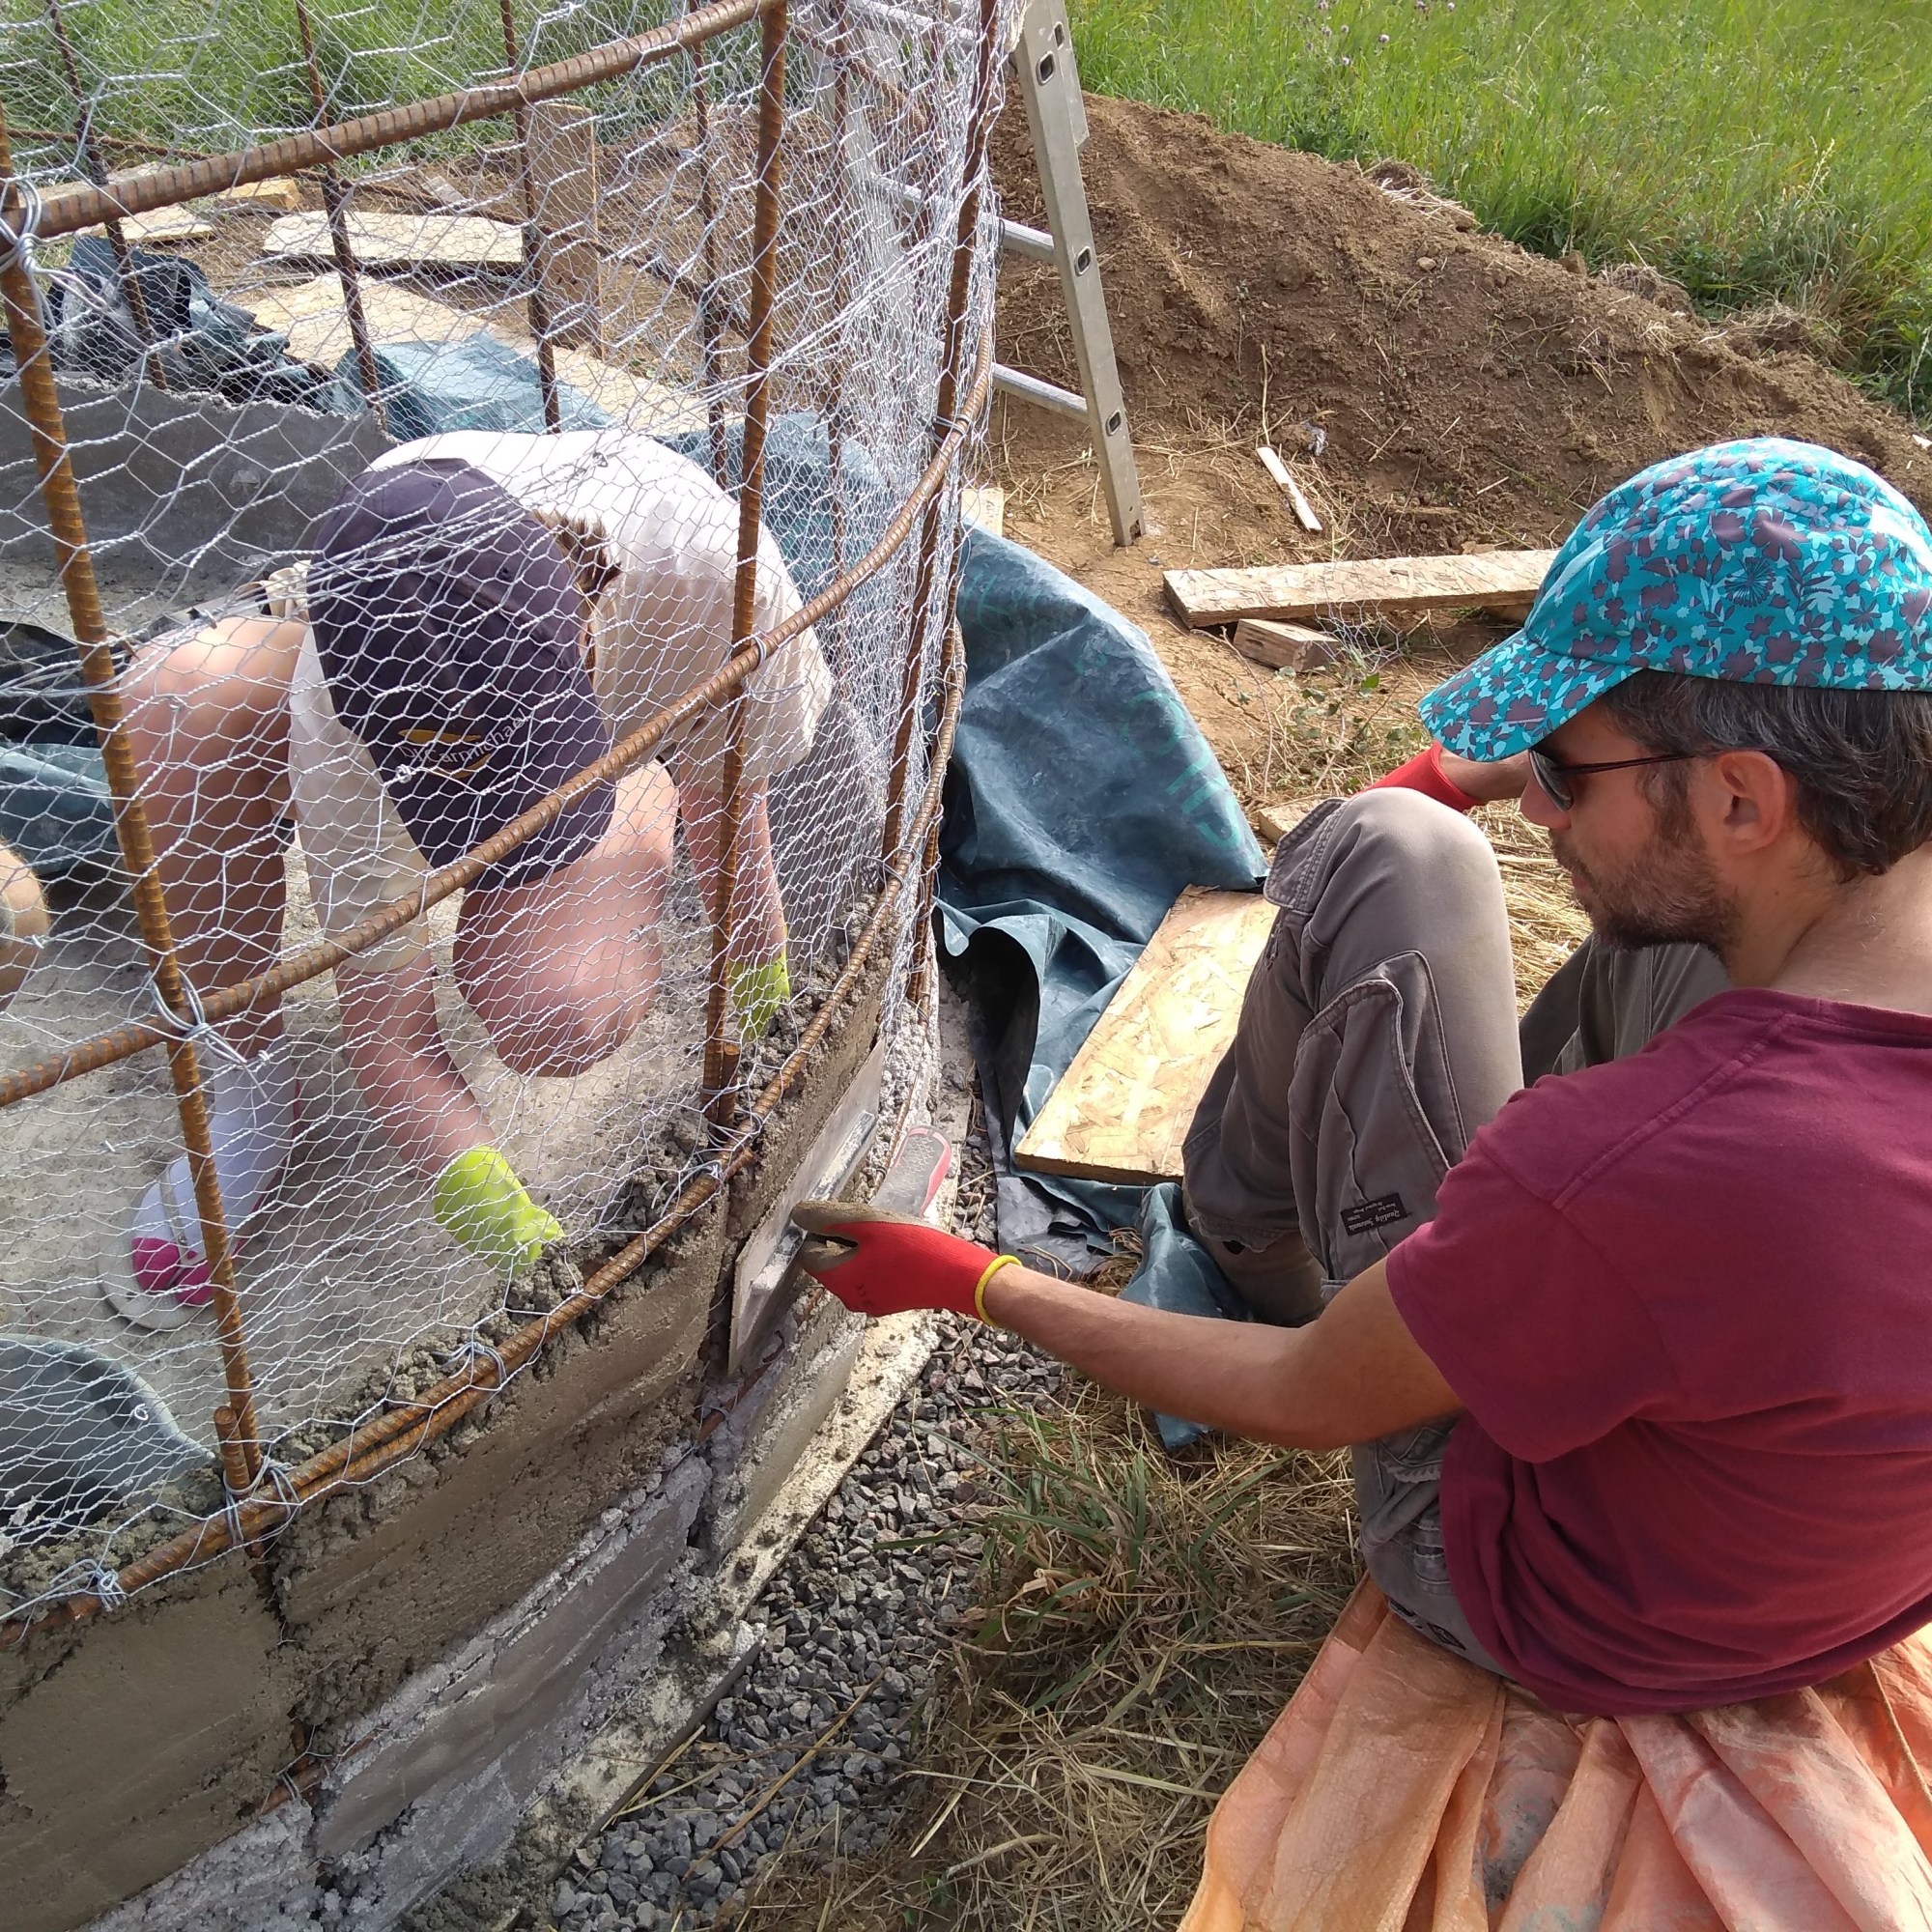
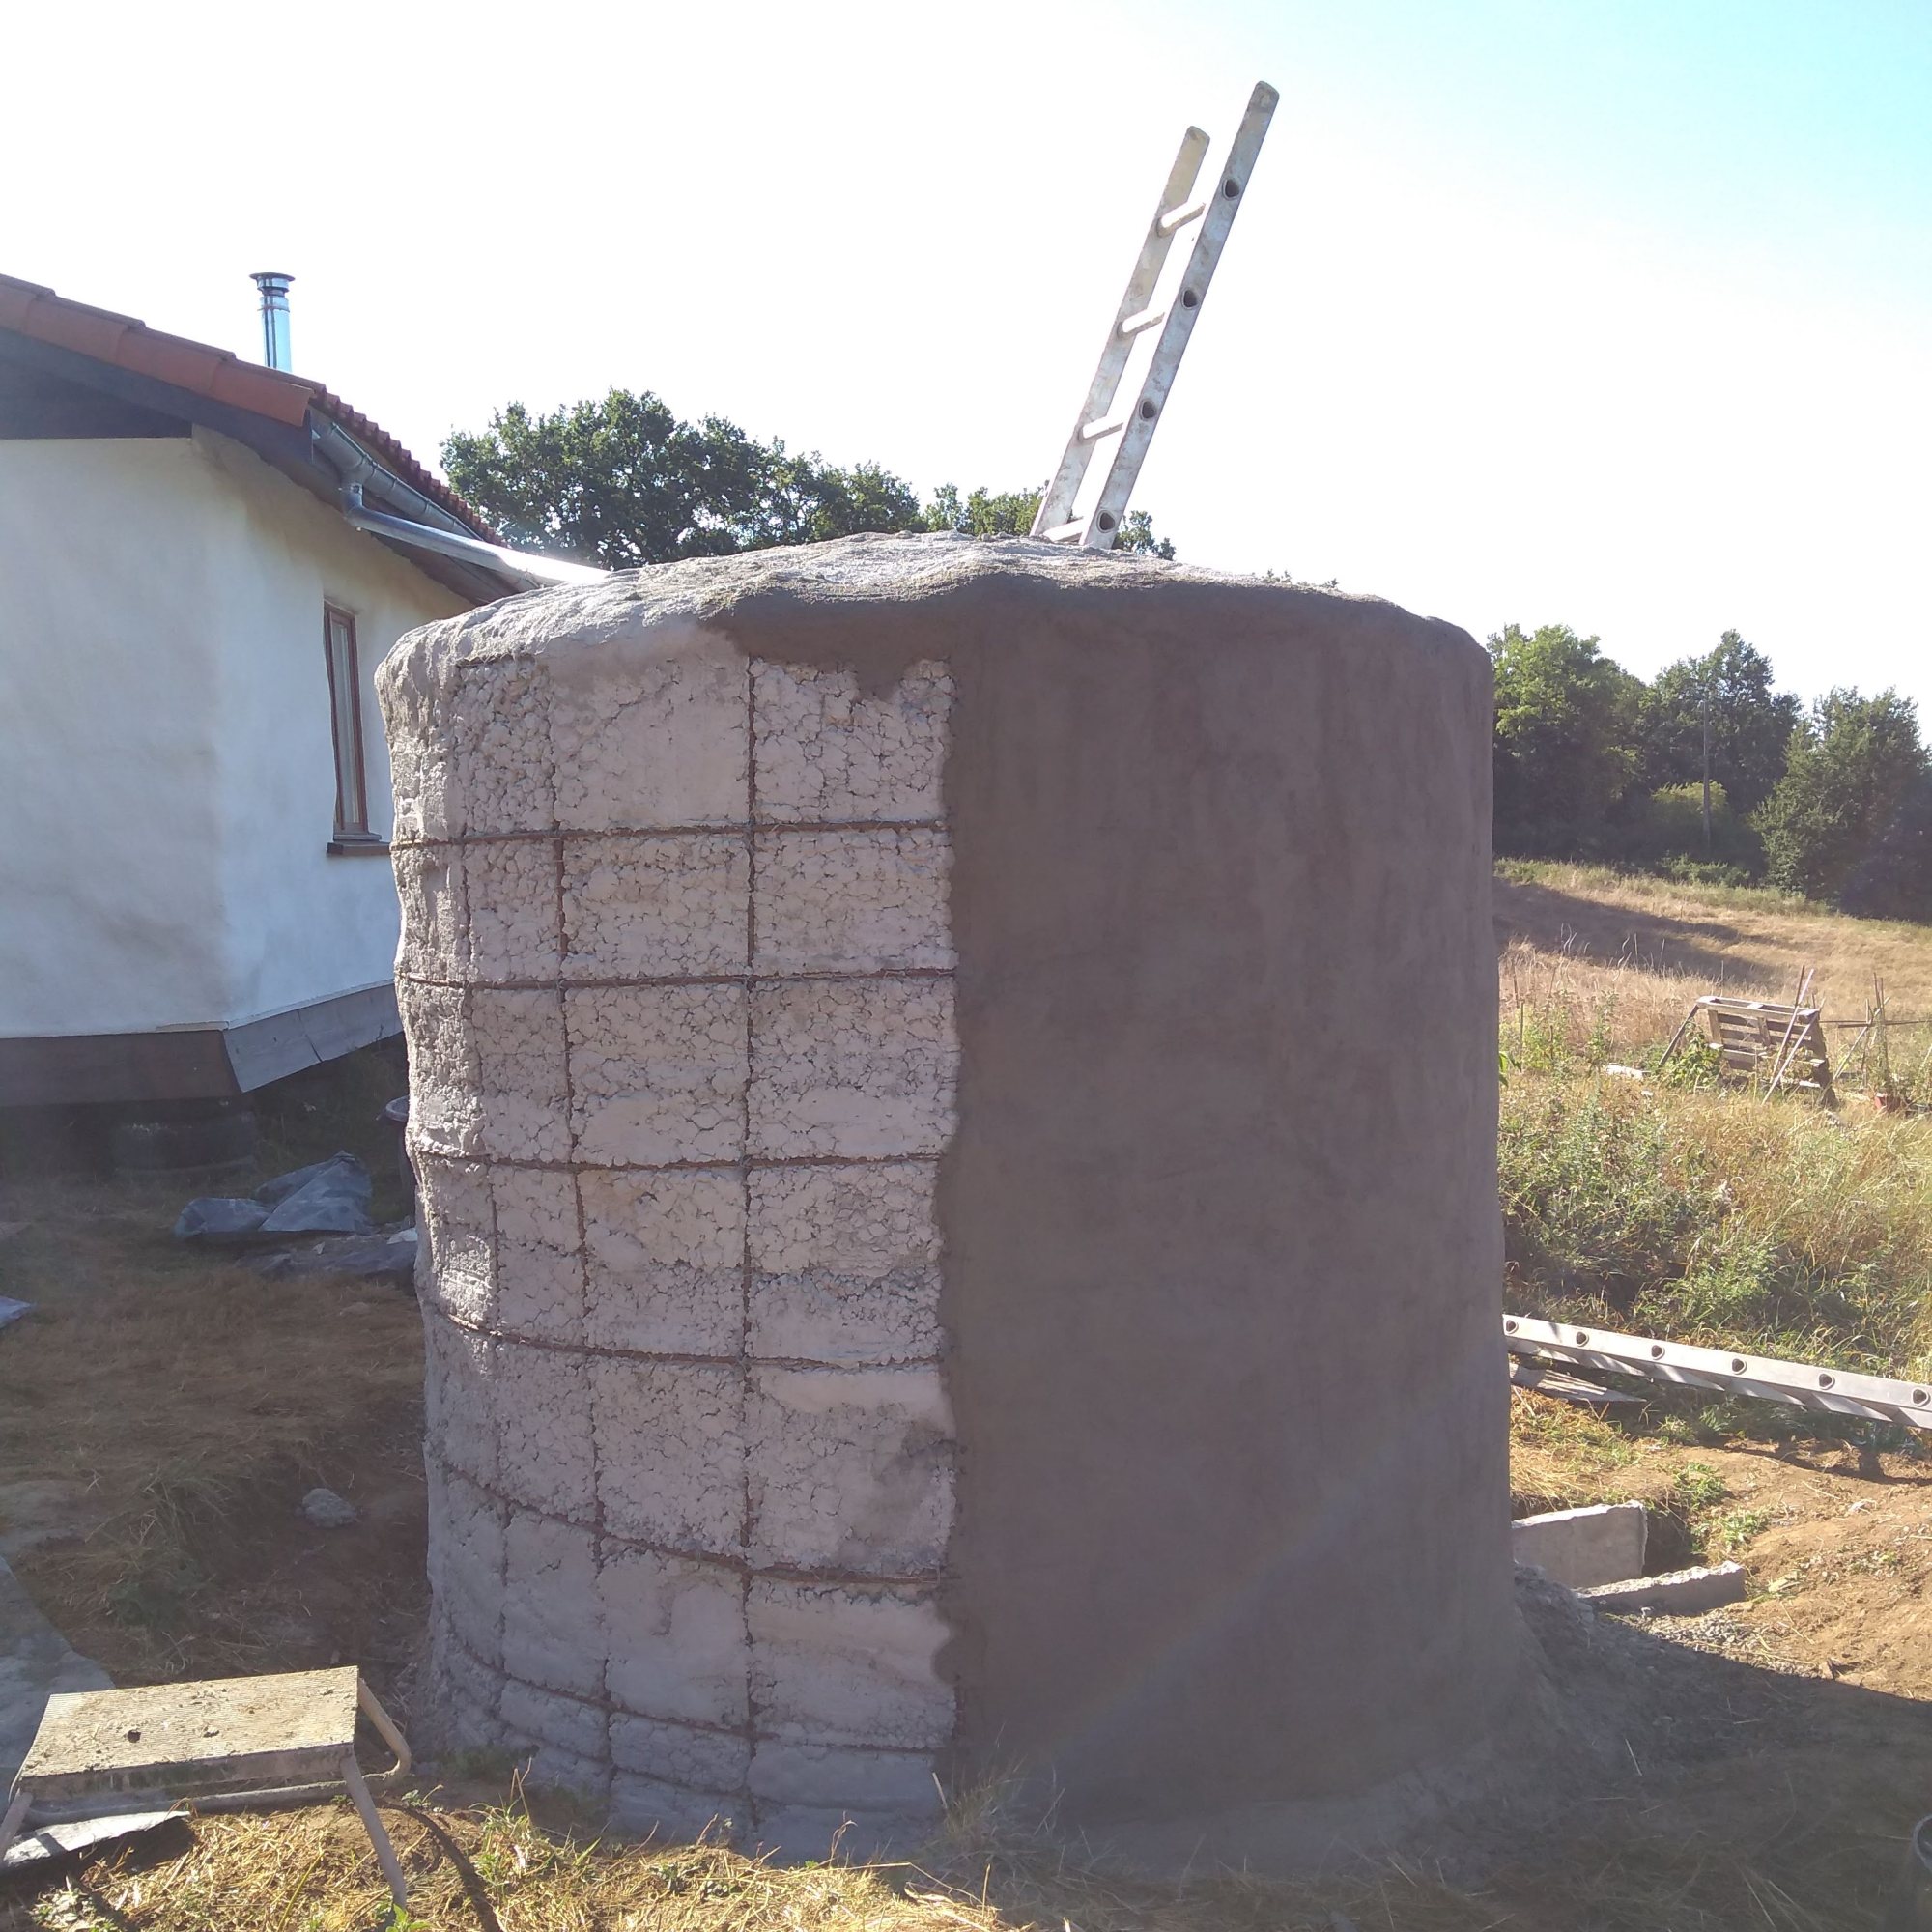
Applying the cement was a bit of an art form. It requires two people, one applying and the other holding two huge trowels against the chicken wire on the opposite side. This allows the applier to apply with pressure and stops it falling through the other side, most of the time.
It required one layer like this on the inside, then another on the outside. Once these two layers were on, the process was repeated inside to create three layers. Cement paste was then painted onto both sides to help fill and hairline cracks or gaps.

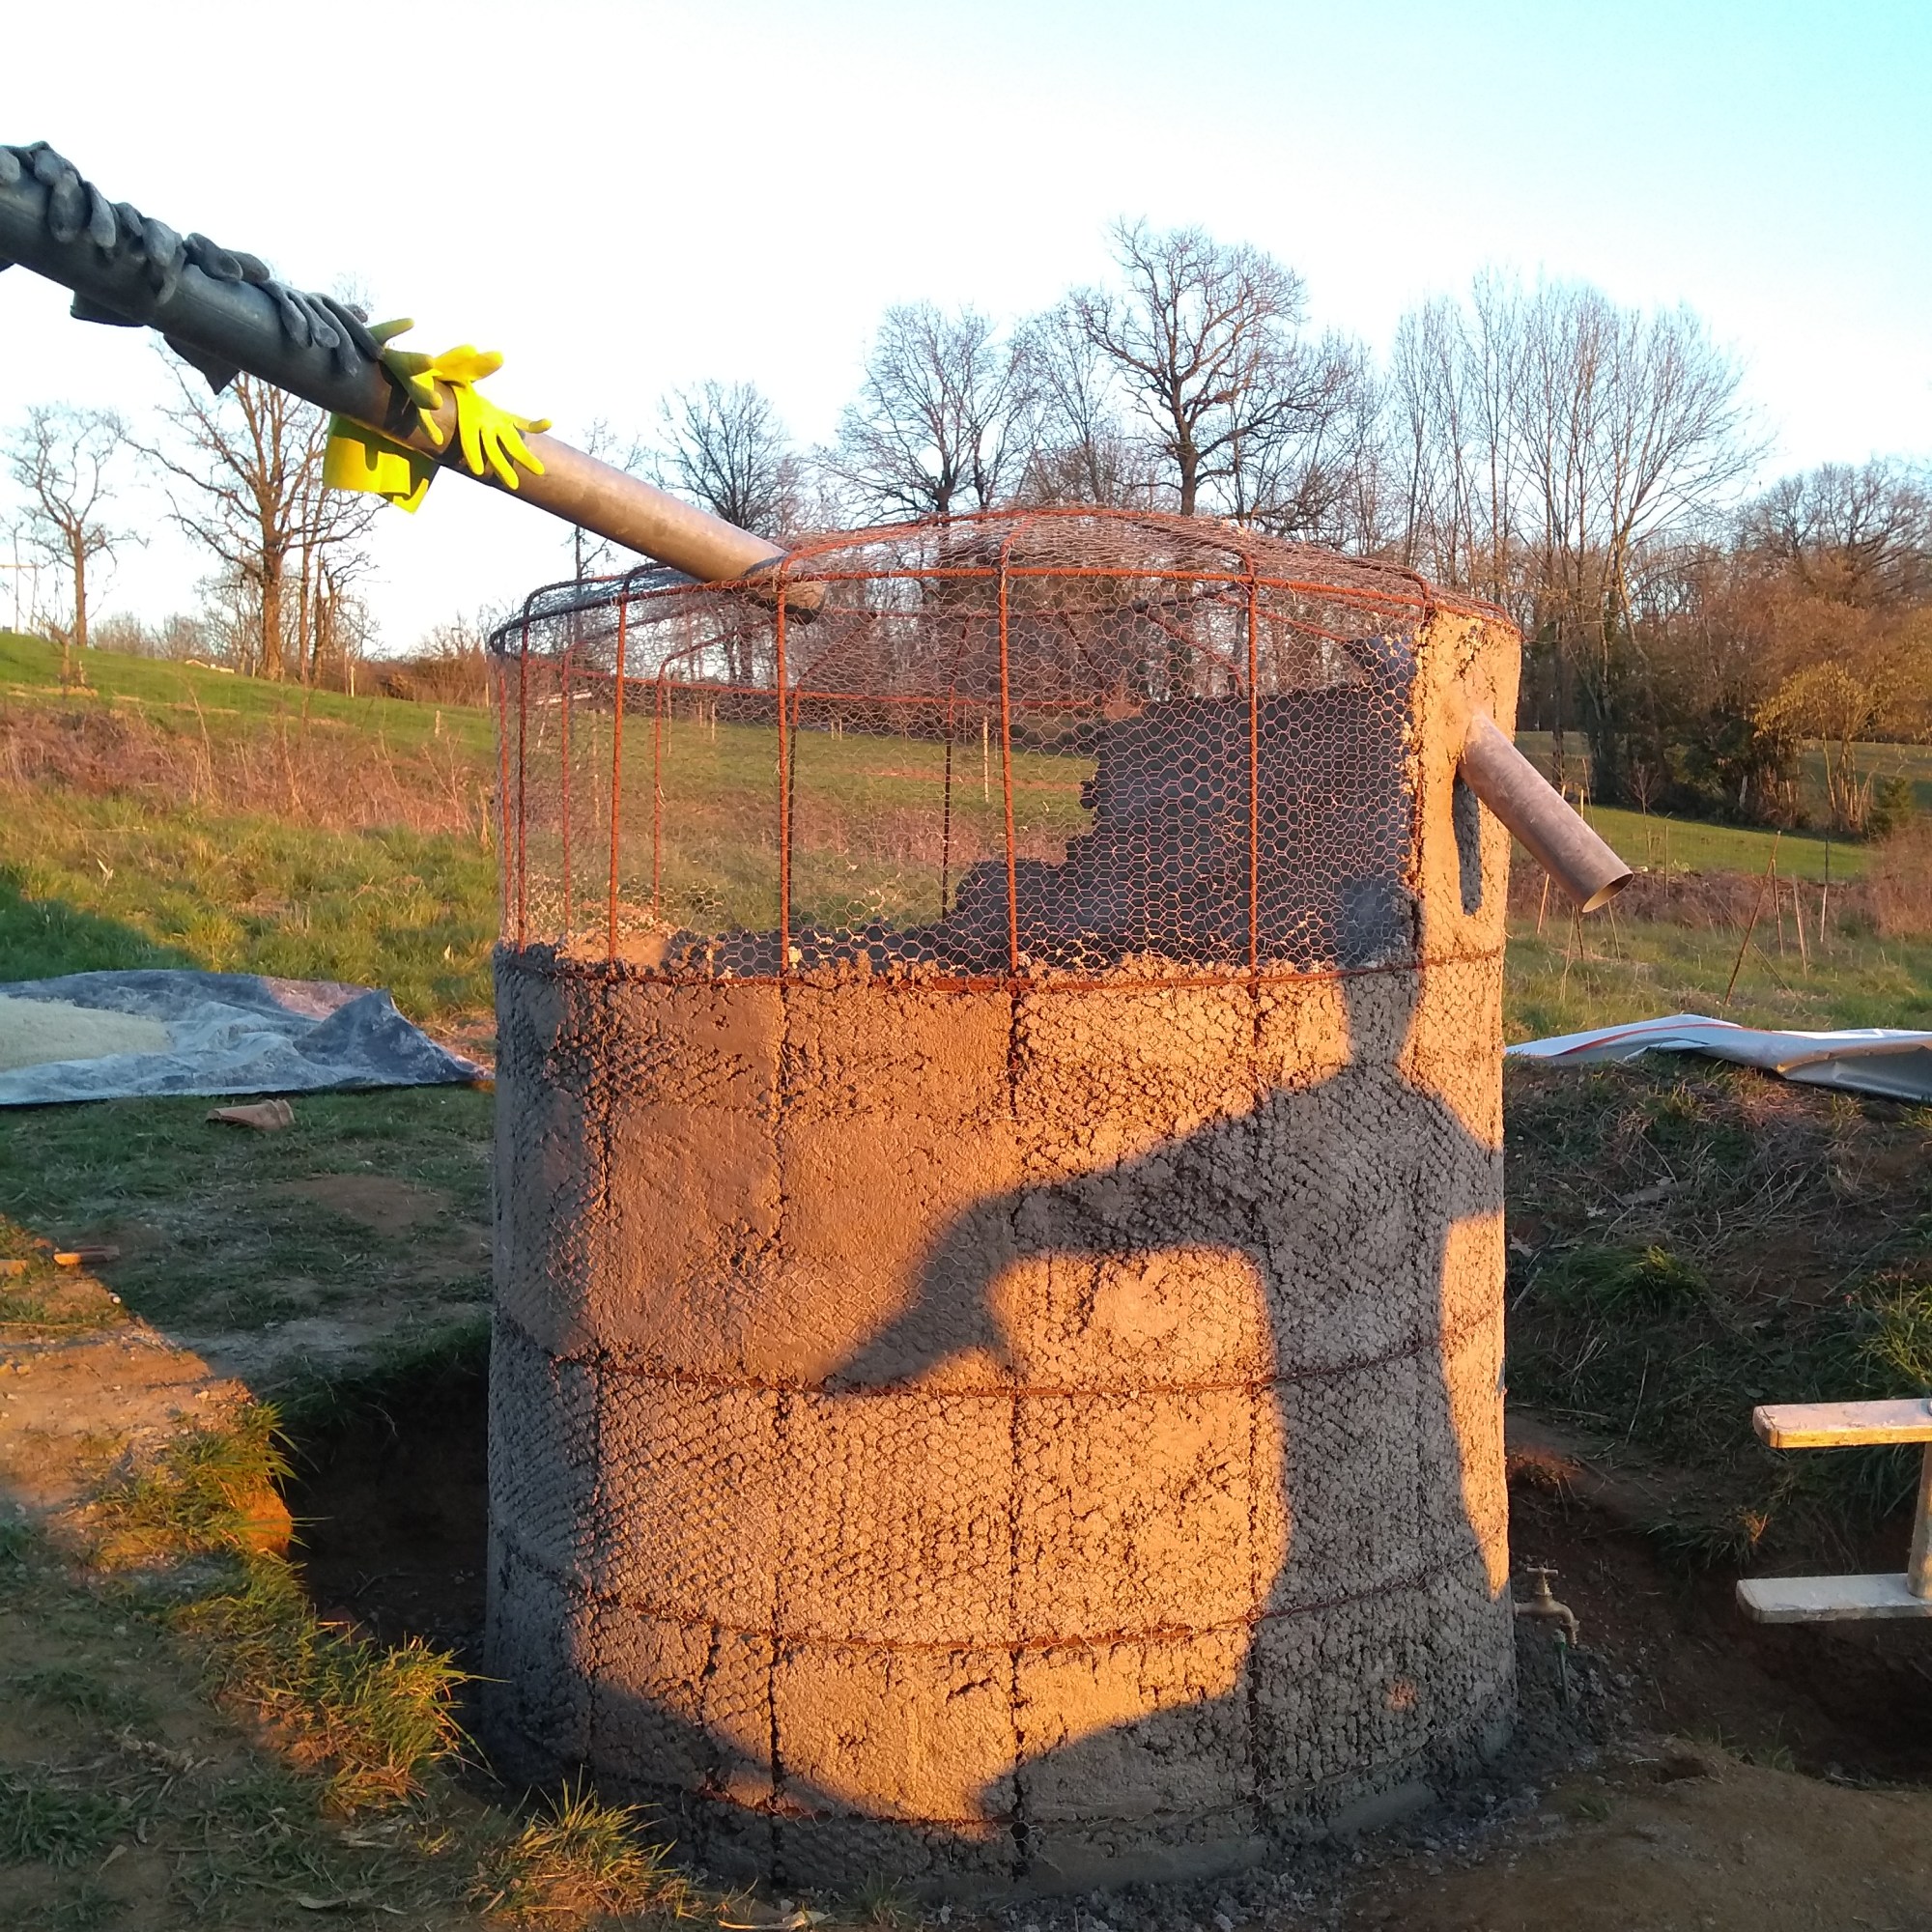
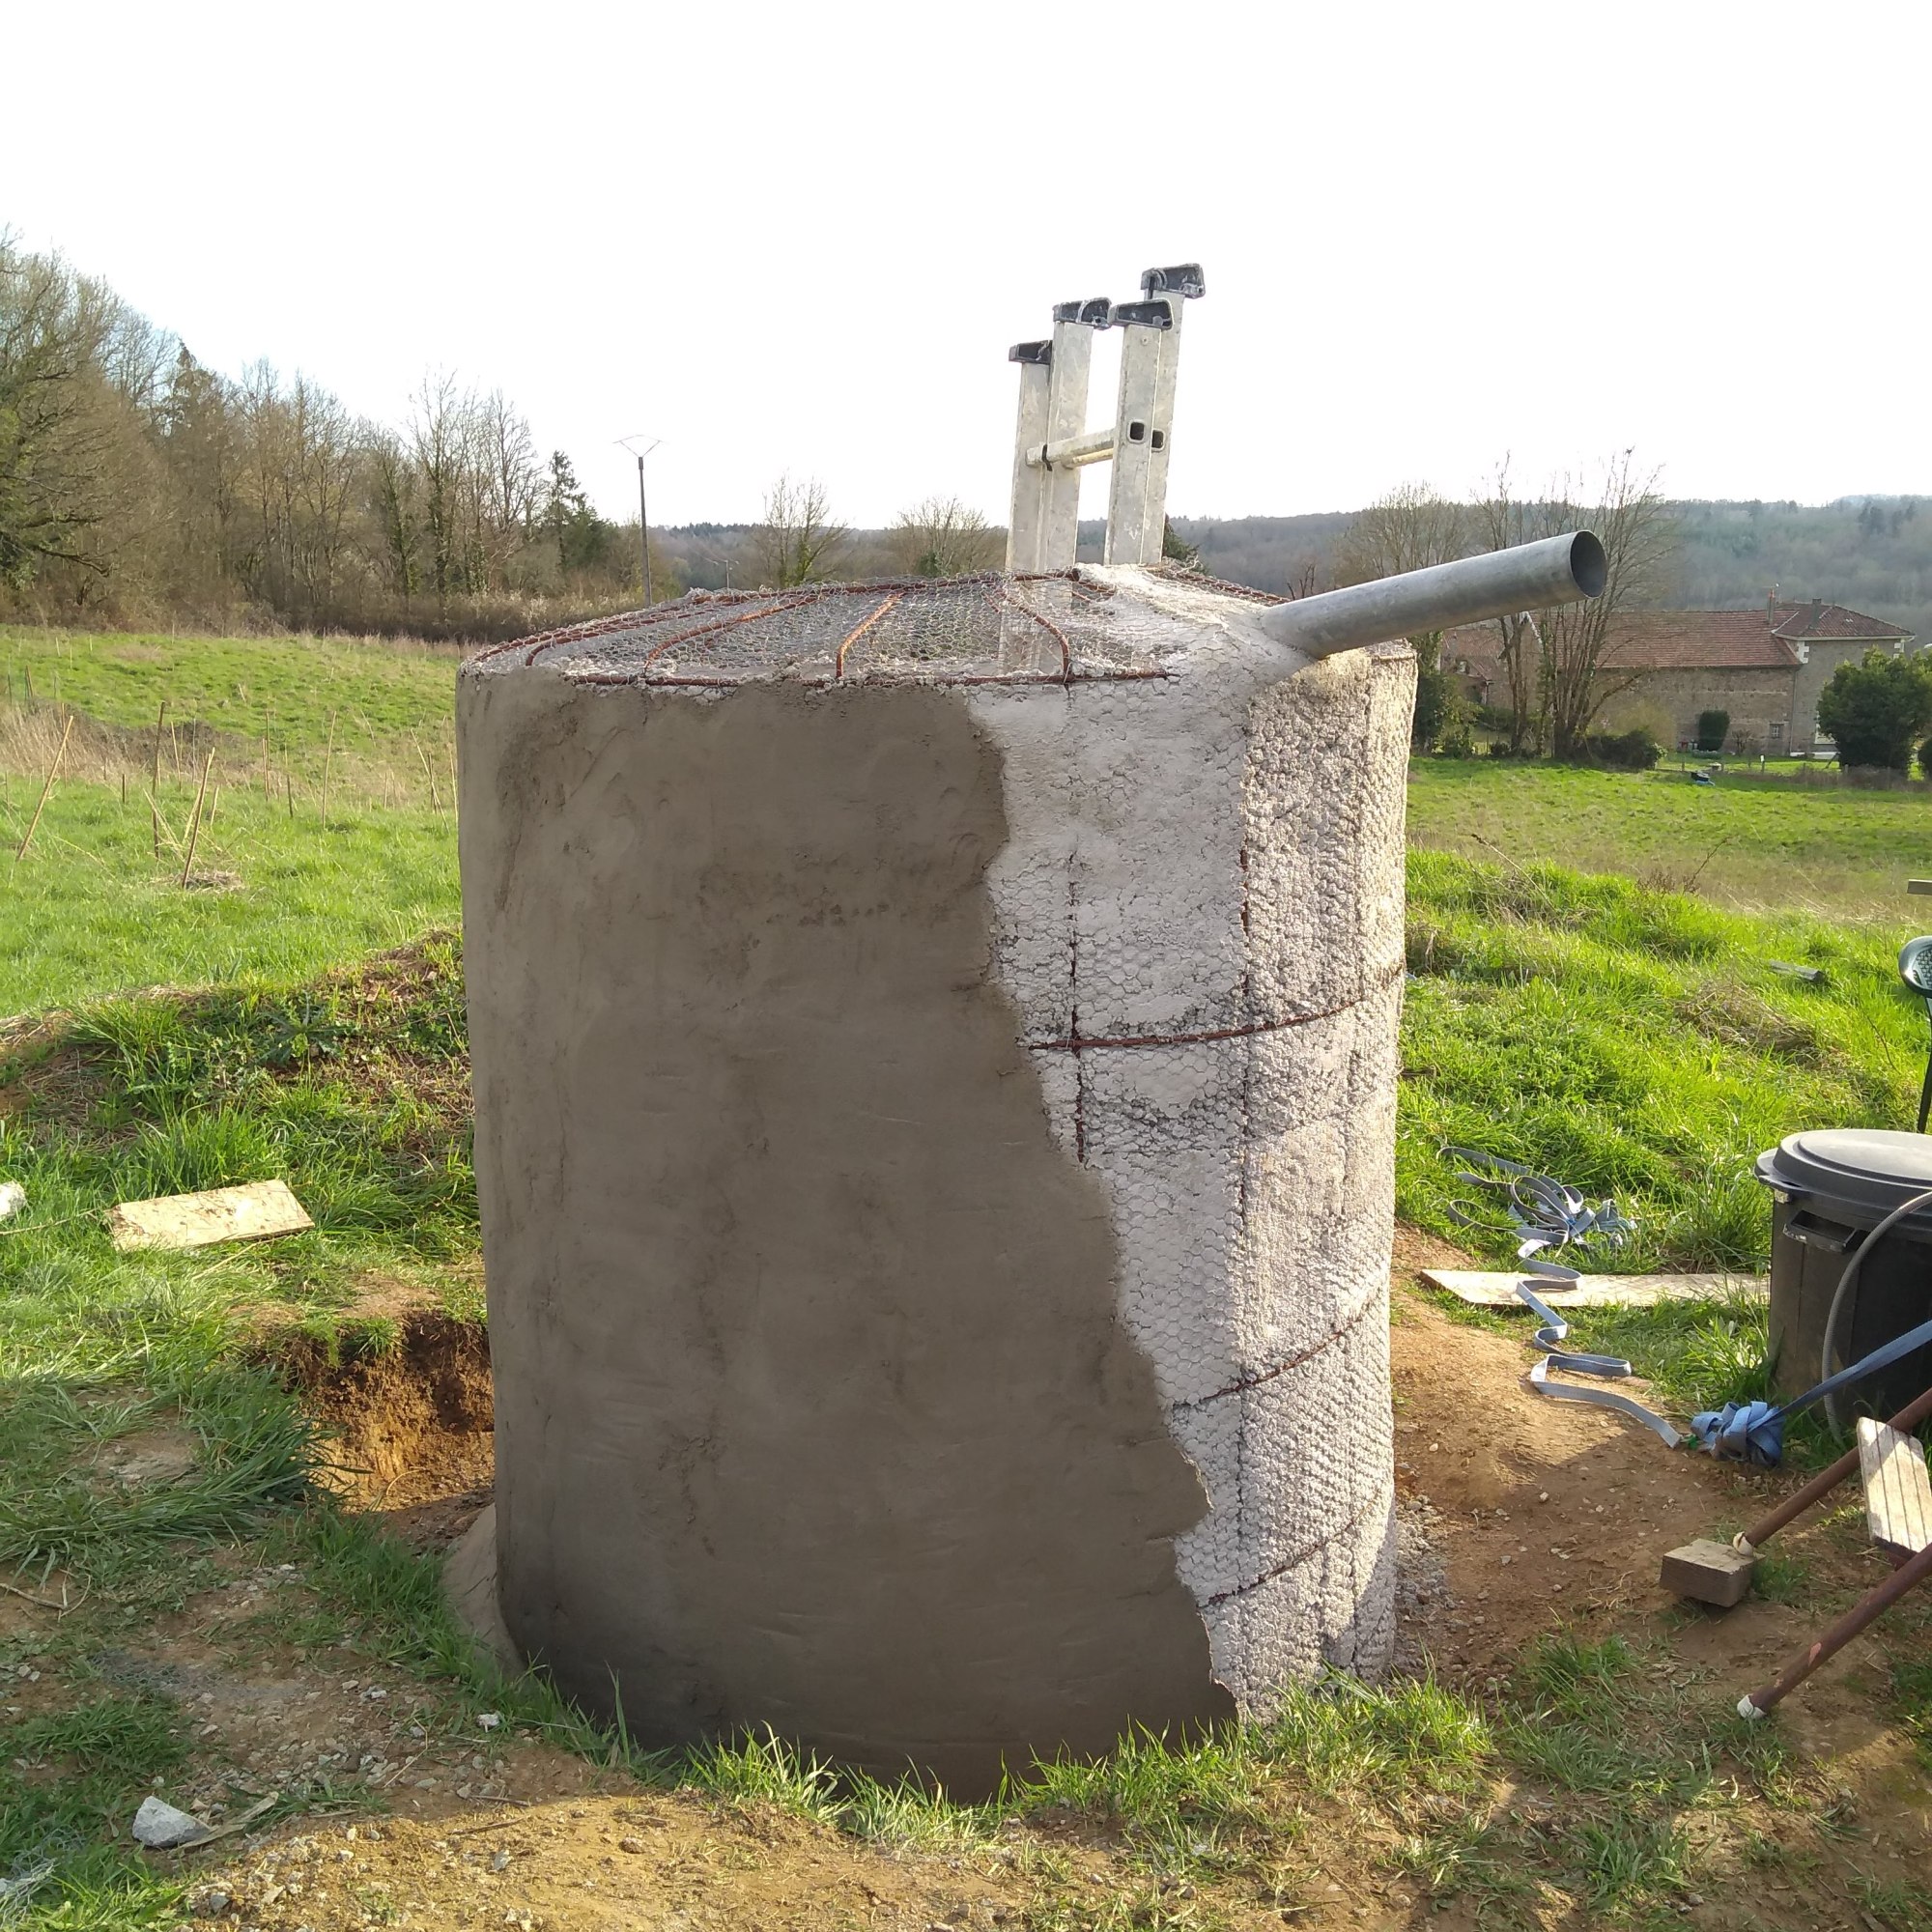
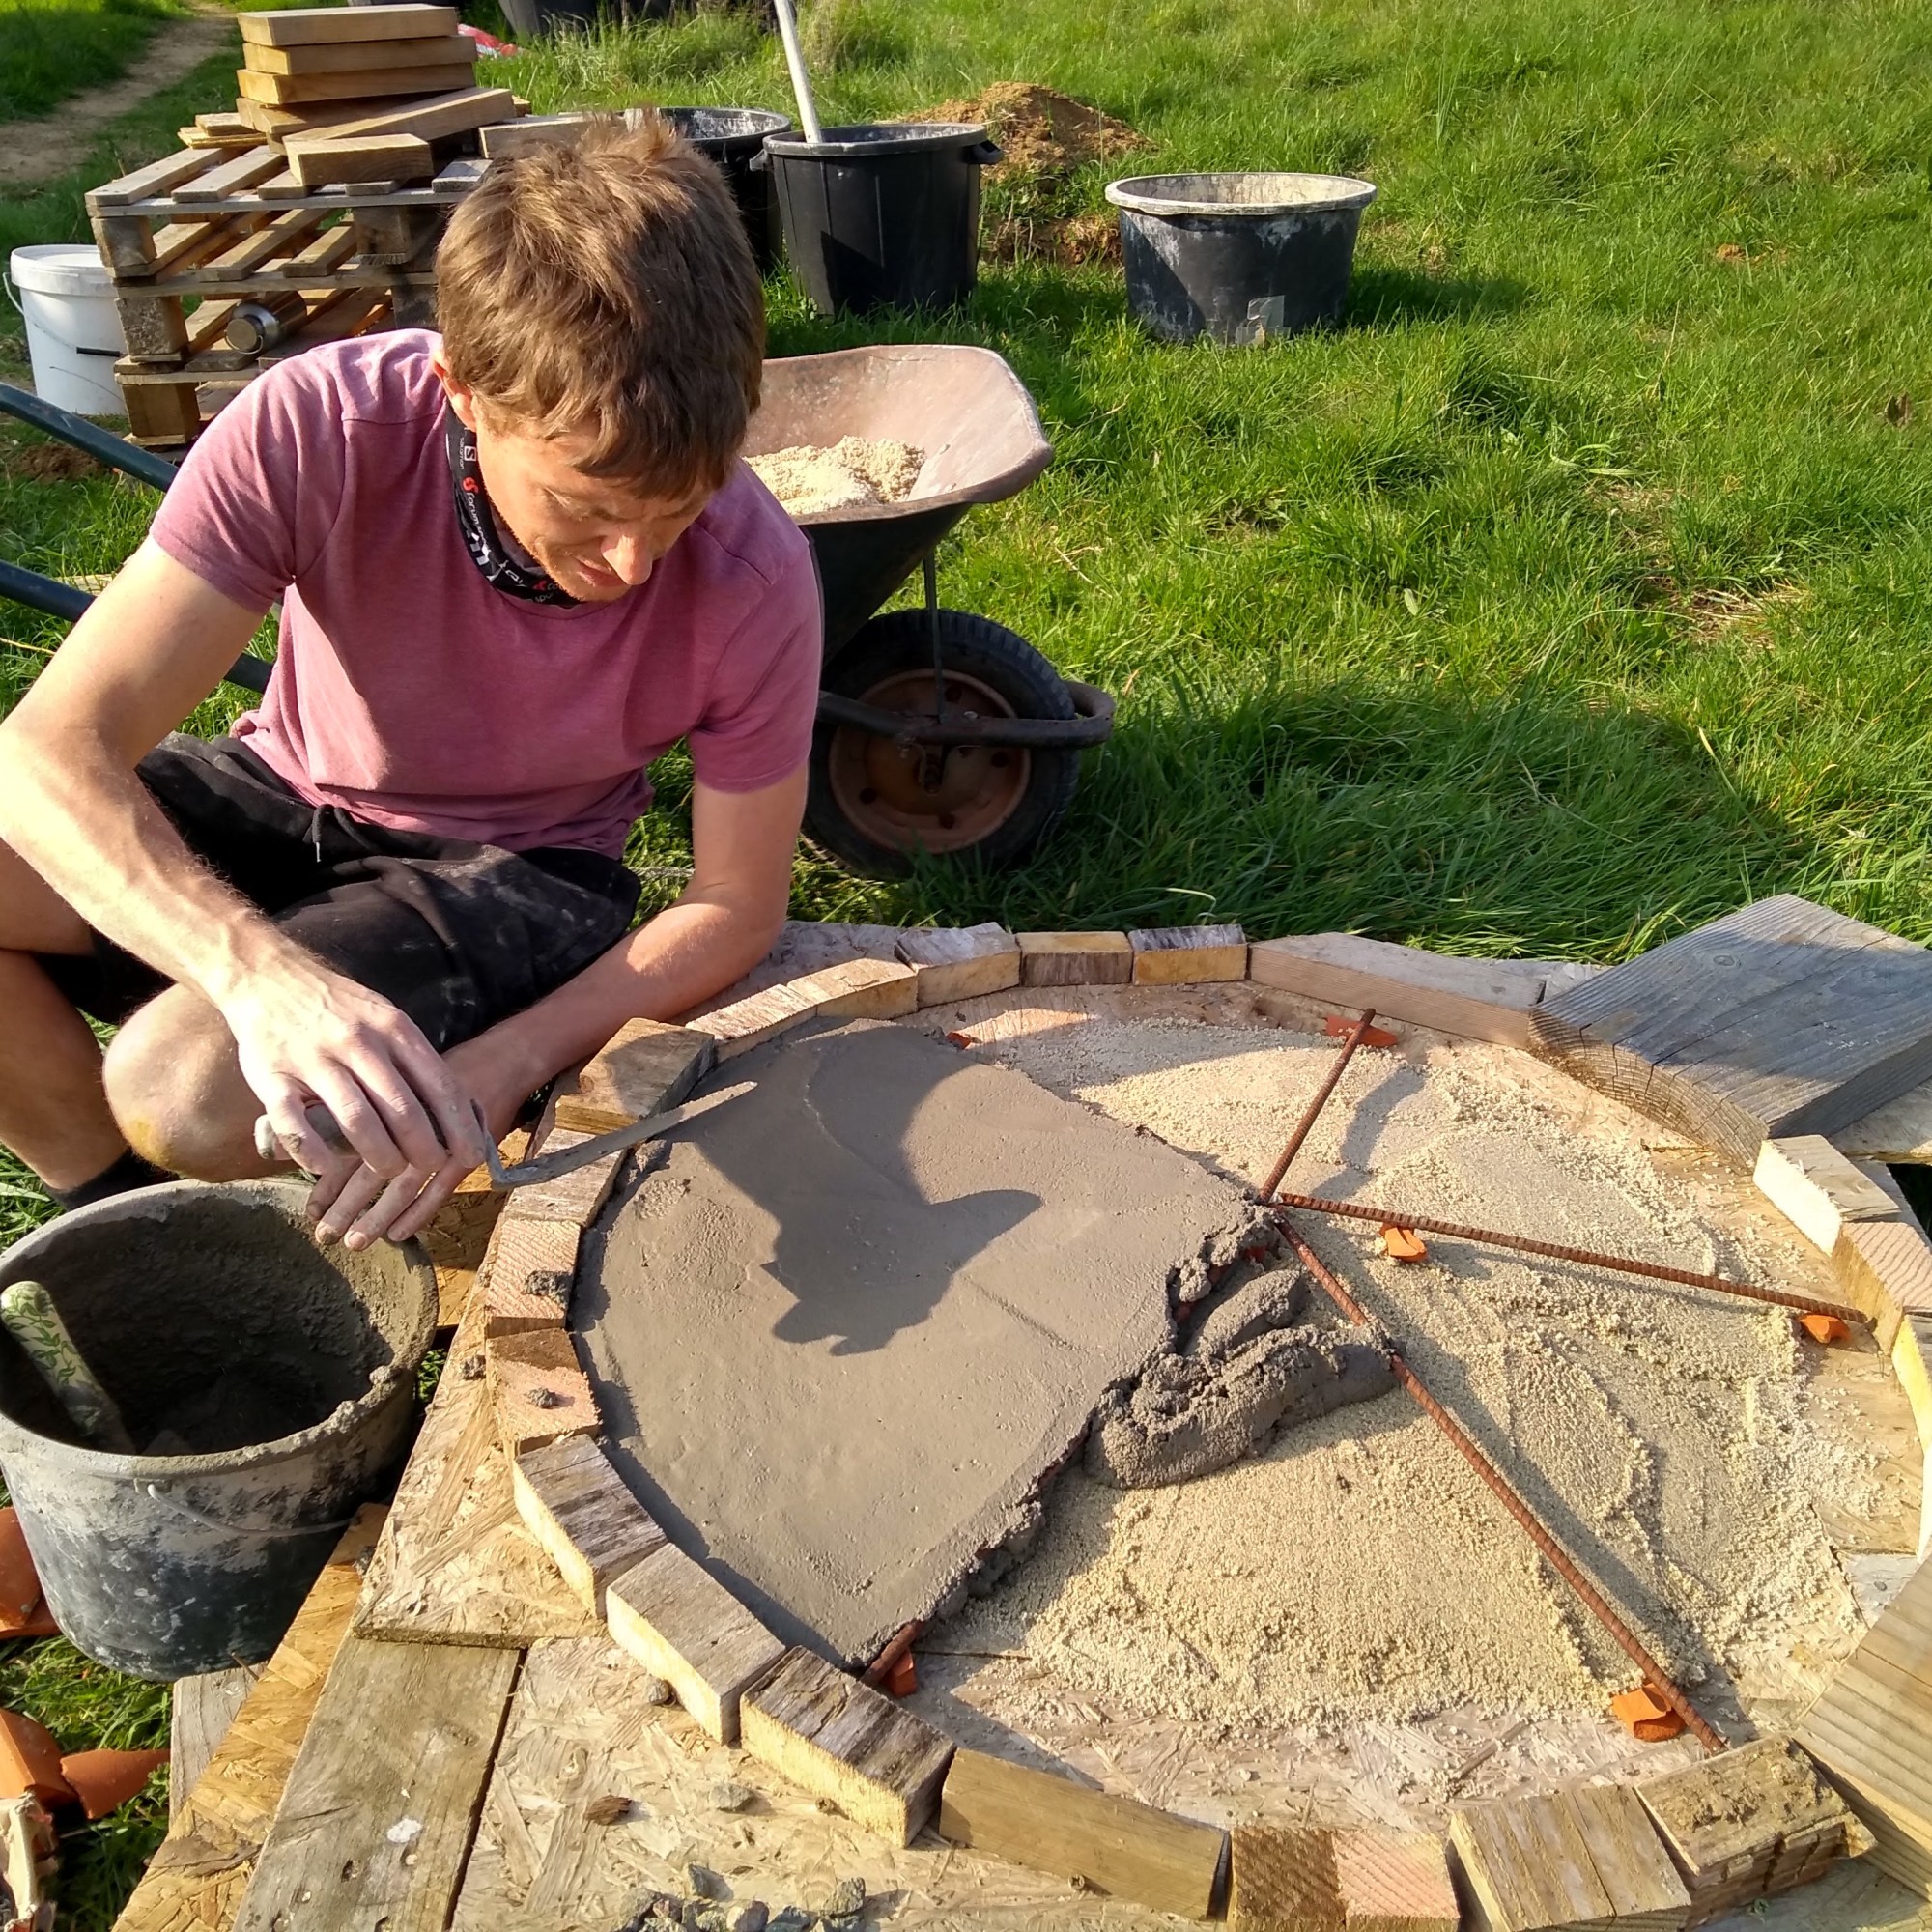
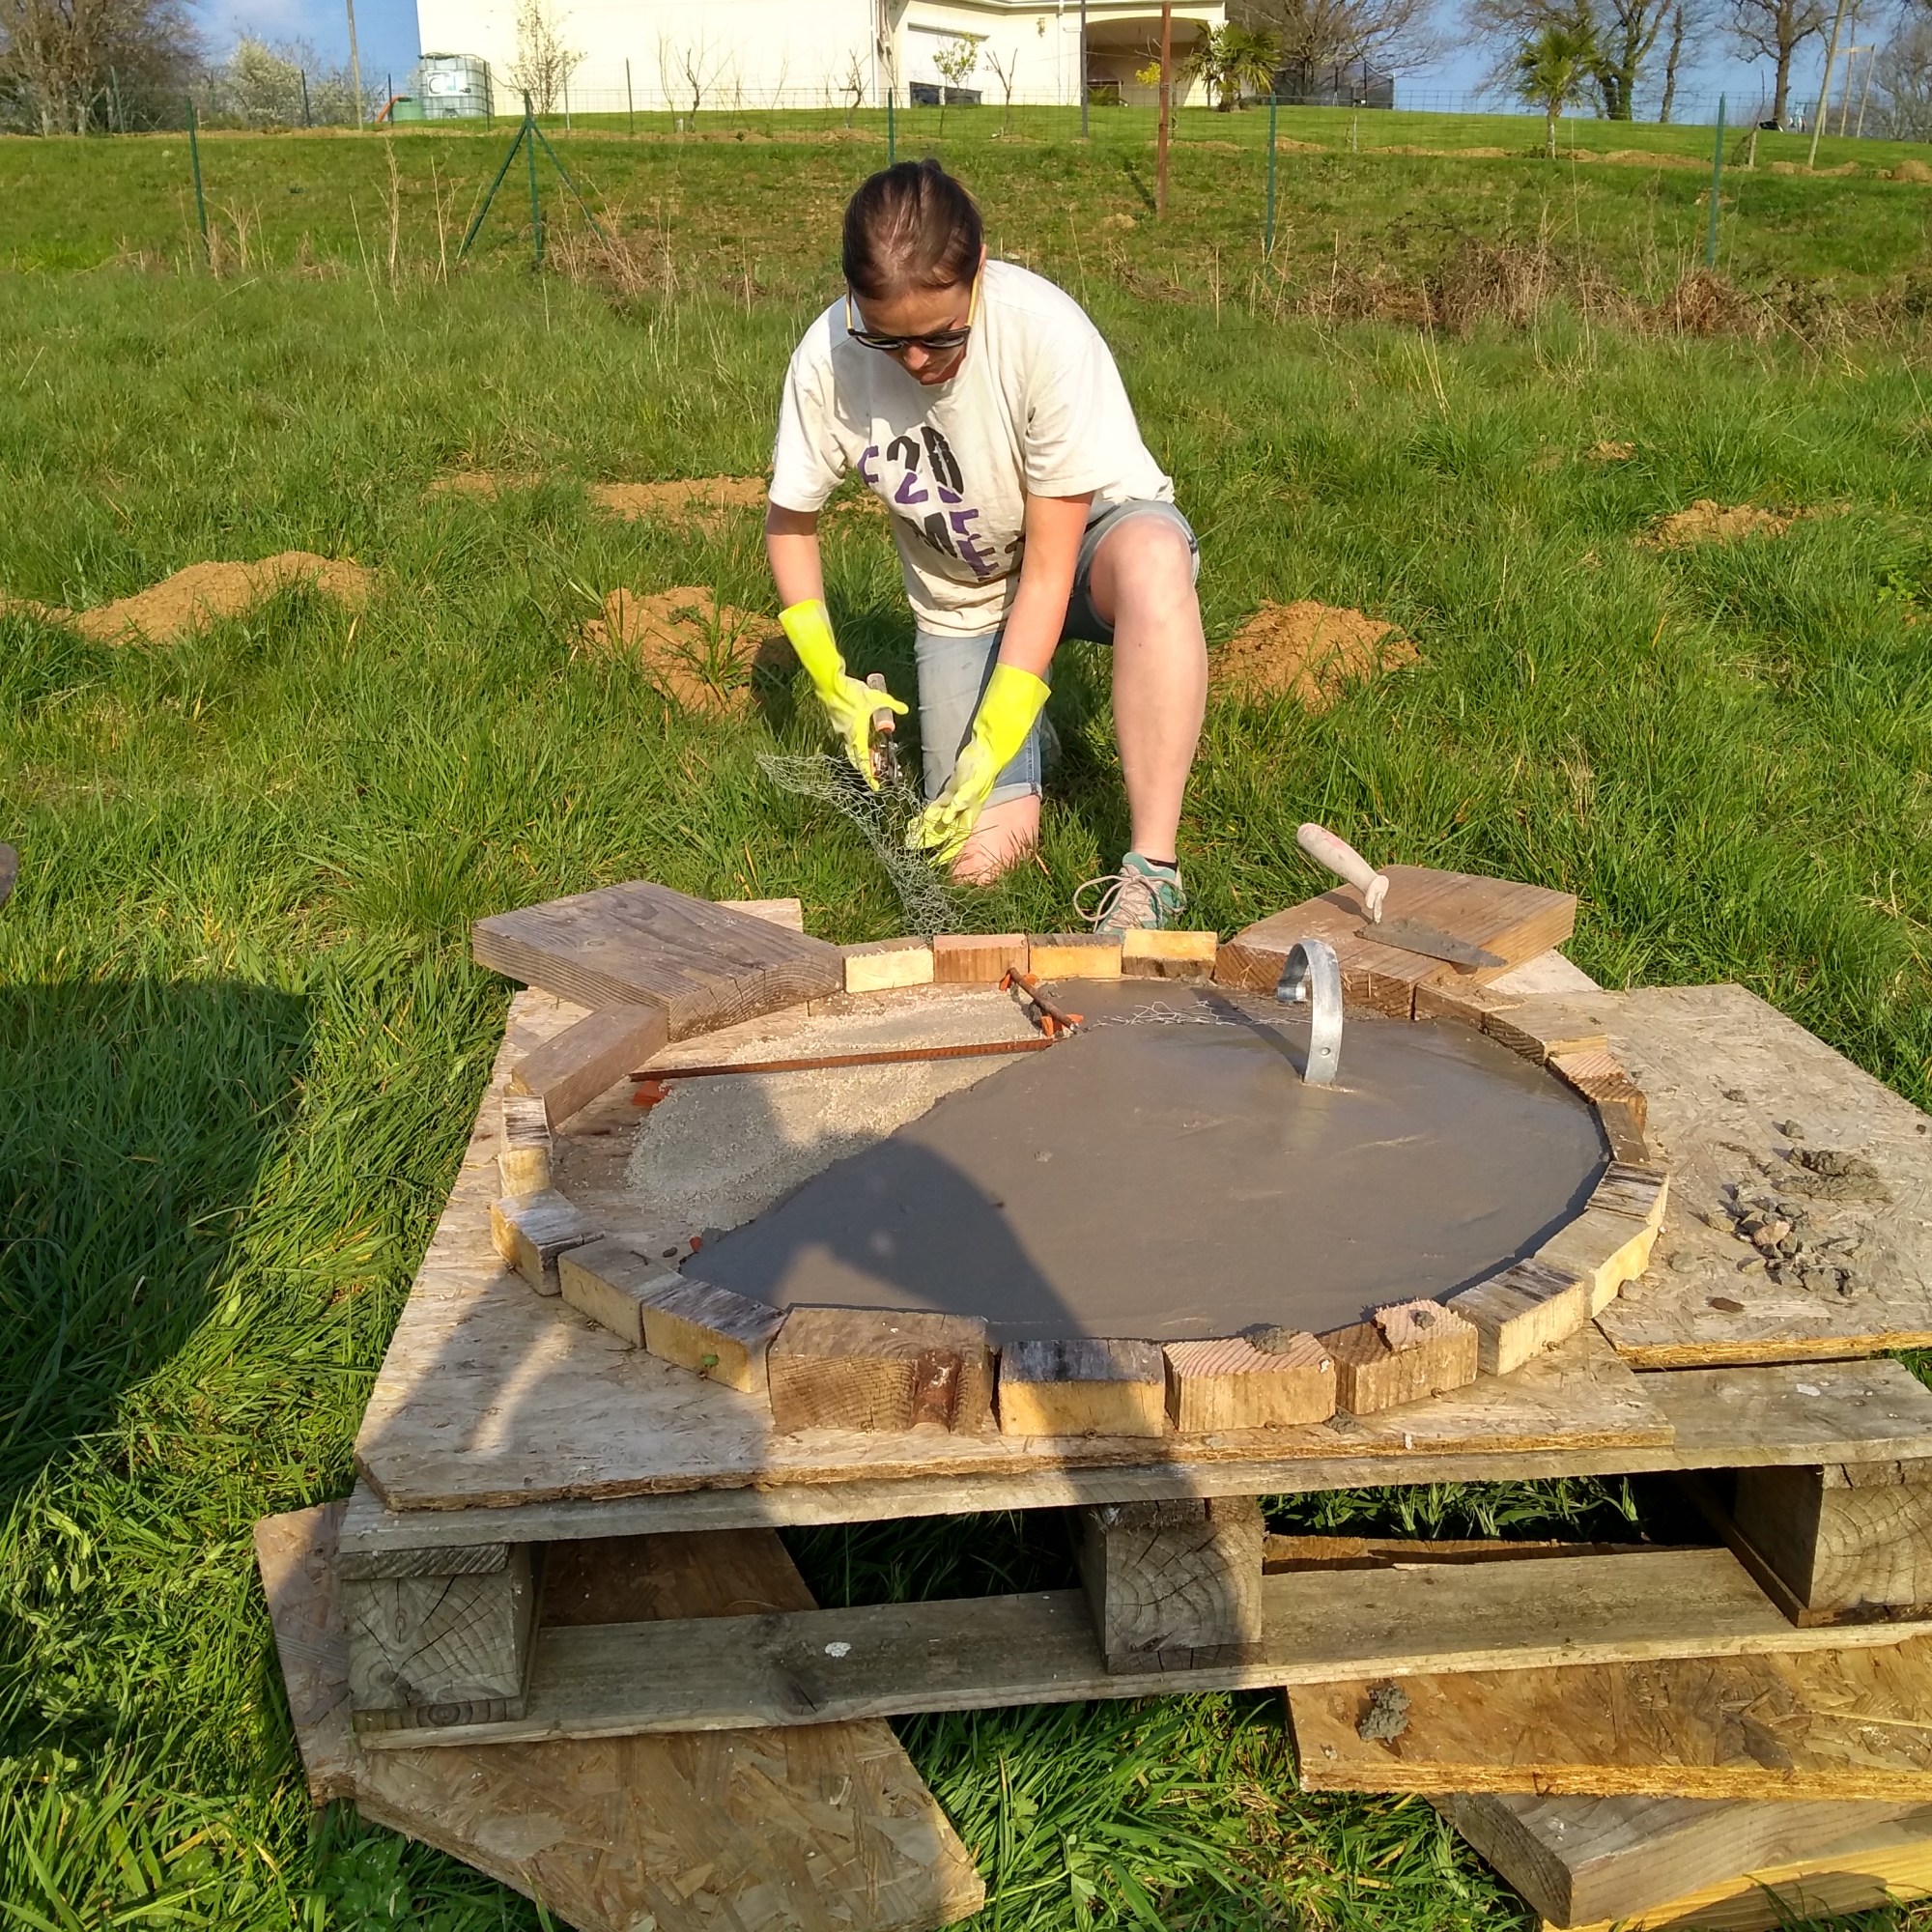
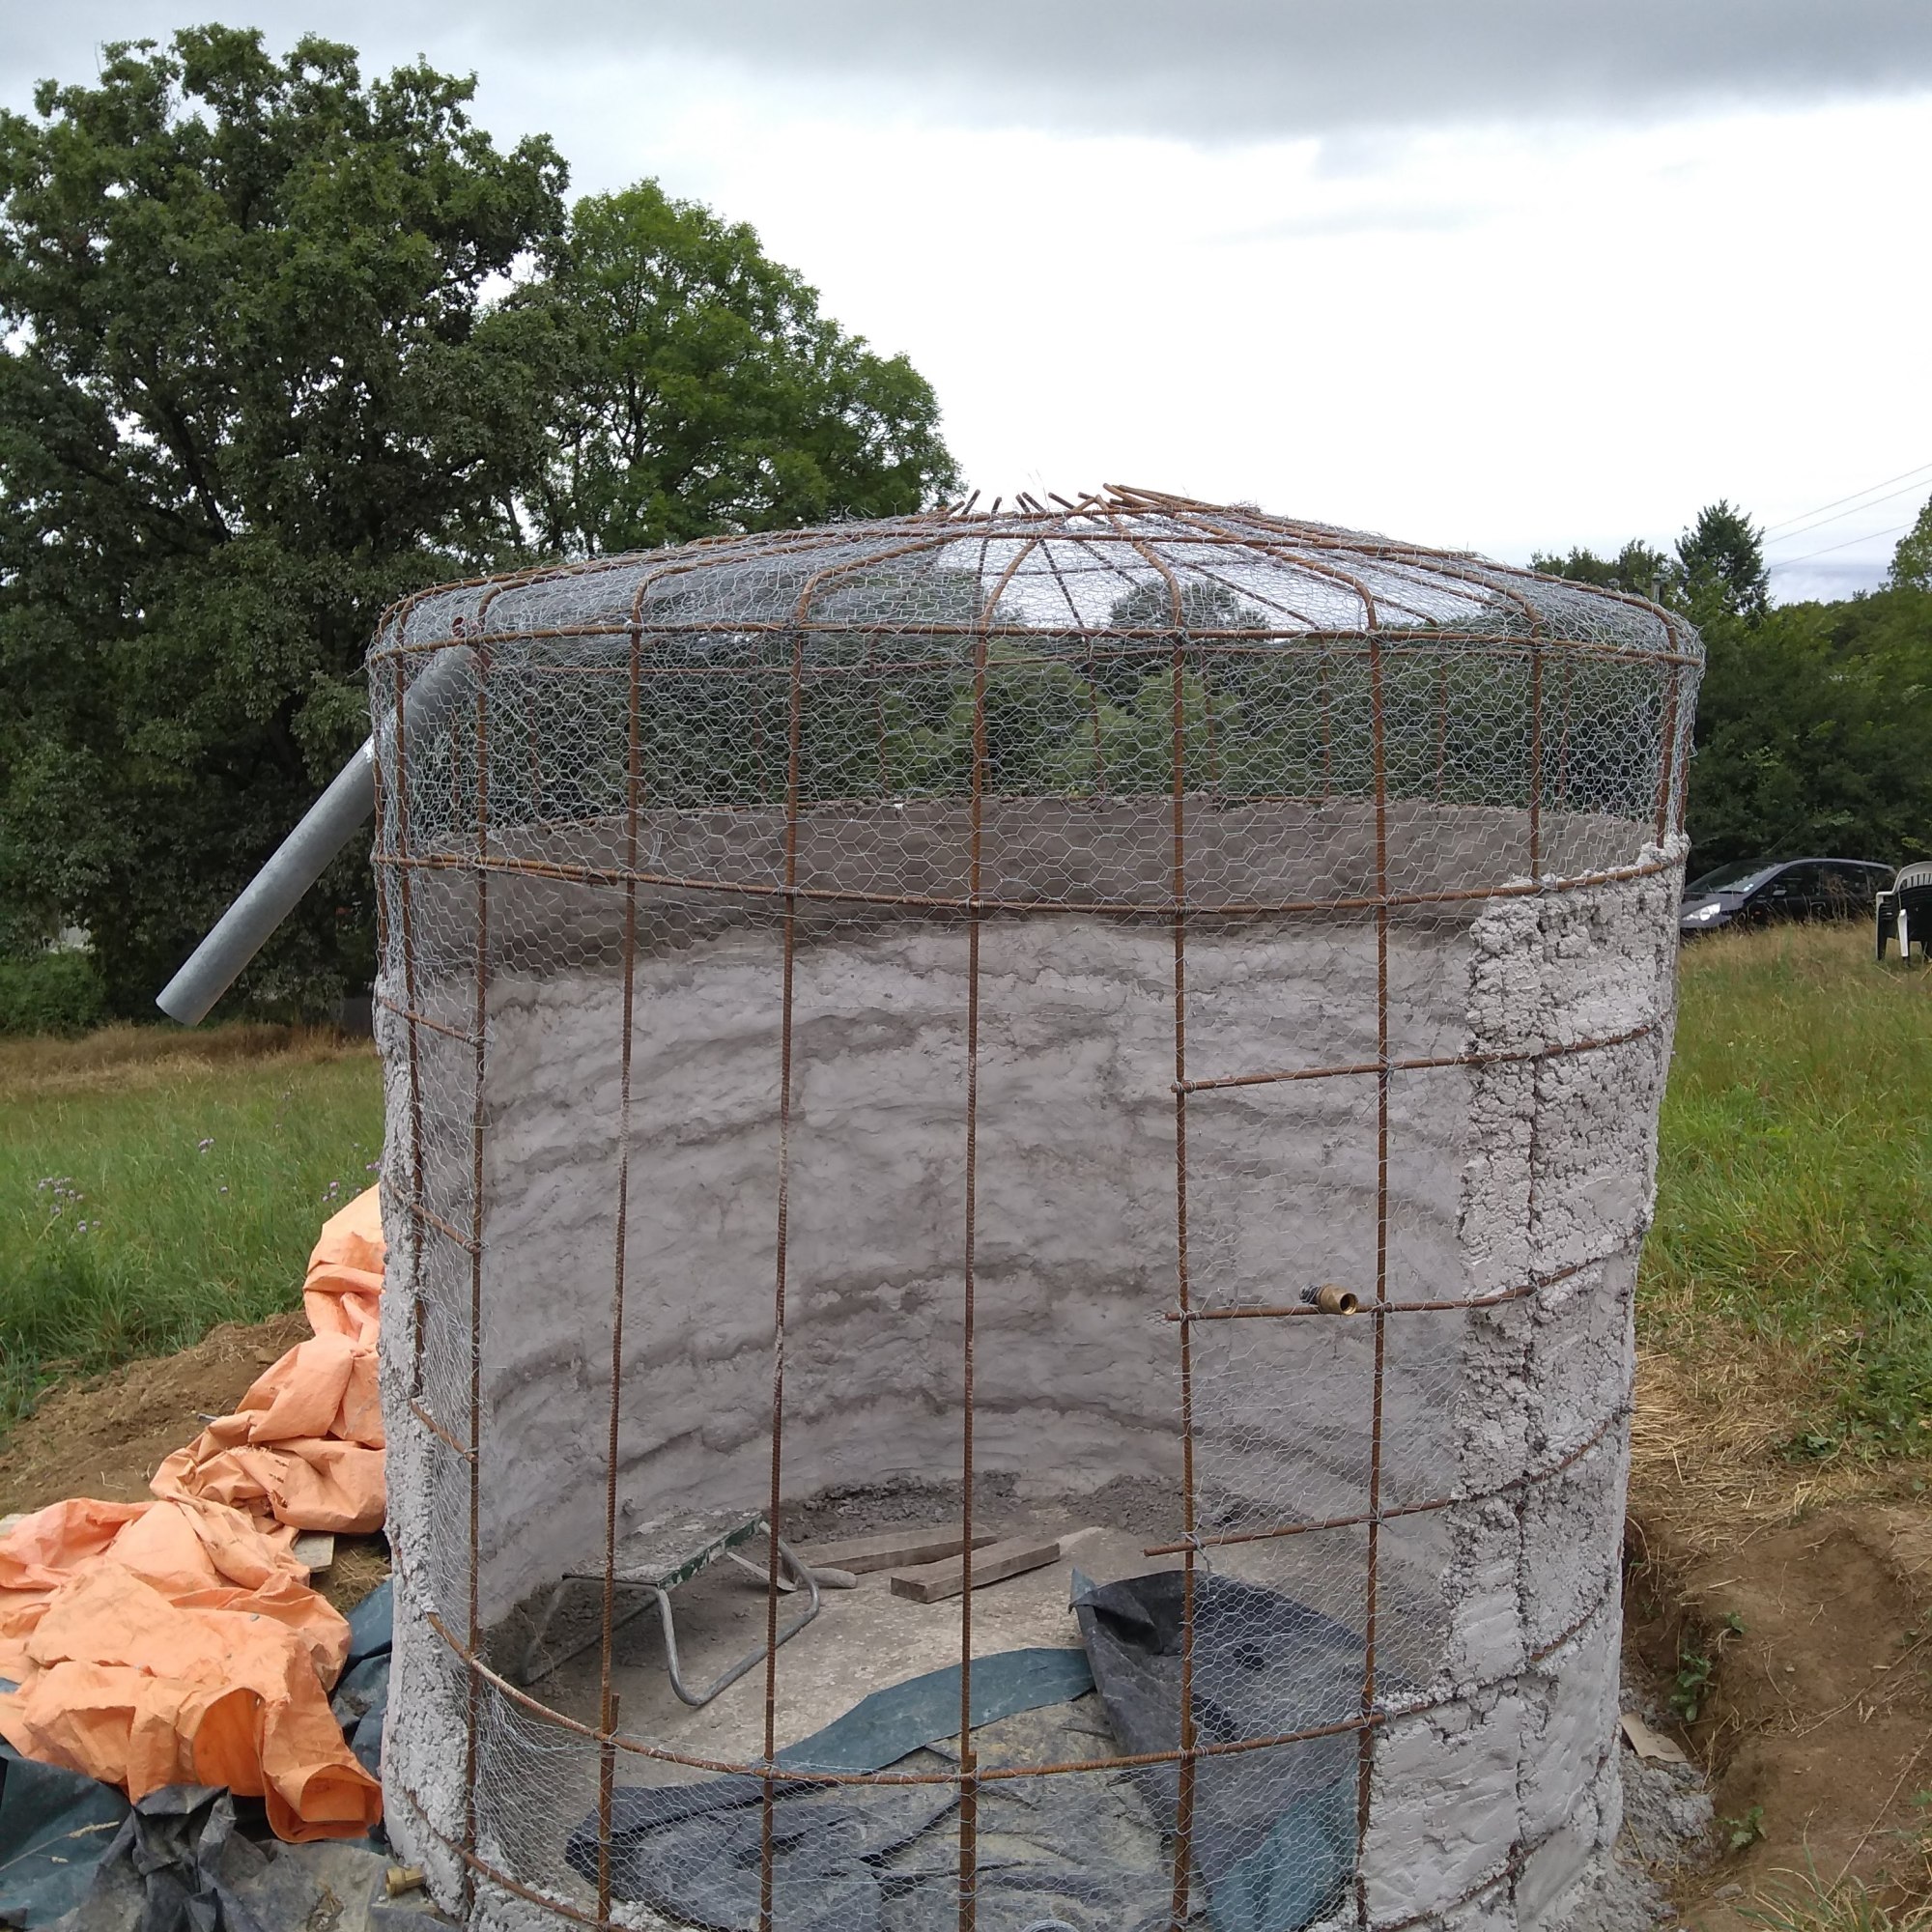
It was really starting to resemble a Dalek by this point, although some thought it looked more like an actual military tank. The jury was out. Anyway, it was time to make the lid, which was formed again with sand and old offcuts of wood we had lying around. We also used some old gutter brackets as handles.
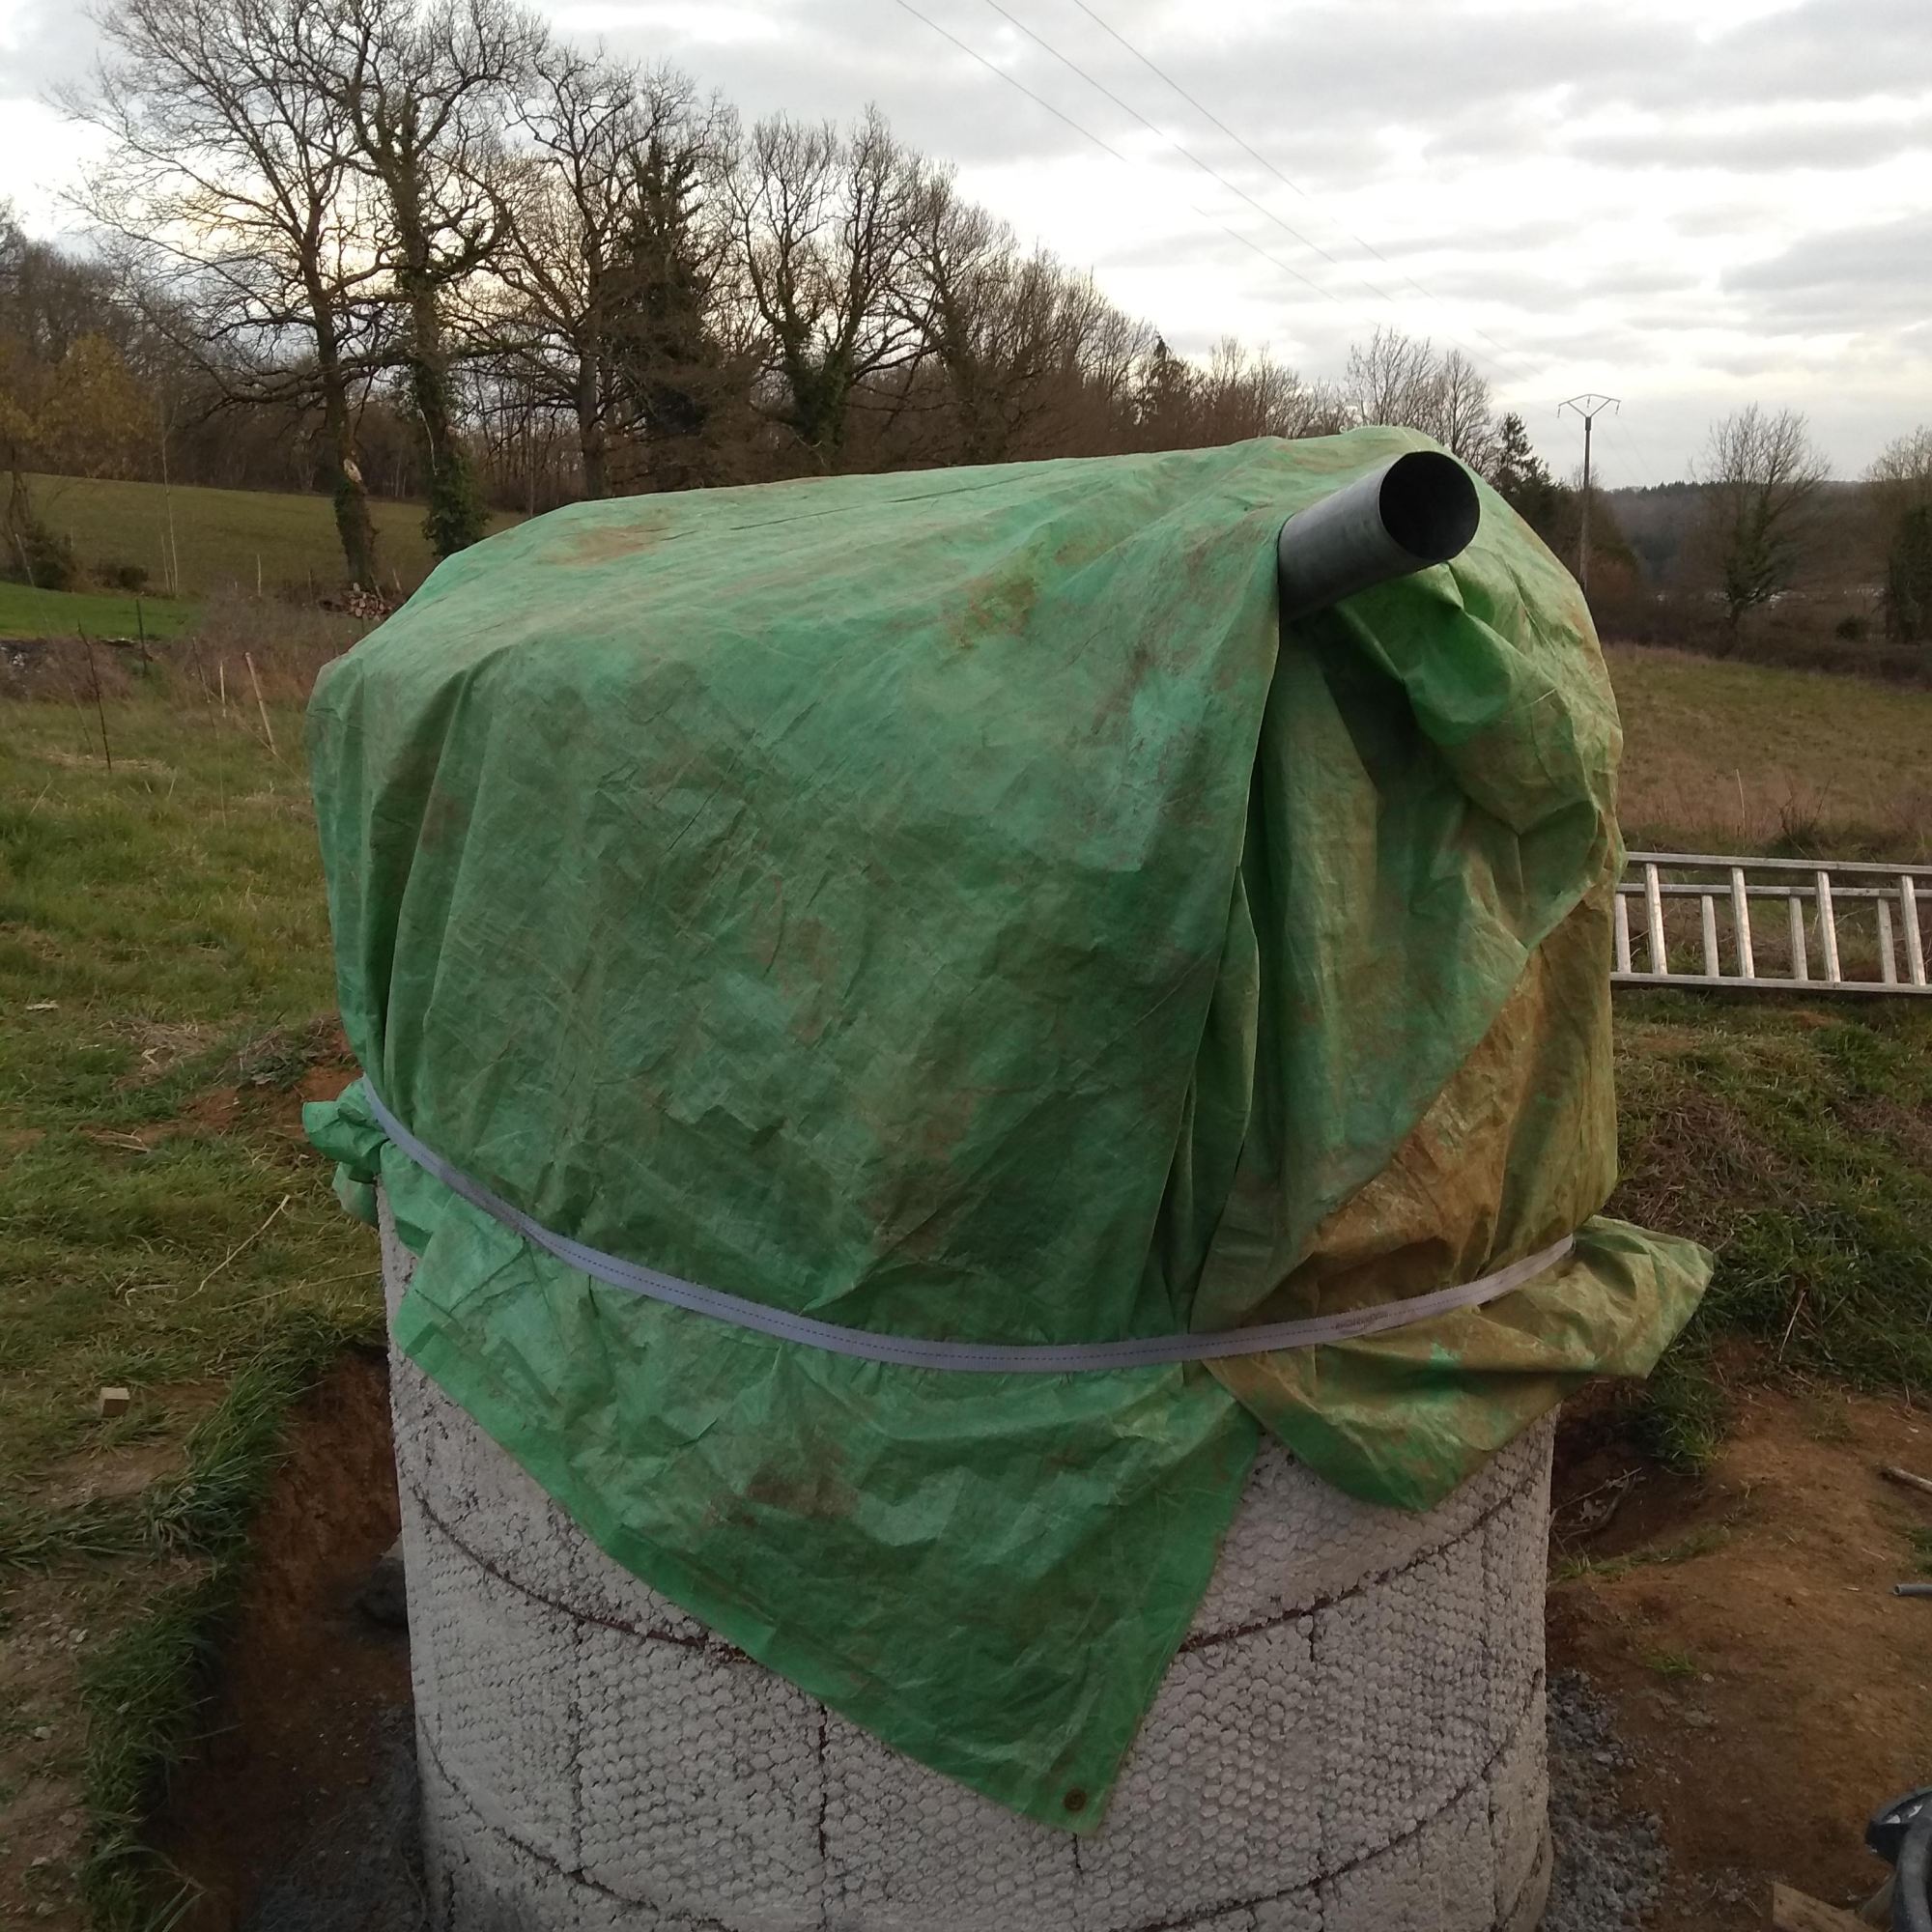
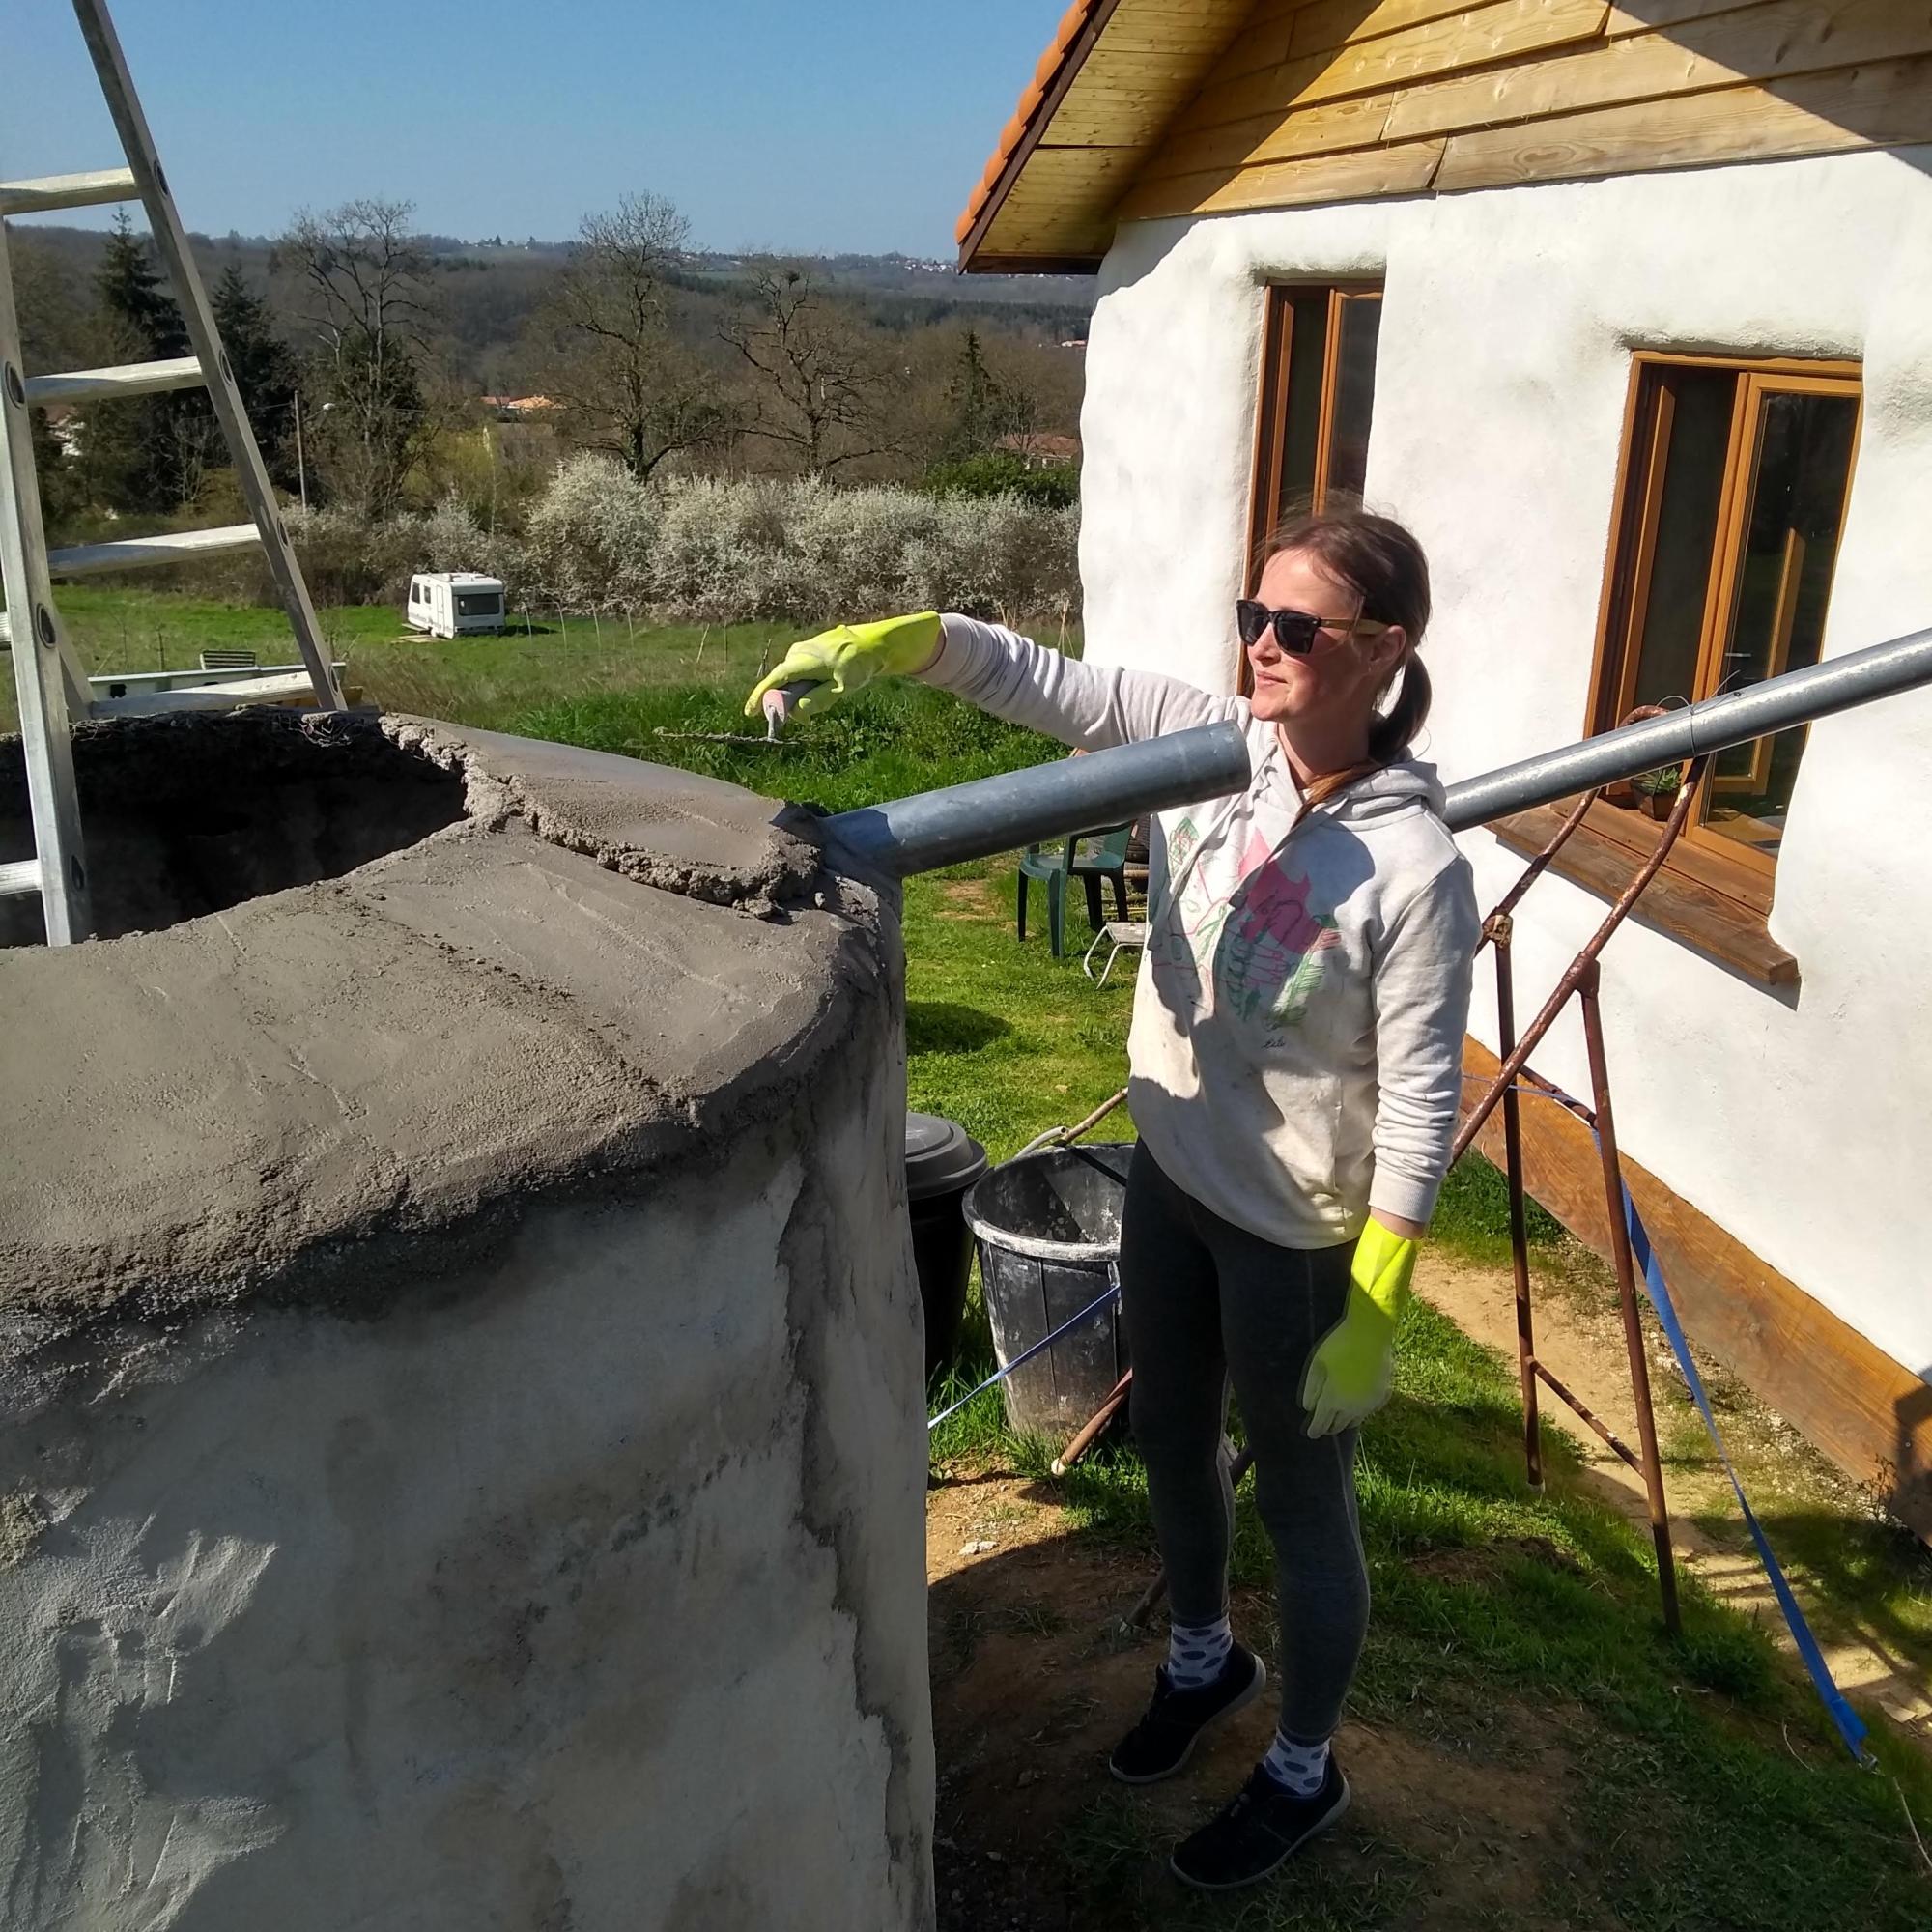
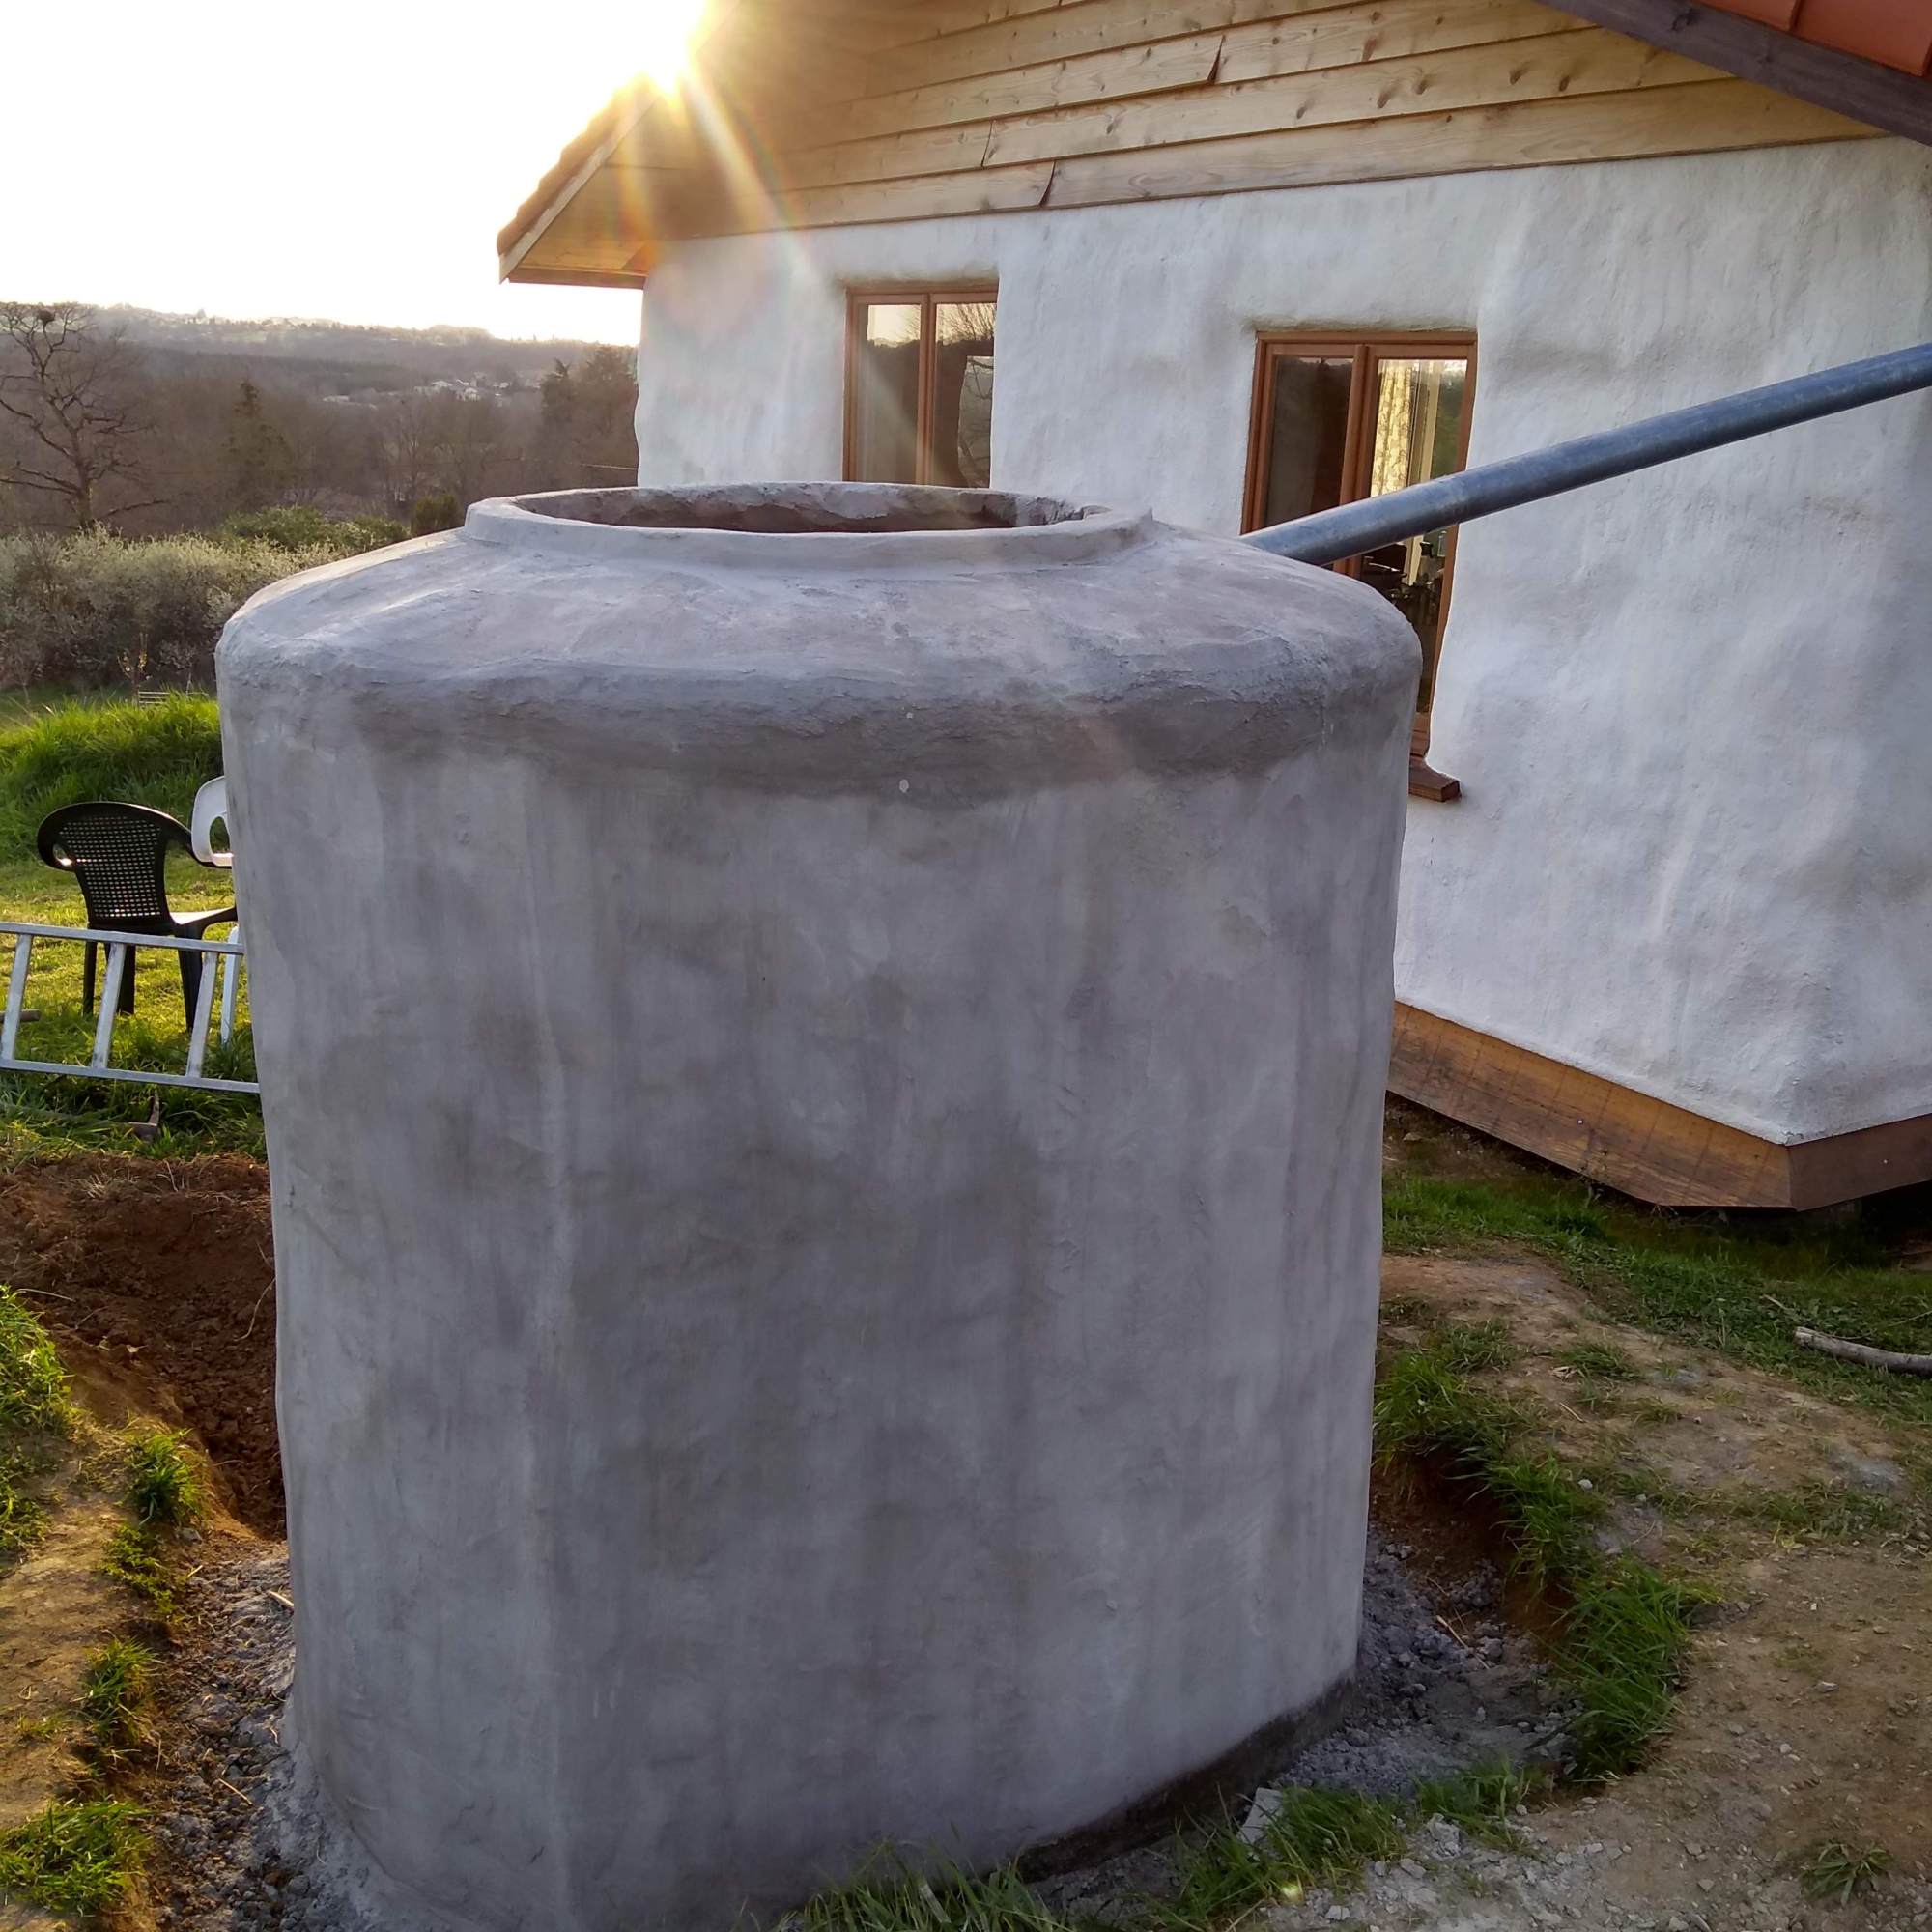
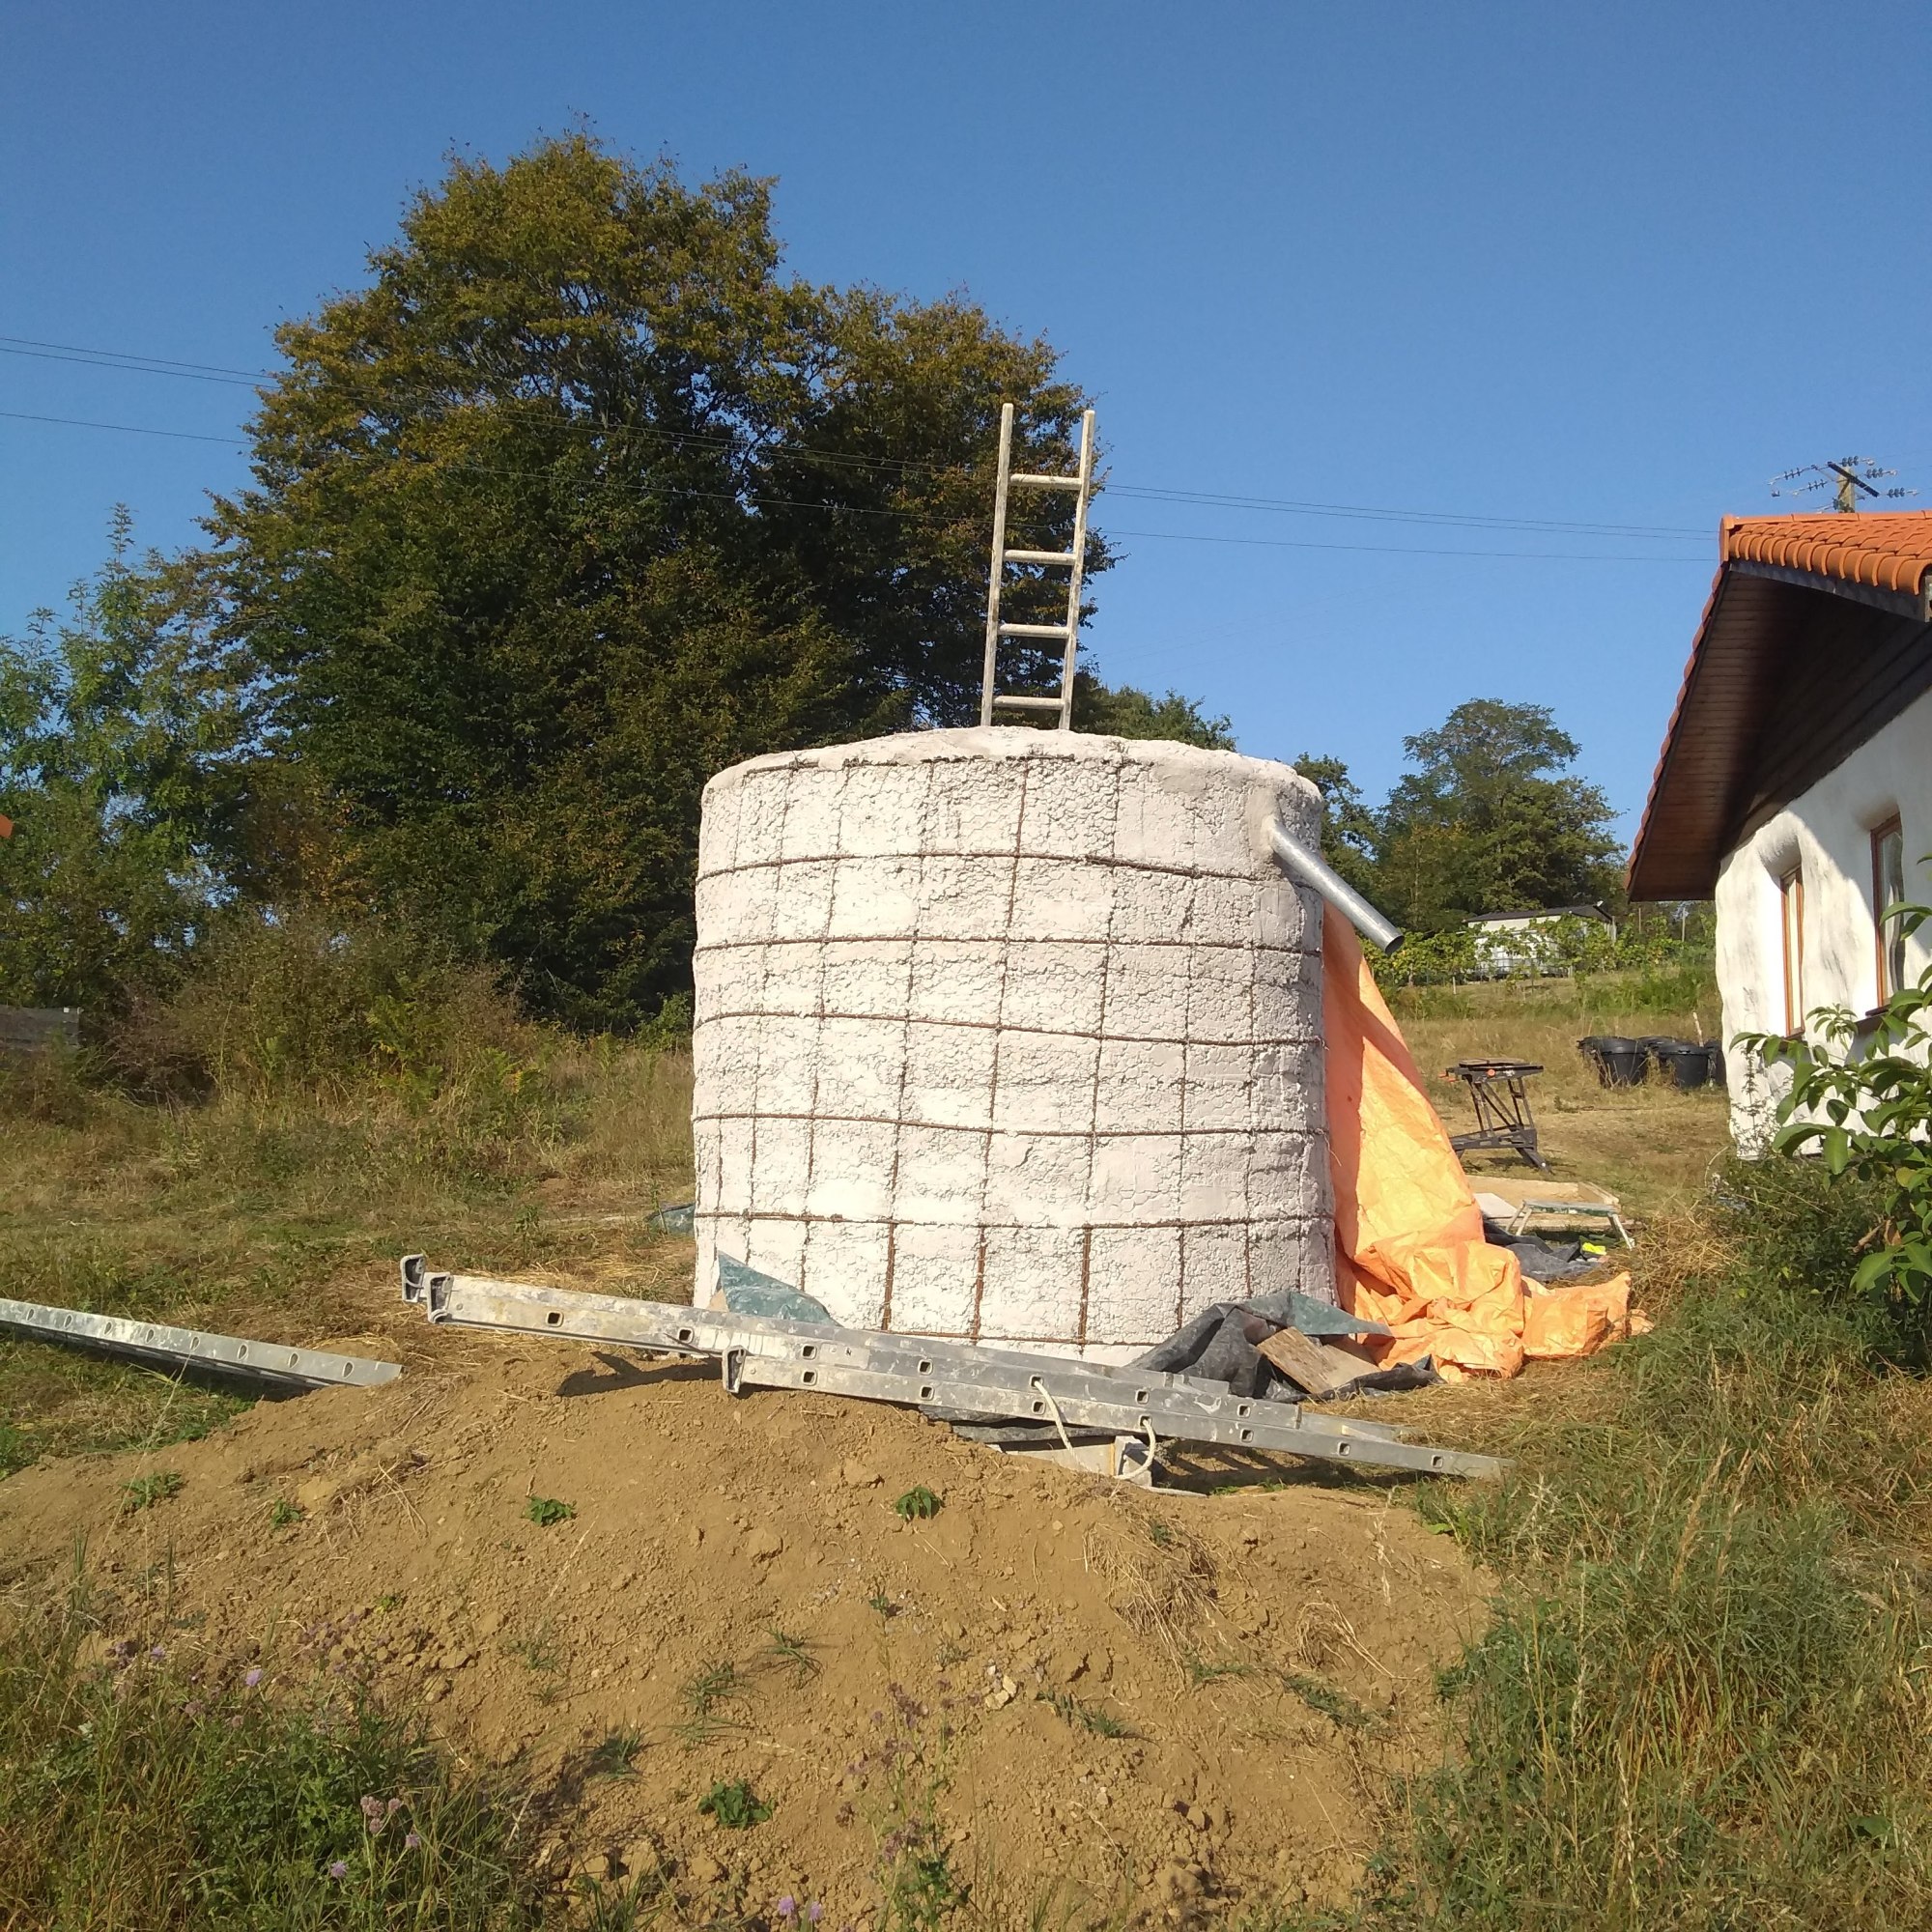
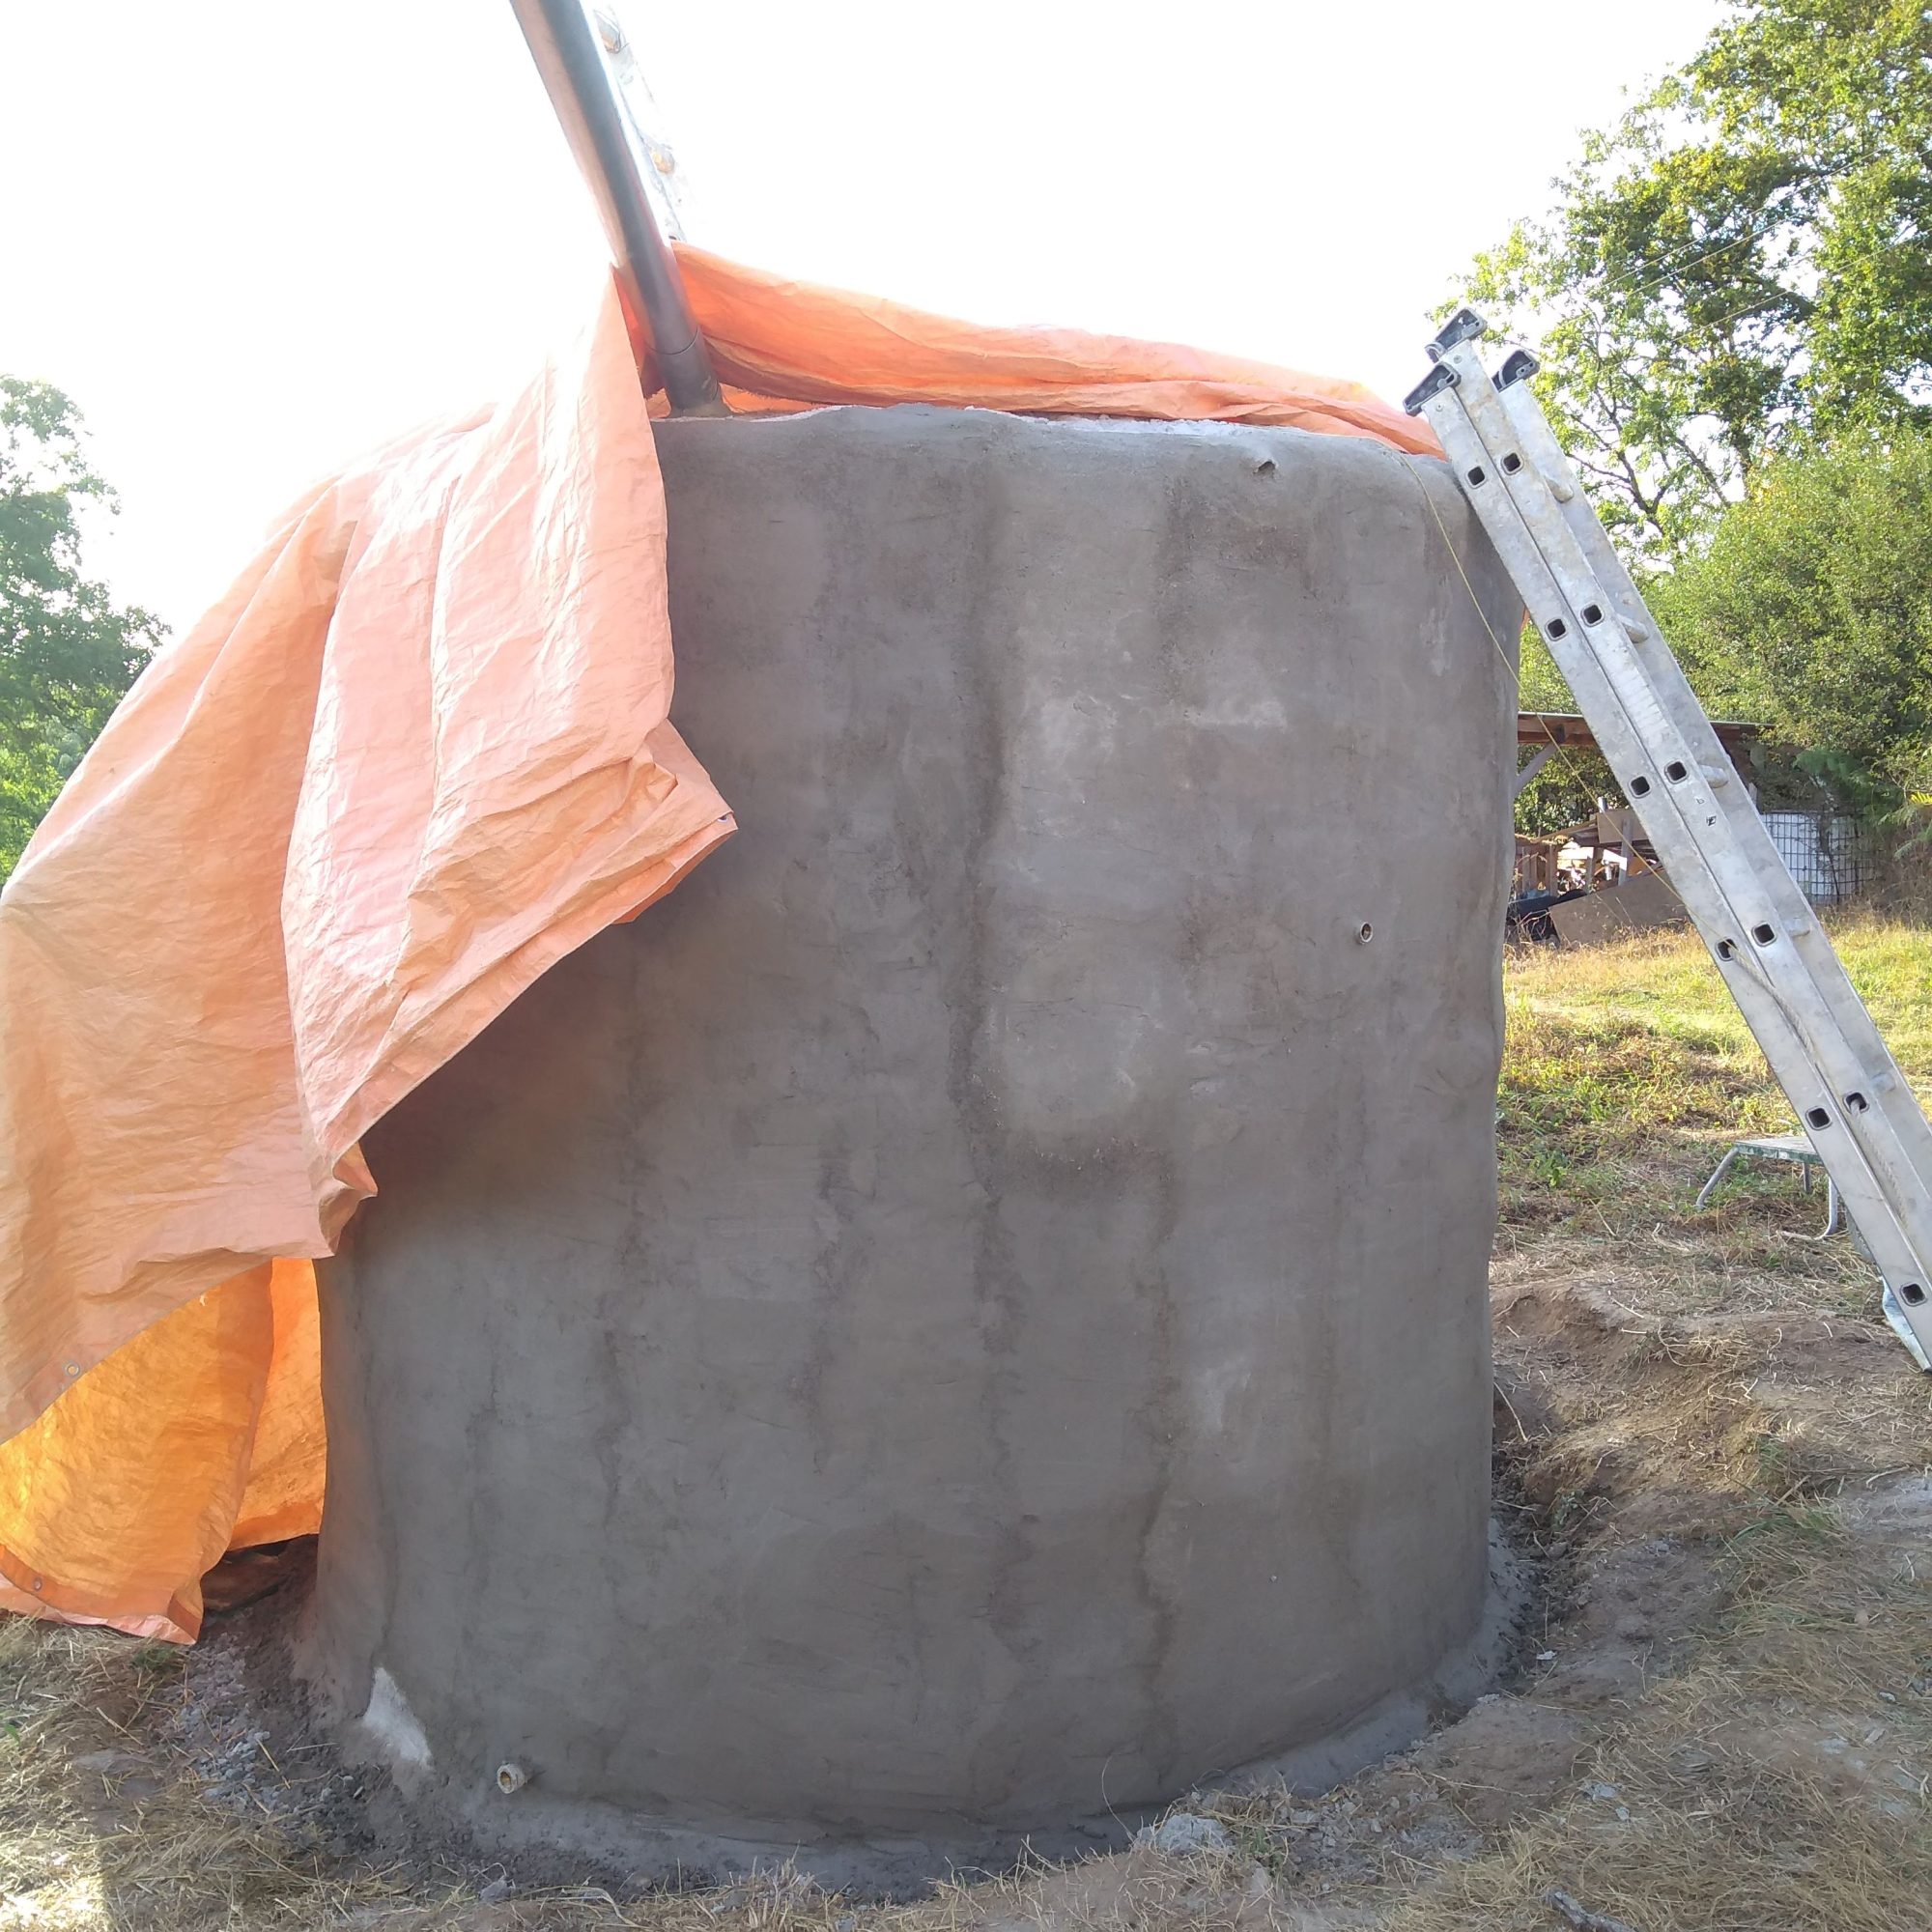
Once the lid was on top, we placed a fine layer of cement around it to connect it to the body of the tank. This will be enough to keep any bugs, especially mosquitos, out of the tank but is thin enough to be chisel-able when we want to get inside the tank. We also placed a mosquito proof vent meant for soffit boardings into the end of the overflow pipe and a mesh across the down pipe in the gutter. Voila, the tank is sealed and ready to take water. The final task was to lime-wash the outside of the tank for an extra layer of protection and to make it match the house a little better. In the future I would like to tile both tanks to make them a bit prettier.
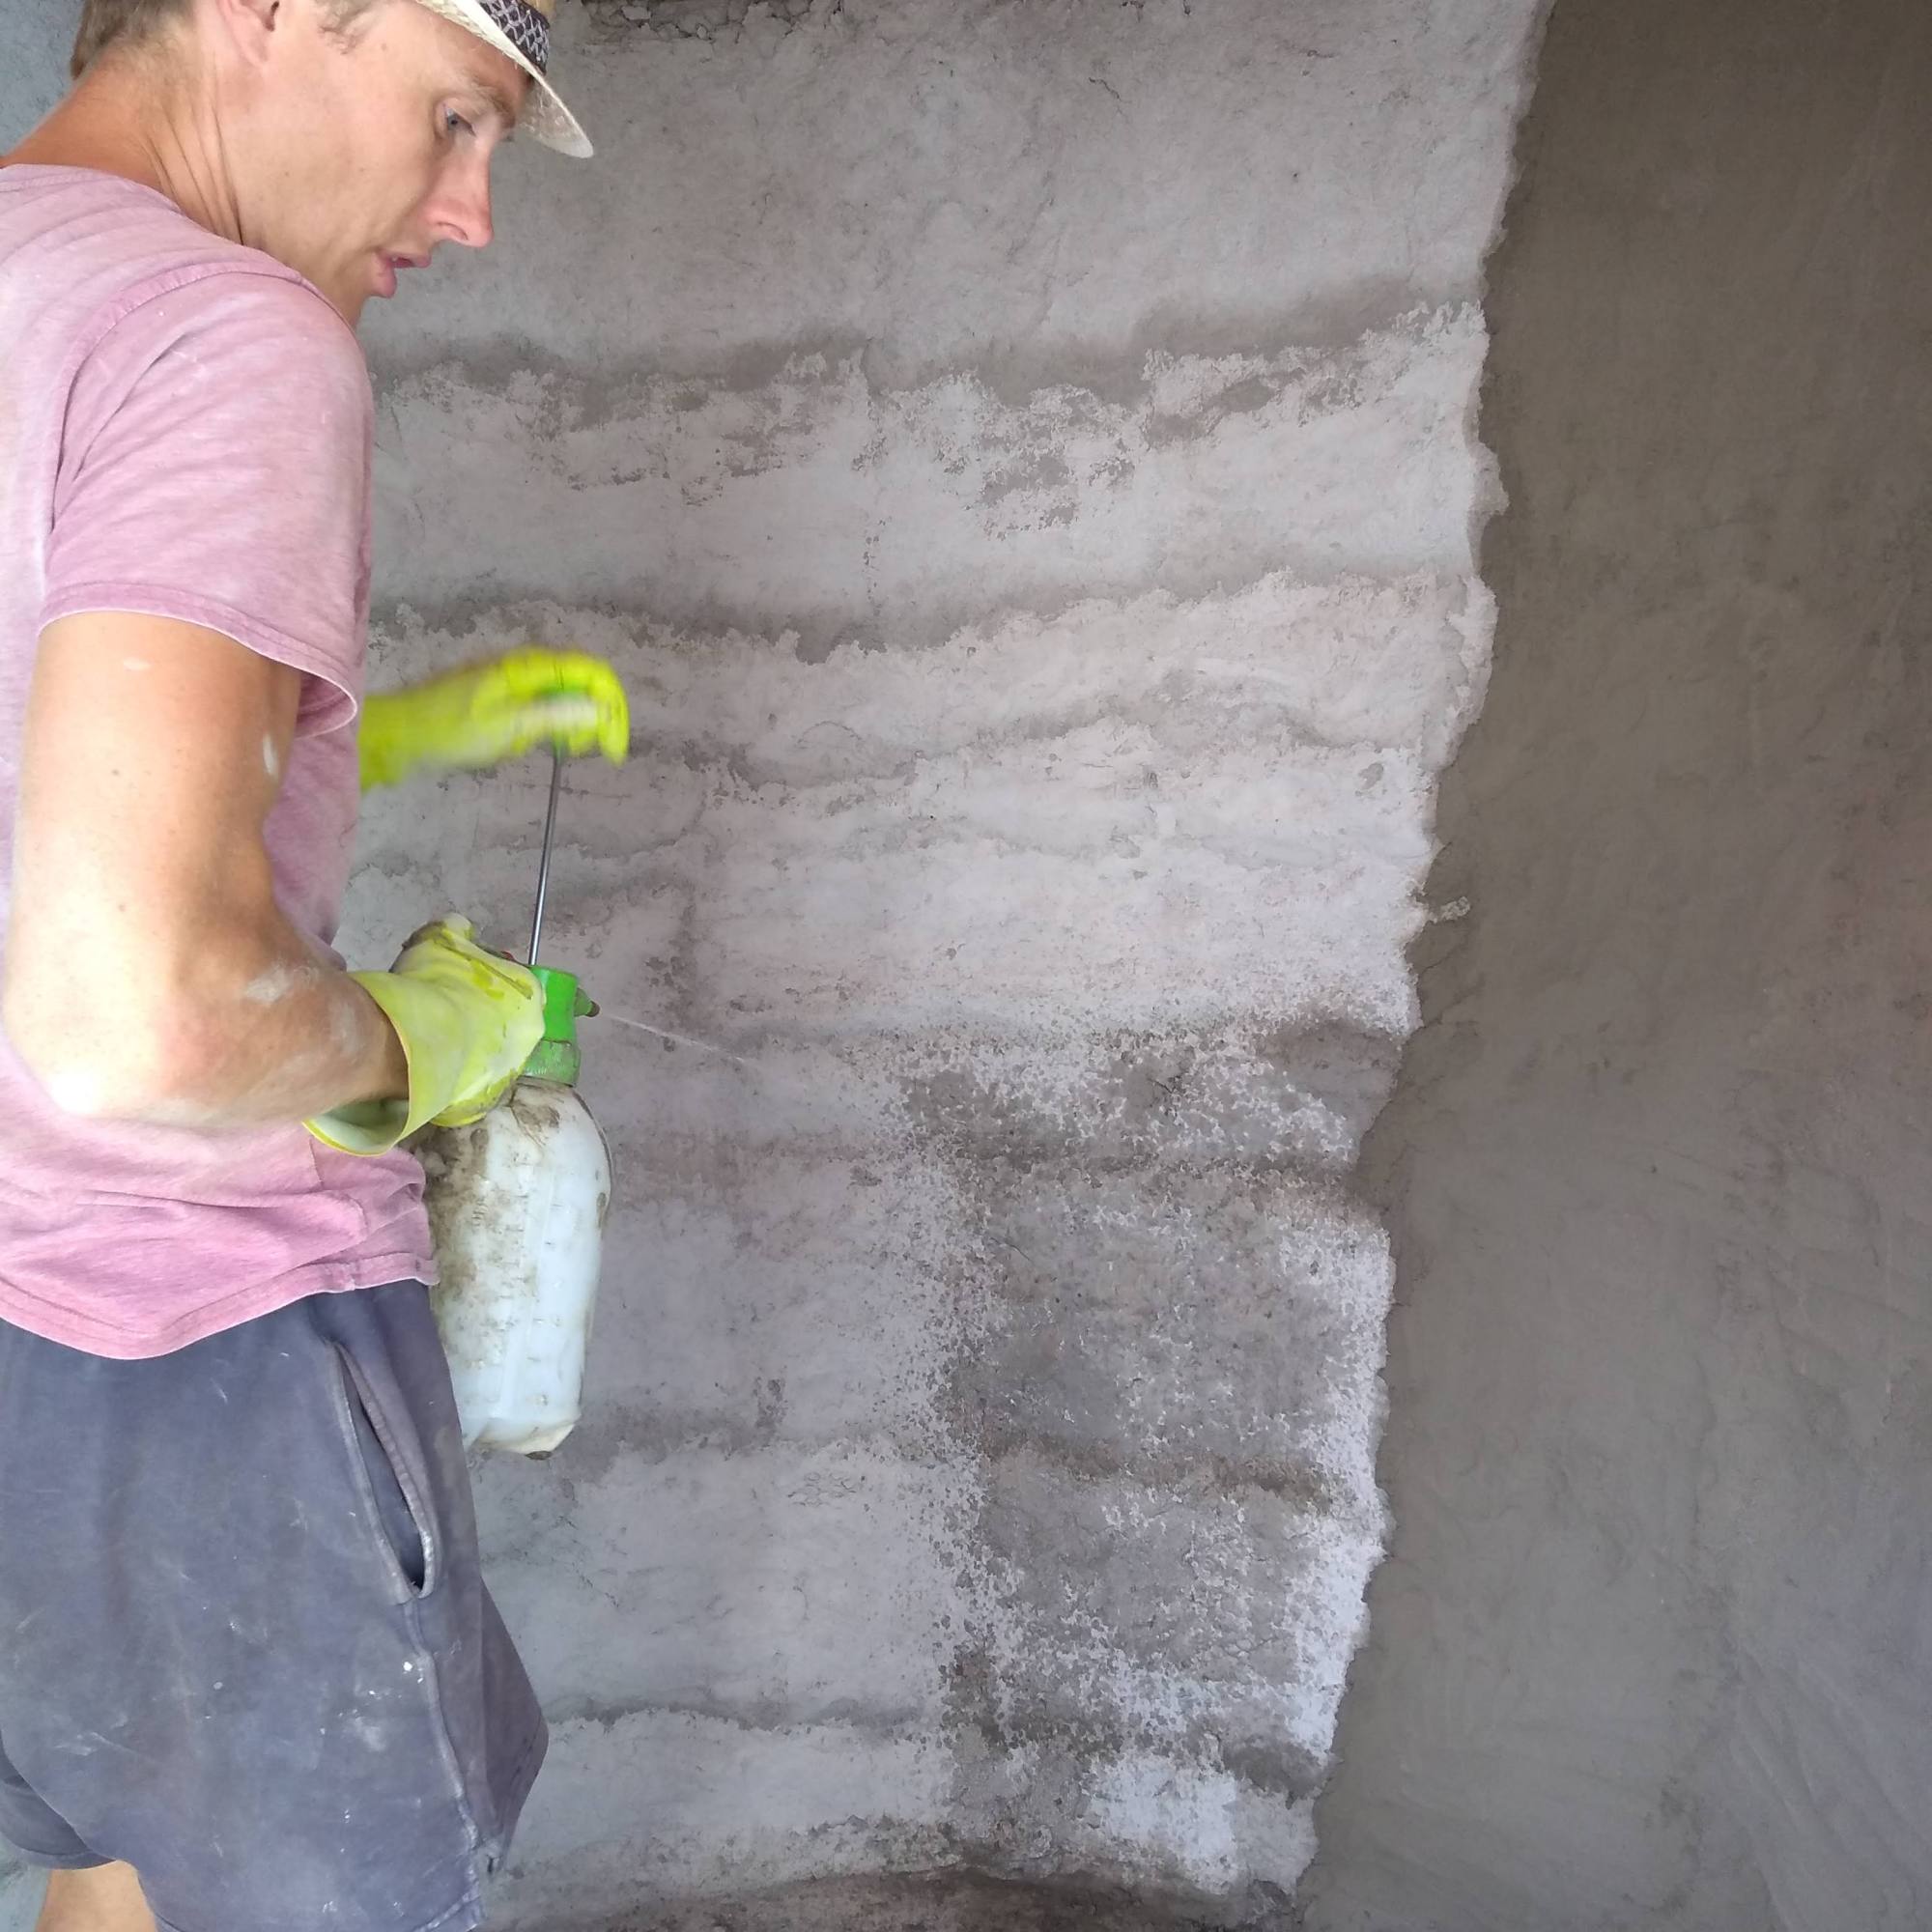
We did some funky rain dances the first time the heavens opened. And prayed a little. Everything was ok, no tidal waves down the land and now it has completely realigned my relationship with the rain! At first there was a little water seepage through to the outside of the tank, something that is totally normal. Over the next few weeks, as the tank held more and more water, the tiny tiny cracks self-sealed with minerals in the water.
Constructing Frank The Tank
Frank followed much the same process, only he is considerably bigger at 7,900 litres. We had other helping hands for this project including, Jess, Marie, Pepita, Mathieu, Benjamin, Amelia and Yiannis. And Whisky cat of course.
This time around the foundation went swimmingly, and with the gap left in the tank we found it much easier and therefore quicker to complete the cement work. I think, due to its grand size, Frank has suffered a few more cracks and leaks, which seem to be filling in now with sediment and minerals.


All in all, we are delighted with the outcome of Hank and Frank. Now we are seeing how we get through winter. Freezing is a problem we are keeping an eye on. Thus far we have taken precautions including backfilling the ground around the bottom of each tank with earth to help some parts of the water maintain a more ambient temperature and the shape of the tank itself as a cylinder also helps to promote very slight convection and ensures that convection can get everywhere because there are no stagnant corners for water to accumulate. The sheer volume of water should help too. Fingers crossed please!

")
")
")
")
")

I am impressed, this is a mighty task to take on and one I have thought about for too long without doing anything about it, so kudos to you. I’ll be interested to know how you get through the winter. I think I would have to keep it drained in the winter as the temps get quite low, but then I would be thinking of one as storage for water for the garden so this would be a working solution. Now you have provided such a brilliant guide on how to do it I have no excuse 🙂 How thick do you think the concrete is once finished?
LikeLike
Pingback: Energy Update: Rethinking Luck, Privilege and Abundance | Les Vignes Basses
Pingback: The Final Straw… 🐪🌾 | Les Vignes Basses
Pingback: Closing Loops And Seeding For Future Generations | Les Vignes Basses
I would love to hear how this has been doing. I bought your book and want to make one but I’m in a climate that freezes and I’m curious if that’ll be disaster. Thanks!!☺️
LikeLike