“If the rules are such that you can’t make progress, then you have to fight the rules”
Elon Musk
For a year and a half we have been meeting our electricity needs through a home built solar set up. It powers our lickle caravan with its LED lights, water pumps, internet router, two computers, a mobile phone and a battery-powered blender. Not a whole lot; the essentials for us. These few electrical items allow us to work remotely as English teachers online. It’s pretty important to us yet we found that there is some inherent vulnerability in our system, namely the battery storage. We are using ancient technology in the form of two lead-acid batteries. Not exactly our environmental cup of tea. With so much R&D into batteries, their capacity, charging time and general reliability, we thought it was about time we up-skilled.
Tesla has made fabulous moves forward in terms of their Powerwall, which is a giant Lithium Ion battery. Batteries composed this way are far less susceptible to completely losing charge due to cold (which it regularly is in the caravan!) and they perform at peak for their cycle and have a sudden drop off instead of a slow, steady decline akin to lead-acid. Still, the components of Li-Ion batteries don’t have the very best possible environmental credentials, the materials still require large scale mining and they aren’t completely inert once their days are over. However, they are much kinder than lead-acid. Their current availability second-hand is also a factor. The millions of laptops and their batteries that are thrown away each year could be salvaged and used to create a giant Li-Ion battery, which is essentially what the Powerwall is.
Always being up for a challenge, we decided to have a crack at creating our own homemade Powerwall using recycled laptop batteries sourced in job lots on eBay. Elon Musk, CEO of Tesla, seems to be pretty happy for laypeople to give this a go and actually released the plans for the Powerwall. He is keen for citizens to be ‘off the grid’ and in charge of their own energy production and consumption as a way of effectively fighting climate change. As a result, there are numerous YouTube tutorials available we found this one by Jehu, particularly inspiring.
The rest of this post, written by Dan, is dedicated to the method and occasional sparks that occurred during our experience of creating a super cell battery that is solar-ready.
Note: Neither of us are electrically qualified and attempted making this knowing the degree of risk involved. School-level physics was required and a constant watchful eye whilst testing and soldering. There were multiple 12V electric shocks and some sparks 
Equipment required:
Laptop batteries, pliers, wire cutters, Lithium-Ion charger/discharger, black permanent marker, multi-meter, fuses, small copper strip, copper bus-bars, Flux, solder wire, cheap dischargers, heat gun/canister welder, mole grips.
Step 1: Find some batteries
It is easy to find job lots of batteries on ebay. There didn’t seem to be any difference between them, just a random selection of untested, used batteries with no guarantee of performance. We spent about £1.50 per battery, so about £150 in total. These will mostly contain 18650 cells, these are the ones you want.
Step 2: Take them apart
There is no elegant way of doing this, just get a pair of pliers, some wire cutters and break the plastic case. When removing the batteries and breaking them apart, you may see a few sparks. We generally tried to remove all the positive connections, then the negatives. On the flat, smooth, negative terminals, leave some of the metal solder work, it may cut you, it’s sharp, but it serves as a useful key for the soldering later on. Stack all the cells in a box, with all the positives facing the same way.
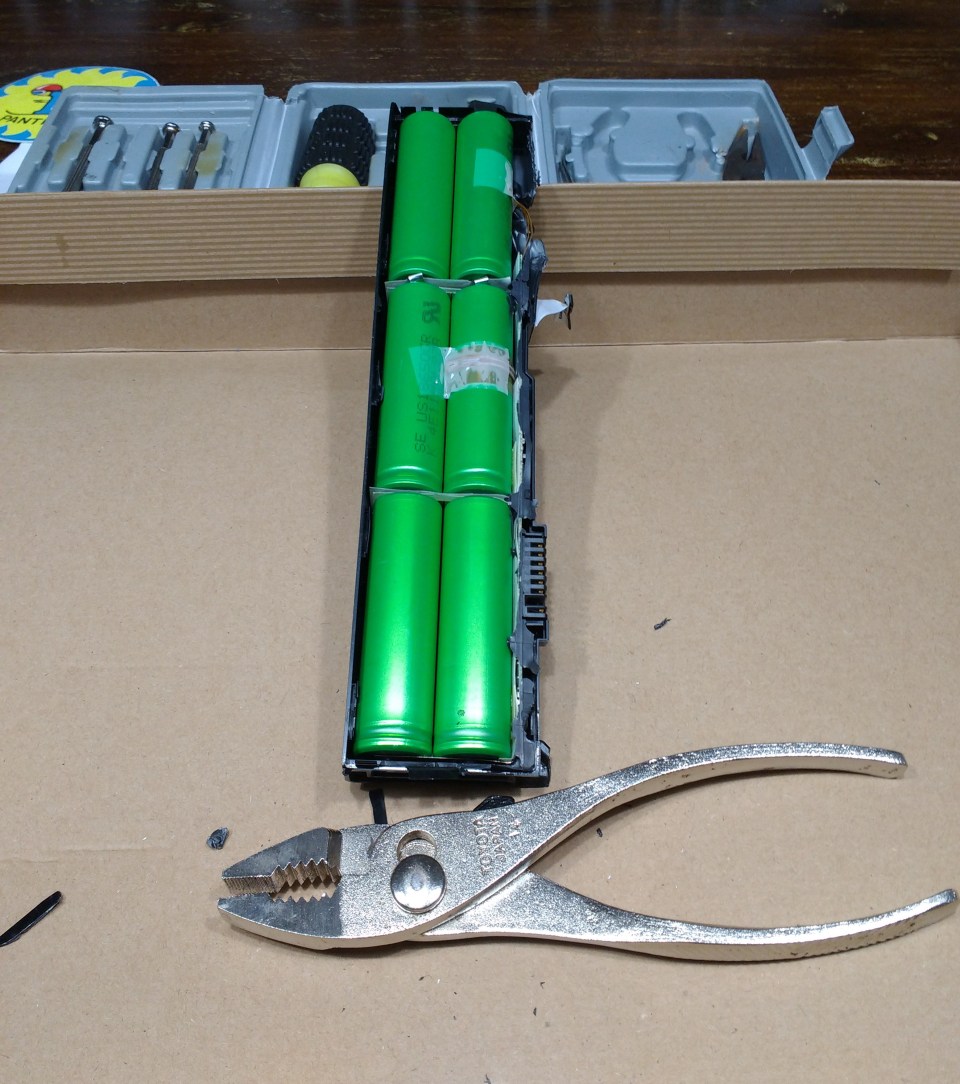
Crack open the laptop batteries to get at the cells
Step 3: Set-up the charger/discharger
Solder four x 4-battery-holders together using copper wire to create a 16-battery holder. Plug or solder this to the charger/discharger, plug it in to the power supply, set it up to charge LiPo batteries, 1 in series (1S) at 5Amps. For the first 10-15 minutes, keep a close eye on the 16 charging cells, run your hands over them every few minutes. If you detect ANY heat, even slight warmth, remove this cell and bin-it, it is likely to be a bad cell. Continue this process until you have 16 cells charging and staying cool. Charge them up to 4.2V, when our machine registered 4.2V, upon checking, the cells we more like 4.1V so we continued charging until the Amps being delivered had dropped to about 1 Amp. This gave us a genuine 4.2V. Write the exact voltage of the cell on the cell in black marker pen.
Repeat this process, discarding cells which heat-up, and storing the fully charged cells in a box with positive charges facing the same way and not touching end to end.


Step 4: Testing for self- discharge
Leave the charged batteries for 2 weeks. Then test them with your multi-meter. Set a threshold, for example: any battery that has lost more the 5/100ths of a volt (0.05), discard it. This way you ensure that all the batteries in your pack will hold onto their voltage and not drain the rest of the pack. Stack up all the good batteries ready for the next stage.

The multimeter is a lovely piece of kit for testing charge
Step 5: Testing for capacity
Buy yourself a few cheap dischargers, we bought 3 plus the original recharger/discharger, this meant 4 batteries could be discharged at the same time. I set the batteries to discharge at 1 Amp, then recorded their capacity on the cell in permanent marker. Divide the cells into various capacities: 1800Mah – 1900Mah / 1900Mah to 2000Mah etc. Set a threshold for those your want to keep. My threshold was 1800Mah. Repeat the process until all cells have been discharged, capacity recorded and organised.
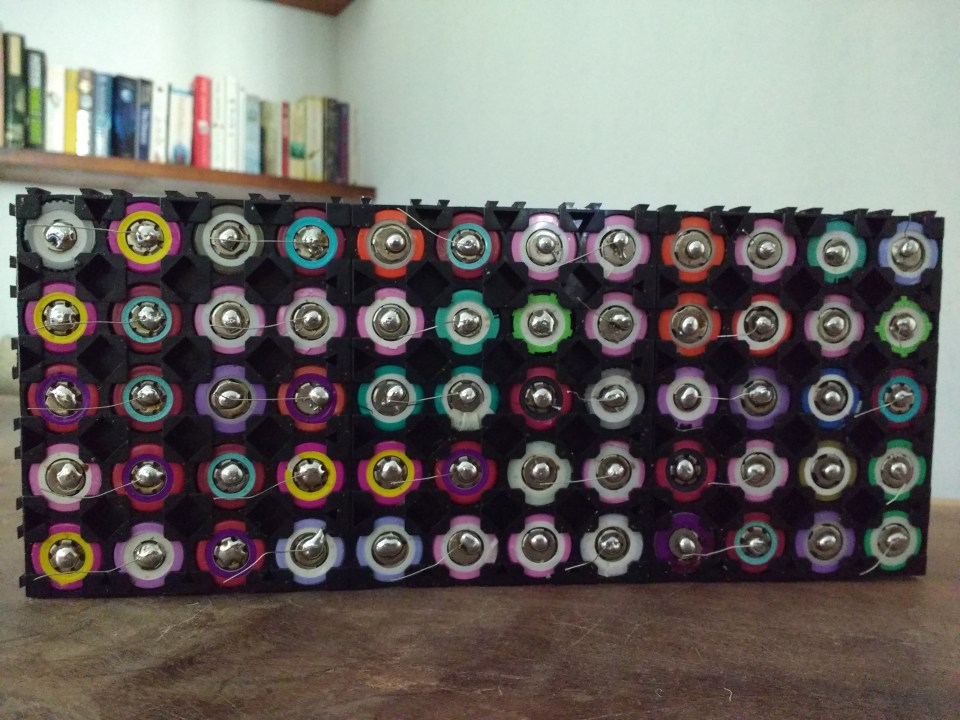
Step 6: Pack design
This depends on what you want your battery to do. We wanted to power our caravan which required a 12 V power supply. The peak voltage of these cells is 4.2V so putting 3 in series gives us 12.6V, perfect! The above process had given us just over 180 good cells, which didn’t heat-up, didn’t self discharge and held a decent capacity, so I decided on a ’60 cells in parallel per pack/3 packs in series’ design. Now, I wasn’t sure how to divide my cells, so I just distributed them evenly across the 3 packs, I think perhaps I should have put those with a higher capacity in the same pack, then increased the capacity of the packs with weaker cells by adding more cells, but, time will tell.
Use the little black plastic 18650 holders to configure your battery, then it’s onto soldering!

Place all the good batteries into packs
Step 7: Pre-soldering
You now have 3 packs of cells, with none of the cells or packs connected. Give everything a little clean with some Flux and then get a decent blob of solder on all negative and positive terminals. Hopefully you left some metal on the flat, smooth negative terminals as a key, if not, just take your time, and try to pick it off when you have finished; if you can’t pick your solder blob off, it’s solid enough!
Step 8: Fuses
Cut the wire either side of the little resistors, we don’t need these the resistors, just the wires. These will act as a fuse, if more than 5A (according to You tube videos) goes though them, they will burn out. Remember, in a pack of 60, 5A per cell would be a HUGE current, 300 AMPS. We are not going to touch this kind of current in our little caravan setup. Each piece of wire will touch two batteries, bridging over the copper bar running up the centre, so for now just solder one side of the wire to every other cell.
Solder together the batteries using solder, copper and fuses
Step 9: Copper soldering
This was the trickiest part, but doable by a novice! You need a heat gun or canister blow torch. First, cut your big copper bus bars to length, with a little bit of overhang for terminals later on. Then, cut the smaller copper strip into lengths long enough to service all the cells (mine were ONLY JUST long enough!) Mark on the big buss bar where the smaller copper will join. Pinch the big buss bar and smaller copper together, corresponding to your marks, in mole grips, get it really, really hot, and solder the two pieces of copper together. The solder will kind of ‘slump’ and go watery when it gets hot enough, this seemed to be a good indication (to a novice, like me!) that a good connection had been achieved. Give it a good pull to make sure the connections are strong.
Step 10: Attaching the bus bars
Rest the bus bar, with recently attached smaller copper strips, on your packs. Then, pull the fuse wire, only soldered to one cell, over the smaller copper strip, and solder to the next cell. A few of these and the bus-bar will stay put. I did all of the negatives first, then the positives. Then, place a blob of solder on the fuse-wire where it stretches over the copper, again, it will kind of ‘slump’ when it is hot enough. Some people sit the bus-bars in sealant but mine seemed solid enough.

Enlist a feline supervisor for the soldering of the battery
Step 11: Checking, checking, checking
You should now have 3 completed packs. Use your multi-meter sound function to test for connection between each individual positive cell, it should go ‘beeeeeeep’ when there is a circuit. If there is a broken connection, re solder it and test again. You cannot be too careful here! Repeat on the negative side.

Divide the battery packs and create a box for them to live in. Test the batteries at every stage to ensure that all batteries are fully connected via the solder
Step 12: Bringing it all together.
The 3 completed packs need to be put into series. The positive from pack 1 to the negative of pack 2, the positive from pack 2 to the negative of pack 3. Now is the time to build a container to protect your beloved battery from knocks and bumps. I used 9mm plywood and a few off cuts of wood to brace the packs and keep them from moving around.
Drill holes in your buss bar terminals and secure a decent sized bolt in the hole. CLEARLY LABEL POSITIVE AND NEGATIVE TERMINALS. Using some reasonably thick wire and connectors, connect your packs. Once connected, check the voltage, it should be about 10-11V, remember, these are discharged at this point.
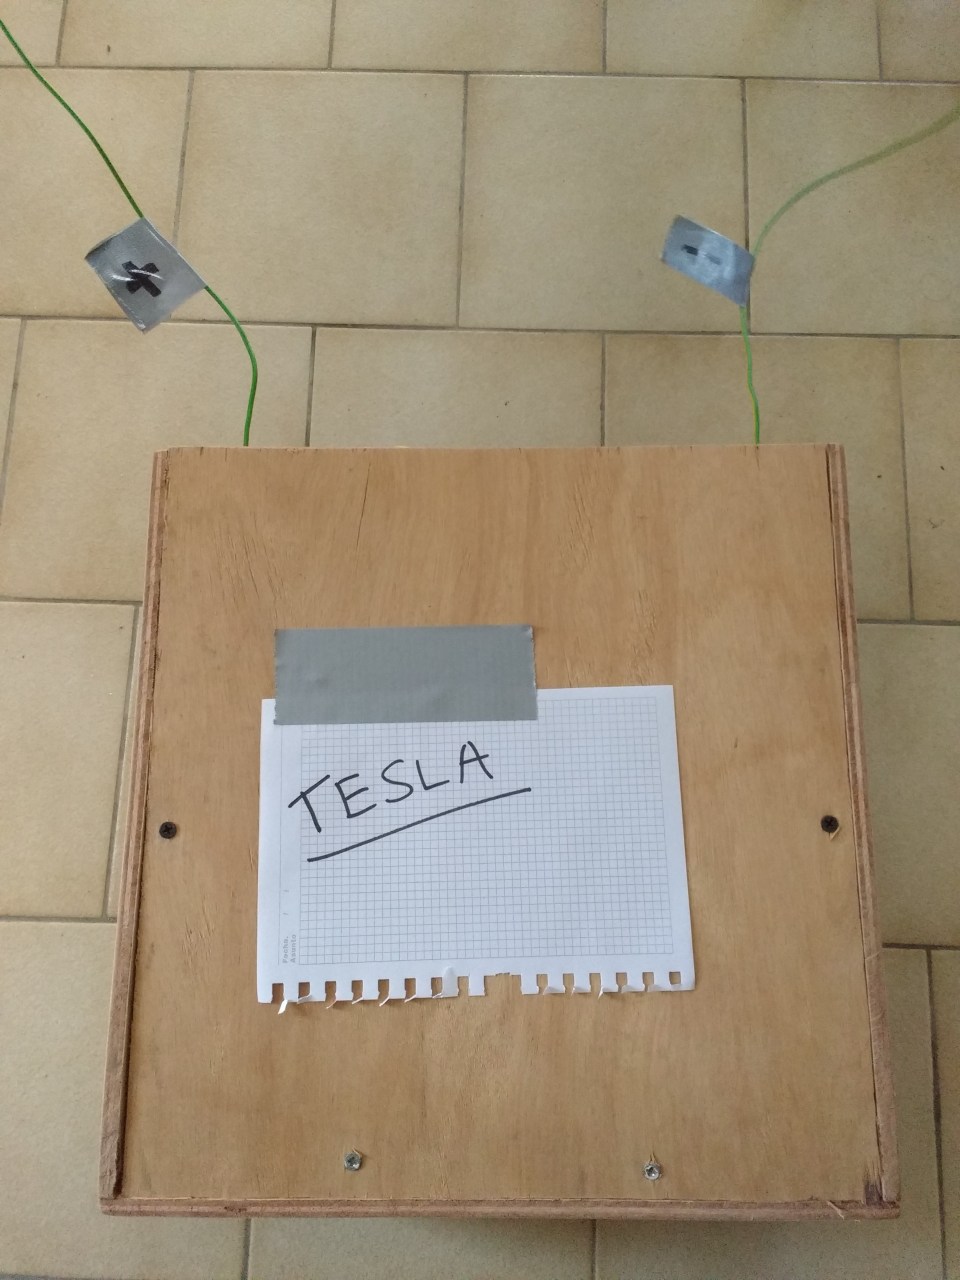
Self-brand your battery 
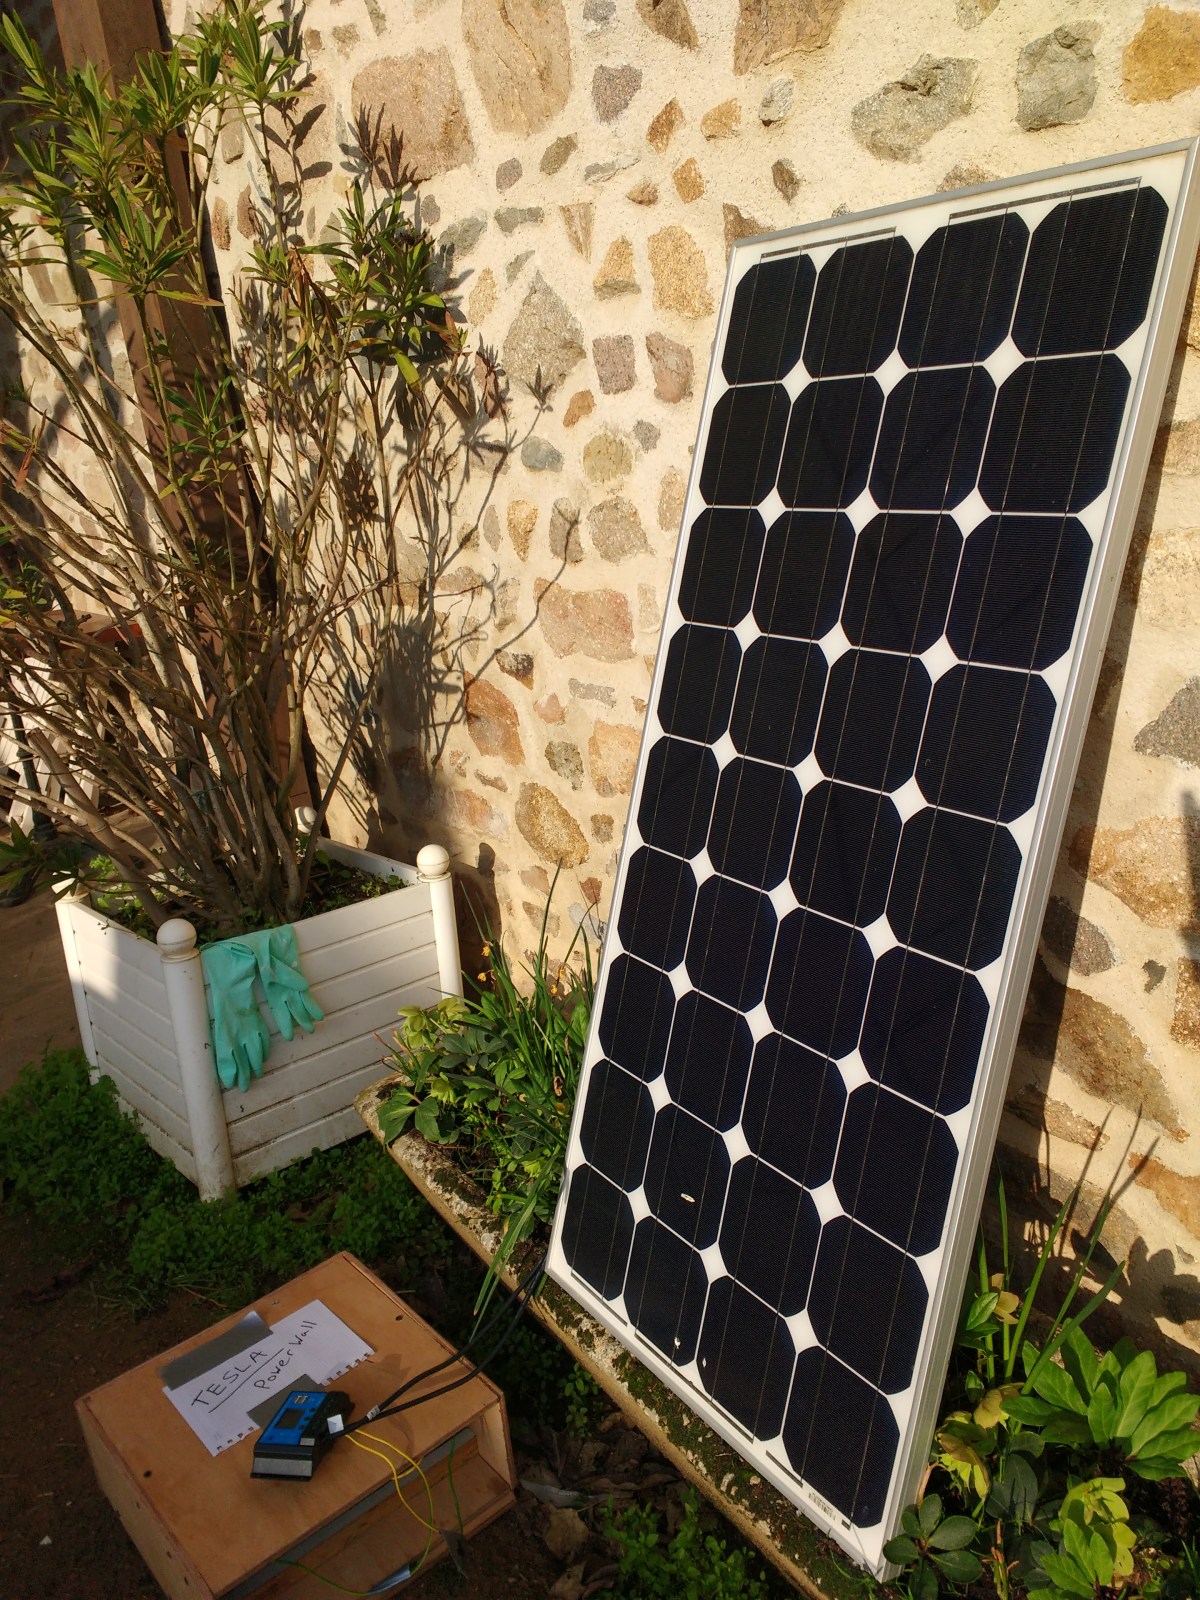
Step 13: Hook-up your solar panel
Attach your battery to a solar panel through a solar charge controller and check it is all working as it should be.

Hook it up to a solar panel for testing
Epilogue:
The battery been in situ for a month or so. It is working well. However, I have noticed 1 of the packs’ charge is about 0.1V lower than the other 2. This means that getting the battery up to 12.6V actually means overcharging 2 of the packs, this will reduce the lifespan of the battery. So, I have bought a couple of battery balancers and will let you know how it goes!

")
")
")
")
")

Brilliant!
LikeLiked by 1 person
Pingback: Van Life – Les Vignes Basses
Pingback: Home Sweet Home – Les Vignes Basses
Pingback: Off-Grid Update | Les Vignes Basses
Pingback: The 90% Rule | Les Vignes Basses
Pingback: Energy Update: Rethinking Luck, Privilege and Abundance | Les Vignes Basses
Pingback: Energy Update: Rethinking Luck, Privilege and Abundance | Les Vignes Basses
Pingback: Energy Update: An Upgraded Battery, Another Winter Under Our Belts and Continued Resilience | Les Vignes Basses