Anyone close to us will know that for the last couple of years our lives have been dominated by our straw bale house. After the foundations got underway and finished last year, we began building upwards in earnest on July 15th this year. The aim was to have the superstructure of the house completed by winter time.
Demonstrating the ups, downs and ups again of constructing the main structure of the house seems to me to be the most important part of the build. There will be some technical detail for those interested in creating their own house, but not too much. The main aim of this post is to outline the blood, sweat and tears involved in a project of this undertaking. Emotionally, physical and socially, the house has had an enormous impact on all of these areas of our lives.
Bales
Our bales were sourced from a local farmer just 3 kms away. Last year we bought some example bales from him, which were perfect. Unfortunately this year’s harvest weren’t as high quality and the bales were not dense enough for building. They were also very small, and this had a huge impact on the bale plan for the house. It also meant we needed to put in a lot of work with the bales, tourniqueting, shaping and reworking the bale plan. It took six of us two solid days in a friend’s workshop in 35 degree heat, wearing face masks and boogieing away to 70s cocktail party music, to actually get the bale into a usable state.
It was seriously sweaty work and quite difficult to maintain motivation. However, our friend’s are magnificent and after two days we managed to go through all 500 bales separating them into sizes and usability. The bales must be tight enough and dense enough to lift them with only one string. Another test is lifting the string and seeing where it reaches on your hand. If it lifts right up to you palm past the fingers then it is too loose.


Hazel Stakes
Our hazel stakes were sourced even closer to home, literally from a garden across the road. Our good friend, Tom, asked one of his gardening clients if he wanted the four trees chopping down. He confirmed and then told us they were free to a good home! It took several days to chop, transport and tidy the area but eventually we had all we needed. Now it was time to axe them into shape with points at the end. Nils had the most practice at this and beautifully demonstrated his technique to everyone else. After the initial stake, which took around 200+ strokes to actually make the point at the end, the technique became easier and eventually addictive, with Amy becoming mildly obsessed with the axing!
We needed long stakes and mini stakes to go into and through the bale courses, adding rigidity to the structure. It was a tough job when it came to it and Dan did nearly all of it. Lifting a sledgehammer to shoulder height and then encouraging a large stake through dense bales took quite some effort!


Joists
Fixing the joists was a really satisfying job (despite the 100mm nails, which were a total pig). It was also the first thing we did on the actual house this year. Last year we finished the foundations and the box beam but nothing more. So it felt great to be finally moving not quite upward but onwards!
The mid beam was attached initially and then we had fun and games making sure the box beam was completely level and bearing on all the tyres. This involved jacking up the box beam with a wagon jack and then stuffing more gravel in some tyres, taking it away in others and adding plywood caps where necessary.
Once we were perfectly happy with the levelling, we began adding all the joists. It truly felt like progress and was very pleasing to look at.


Bale Delivery
Rain, rain, rain, was the ode of the bale delivery onto the land. We had such poor weather after the joists were finished, which meant we lost five days on the house; five days we had off work with five of us here. So, extrapolated, this equated to several weeks of Dan and I working on the house once we had gone back to work.
As the bales were arriving it chucked it down and so we created a makeshift enclosed space using tarps around the workshop. It wasn’t pretty but it did the job.
Bracings & Framing
Bracings were required at the window and door frames as well as the corners of the walls to ensure a straight edge. We all found these to be difficult, especially the corner bracings. Mainly because it was time consuming to create a base for the bracings to fit into on the floor. I’m not convinced that we did this the best way, but it was the best we could come up with at the time and it held them all for a few weeks.
All the window and door posts were set prior to placing bales, ready to receive their framings. This was straight forward and the only extra detailing was to make the door noggins on the box beam a semi-circle so that we can achieve a lovely shape on the edges of the frame with the bales all the way up the door edge. The window frames and their braces made a photo frame too.


Bale Frenzy 😆
Preparing the box beam to receive the bales was relatively straightforward but required a lot of effort to get it all ready. Circular holes into noggins, 80+ mini stakes all tapered at the end and the beginnings of amending the bales to fit around the posts – notching and halving.
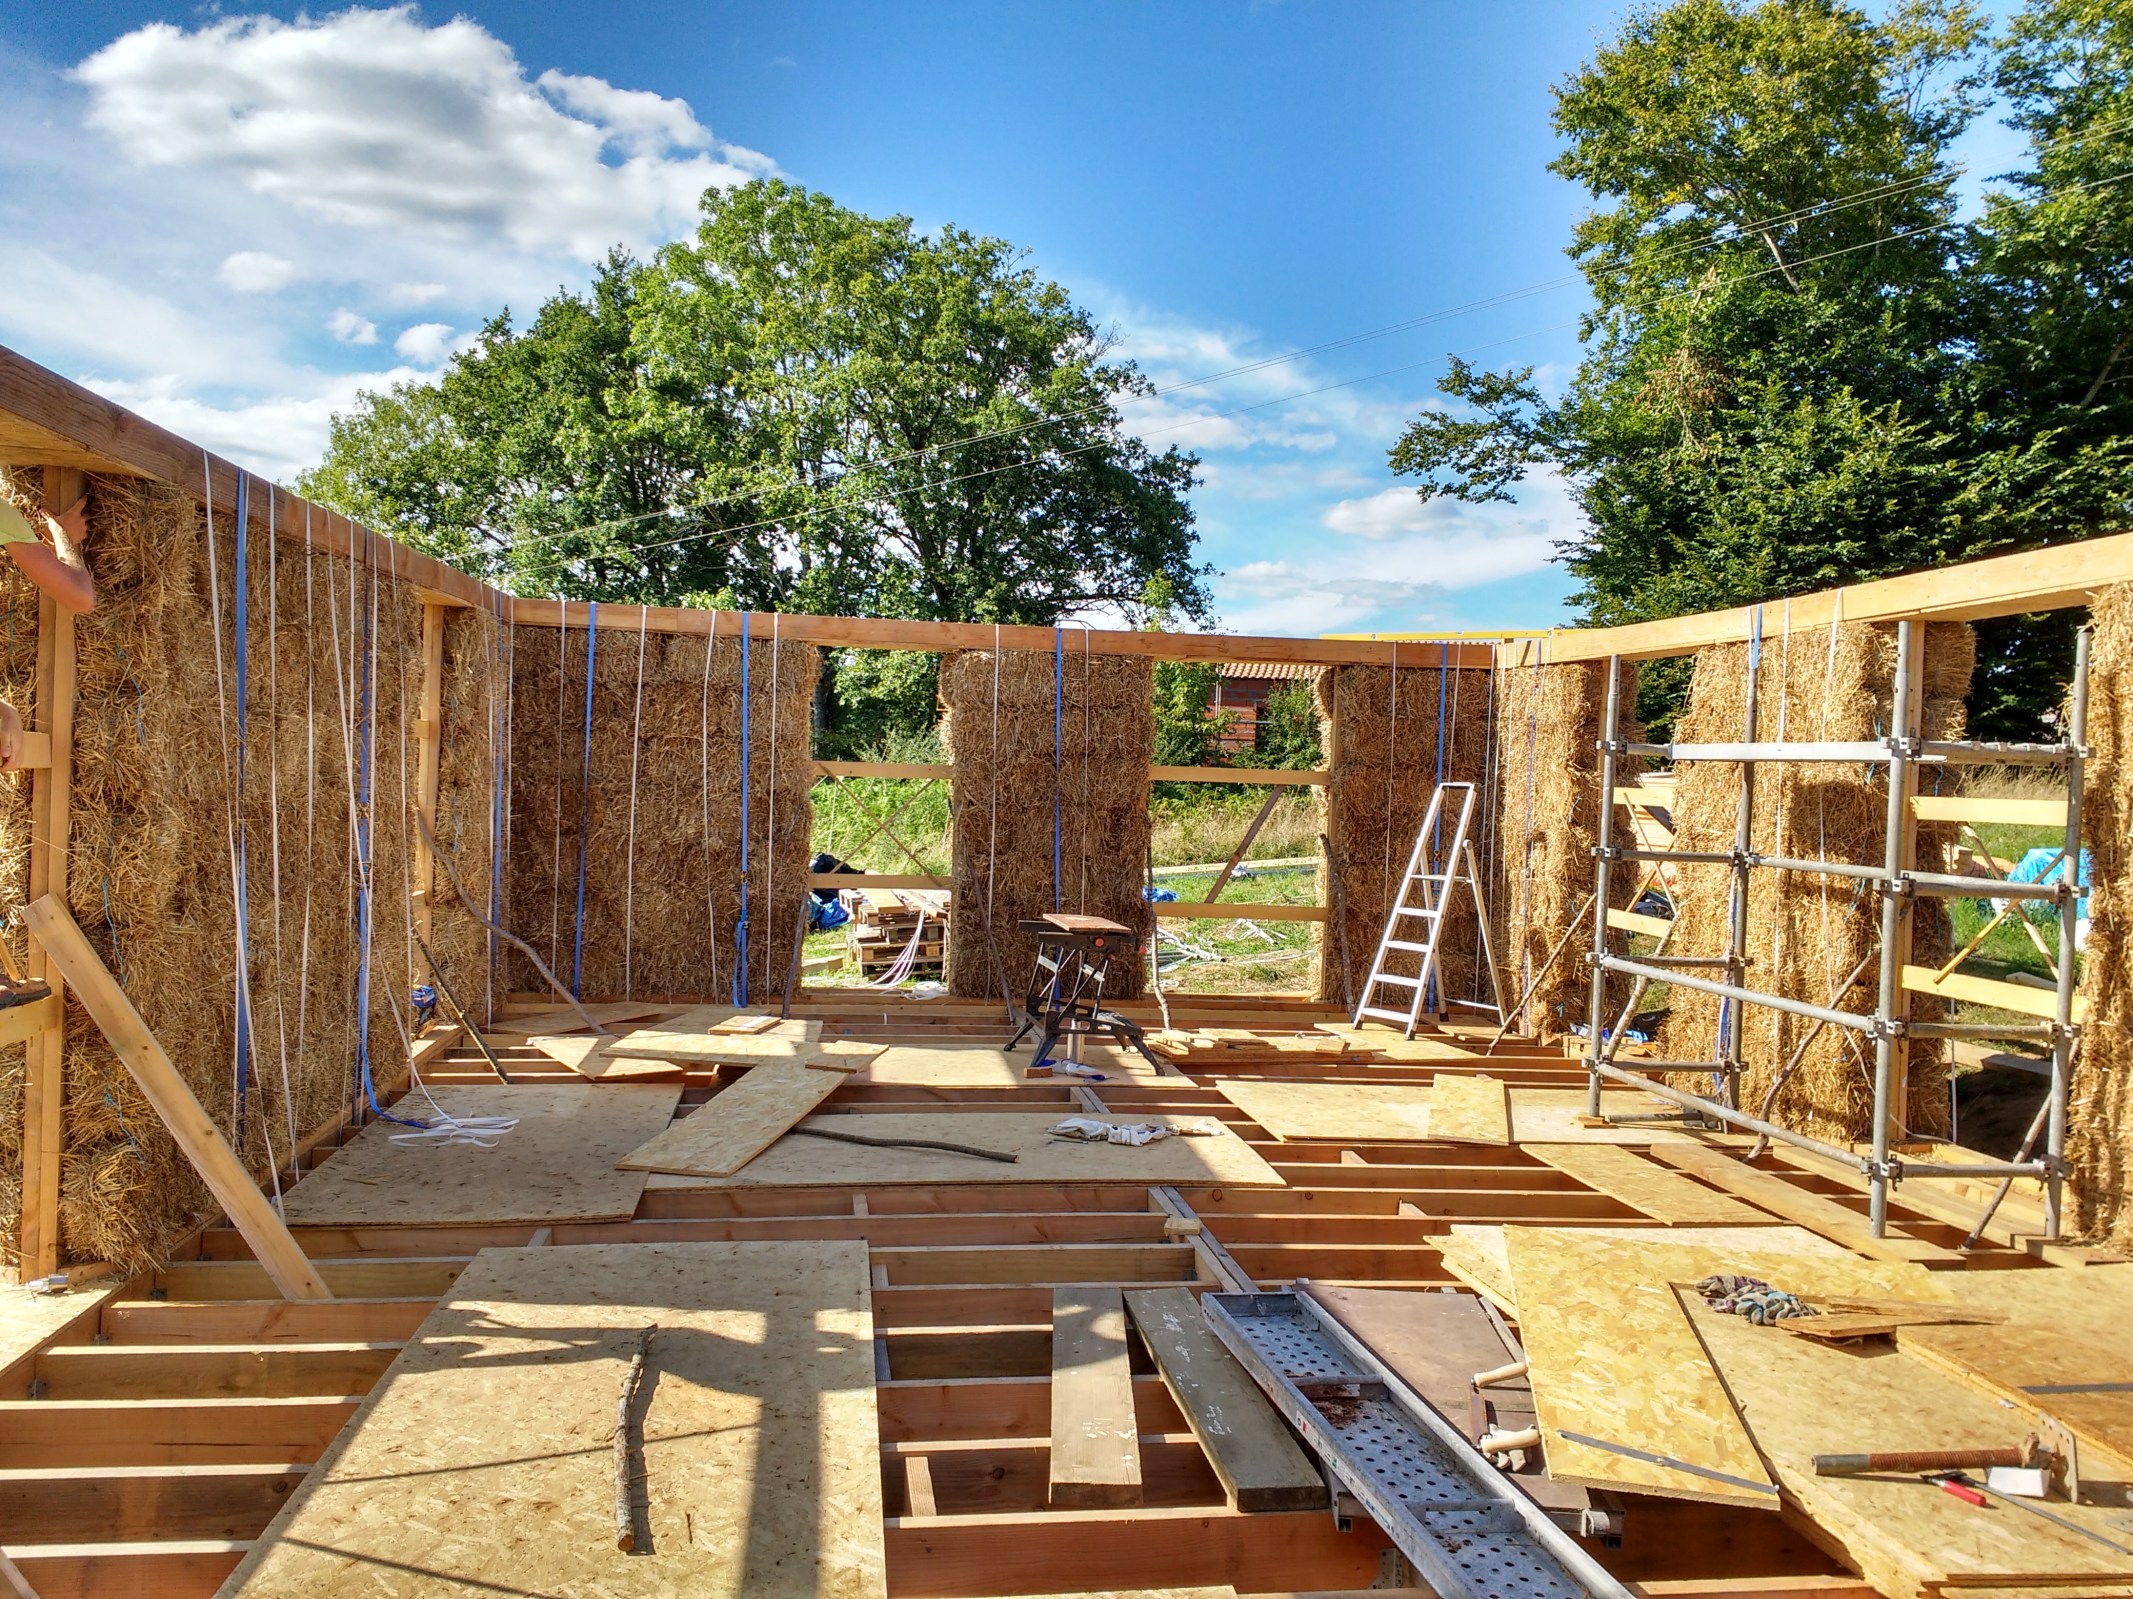
The seven courses went up really quickly, it took three of us three days to get them up. But we did not sleep at all, any hint of wind which could possibly mean rain had us up at the house site; 2, 3, 4am we were up there checking and checking again for moisture. Our weather Gods really weren’t on our side at that time. Until the completion of the roof beam, the bales couldn’t be covered or protected from the rain, so it really was a race against time in a very nervous fashion.
Laying out the bales was fun but required a lot of shifting around to find the right fit each time. Due to being so small, notching the bales was difficult as the strings would often fall into the notch or off the bale. Halving them was very easy but time consuming. And as I mentioned before, putting the hazel stakes through the course was really tough. But the sense of teamwork between the three of us was awesome. We all felt a real sense of satisfaction once it was all up.


Roof Beam
This was by far the hardest job of the build. It was quite difficult to handle, and so we made the jigsaw pieces into even smaller pieces to allow us to more easily lift each bit on top of the swaying bale walls. They all slotted together beautifully and we continued until about a quarter of the beam was completed. Then we reconsulted our bible, Barbara Jones’ book. Uh oh. We realised we had roof beam joints over window and door openings. Time to pull it apart and redo it. Dammit. So that took a considerable amount of time! But eventually we had all the joints sitting across walls.
We had to reinforce the box beam above the window and door openings and there is now so much Douglas Fir in that beam that the big bad wolf can huff and much as he likes but it ain’t shifting! Holes were made to receive the window and door posts and as the walls compressed under the weight of the of box beam each post needed cutting down further to give is space to compress more once the roof was on.


Compression
We spent some time compressing the bales, however in hindsight I don’t believe it was useful. As soon as the trusses were up the packaging straps we had used to maintain the compression of the ratchet straps were loose. I can understand that it gave a little bit of rigidity and therefore peace of mind when lifting the trusses, but I wouldn’t personally bother doing this again, I would just use the weight of the roof.
Trusses + Bracings + Membrane + Tiles = Roof. Easy, right?!
The roof was such fun to put up. Each stage presented yet more learning, but it was very rewarding. The fun of climbing over the roof was also awesome. Our sleep levels increased at each stage of the roof. However, this was the stage when our worst fear occurred; water ingress into the bales. Nightmare. We still aren’t sure how, but we think the water ran down the bare trusses and pooled on the dip in the box beam and then trickled down through the tiniest of holes in the tarpaulin, creating a huge amount of water in one area 😭 For a day or two we just aired the wet bales and hoped it would dry out, but eventually we pulled the wet stuff out and left the rest to dry. This worked a treat and the damage was very much confined to one spot. Phew.
It took us a little time to work out the best way of putting the trusses up onto the beam without placing pressure on their flimsy structure. A few YouTube videos later and it all became apparent. The trusses went up quickly, as expected, and it became addictive placing them and watching the progress. Next up was the bracing of the trusses. Working out the 2D roof plan was, erm, interesting! But it turns out that the roof plans and the colour coding is pretty universal across Europe so we just used our trusty friend Google and Jo’s mechatronical mind.
Very sadly, during this process Dan’s father passed away, making us both rather subdued and we lost Dan from the build site for some time. More bad luck when Dan returned, whereupon he broke a rib during a fight with a rogue nail, which he lost. Dan was out of action for quite some time, but the rest of us continued and once the bracings were in place we fixed the roof membrane and OSB at the gable ends of the roof to stop it from turning into a wind tunnel.
Laths were next and working out the gauge was a little difficult and inaccurate, as it turned out. We worked it out using only two tiles…big mistake. After we had placed the laths, our good friend Dave (a proper builder, like), came over to give us a hand getting the tiles on, however it became apparent with four tiles that our lath gauge was wrong and all of them had to be taken up and reset.
Our tiles were delivered a day before the arrival of my parents…handy! All four and a half tonnes of them 🙂 We spent the next few days with my parents, lugging the tiles up to the house site and then lifting them onto the roof. These were then placed along the ridgeline of the roof ready to be laid out. The tile laying took about three days in the end, after which we had our version a topping out ceremony, bubbly on the roof at sunset, veh nice 😉


Encouragement, Help & Support
Undertaking such a big project really reveals how wonderful people are. We have received such help and encouragement from everyone around us, near and far. It has helped immensely in keeping our conviction strong and we are truly grateful and eternally humbled by this.
The Next Stage
Moving forward, the next job is to fix in all the window framing and then progress on to the plastering. We hope to do this by the end of Autumn and my feeling is that it will warrant a whole other post with a host of other learning curves and challenges. BRING IT ON 😀


")
")
")
")
")

A big round of applause from Poland, fantastic work, it looks stunning. Fingers crossed you get the windows and some plaster on before the winter, but looking at what you have achieved so far I think you should be fine. Congratulations!
LikeLiked by 1 person
Thank you so much Eddy! 🙂 We are elbow deep in plastering right now, hoping the good weather holds a little longer!
LikeLiked by 1 person
Wow that’s amazing well done to you both and all involved, so are you going to build a straw bale swimming pool next ?😉
Cheers Fran
LikeLiked by 1 person
Thank you very much Fran! Top idea….straw bale swimming pool! Winner!! 😀
LikeLike
Pingback: The Splendour Of Render – Les Vignes Basses
Pingback: The Final Straw… 🐪🌾 | Les Vignes Basses
Pingback: Espying Energy Efficiency | Les Vignes Basses